This bread makes excellent grilled cheese sandwiches.
Sourdough Pumpernickel Rye Bread
Rye Sourdough Starter
1/2 cup sourdough starter
1/2 cup lukewarm water
1 cup rye flour
1/4 tsp. active dry yeast
Combine all ingredients in a non-reactive bowl. Cover tightly, and let stand 24 are room temperature.
Sourdough Pumpernickel Rye Bread
1 batch rye sourdough starter
1/2 cup lukewarm water
2 tsp. salt
1 Tbsp. barley malt, sorghum molasses or honey
2 Tbsp. espresso powder
1 cup dark rye flour
3 Tbsp. gluten
1 cup bread flour
Make the rye sourdough starter. The next day, add the remaining ingredients except the bread flour. Add half the bread flour, and beat until a smooth, stiff dough forms. Knead in the remaining flour as needed to have the dough pull away from the sides of the bowl.
Remove the dough hook, cover the bowl and let rise until doubled, about 1 hour. For more intense sourdough flavor, cover the dough, and let it rise overnight.
Bring dough to room temperature if it was refrigerated. Turn dough onto lightly greased or floured surface, and punch dough down. Shape dough into a round loaf, and place on a greased baking sheet. Cover, and let rise until doubled, about 45 to 60 minutes.
Preheat oven to 375ºF. Slash loaf with a sharp knife. Bake 40-45 minutes until done. Cool on a wire rack.
December 18, 2011
Country Sourdough Bread
I'll be honest. I'm not completely sure I had the bread labeled correctly in the freezer, but I believe I did. If the label was correct, this bread is awesome.
The reason I'm a bit uncertain is that much of the bread I bake goes right into the freezer as we can't eat as fast as I bake. In the interest of saving money and the environment, I reuse our freezer bags. Occasionally, that means I can't positively identify a bread when it's pulled from the freezer.
Still, for as good as the bread was, it's worth taking the risk to make it. Slightly crunchy crust with great texture and rich flavor.
Country Sourdough Bread
Sourdough Starter
1 cup warm water, between 105ºF and 115ºF
1 cup flour
1/8 tsp. active dry yeast
Combine all ingredients in a non-reactive bowl. Cover tightly, and let stand 24 to 36 hours, until the starter is bubbly and has a sweet-sour aroma. Cover and refrigerate for storage or use immediately. Replenish after each use with a mixture of half water and half flour. Let stand at room temperature 1 to 2 hours, until bubbly. Cover tightly and refrigerate.
Country Sourdough Bread
1/4 cup water
1 tsp. yeast
2/3 cups sourdough starter
1/4 cup nonfat plain yogurt
2 tsp. salt
1 cup dark rye flour
1 cup whole wheat flour
2 Tbsp. gluten
2 cups bread flour
Heat the water until warm, between 105ºF and 115ºF. Pour into warmed mixing bowl, and add yeast and room temperature sourdough starter. Let stand 5 minutes.
Add salt, rye flour and wheat flour. Beat well. Cover, and let stand 15 minutes.
Add gluten and bread flour. Knead the dough until soft and springy but soft to the touch. Remove the dough hook, cover the bowl and let rise until doubled, about 1 hour.
Turn dough onto lightly greased or floured surface, and punch dough down. Shape dough into a round loaf. Place on prepared baking sheet. Cover, and let rise until doubled, about 45 to 60 minutes.
Preheat oven to 400ºF. Slash bread with a sharp knife, and brush with water. Bake 45 minutes, until golden. Cool on a wire rack.
Artichoke Relish
This is my second canning experiment with Jerusalem artichokes. Word on the Internet (no one talks on the street any more) is that Jerusalem artichoke relish is a Southern delicacy. I've tried a number of Southern delicacies like grits, greens, cornbread and fried dandelion greens thanks to my mother's Southern roots. But even she hadn't heard of artichoke relish. I'm not sure if that's a good sign or not. (I'll let you know once we crack open the first jar.)
Update: We opened the first jar of relish at Christmas due to no mustard in the house for the ham. The overwhelming verdict was the relish tastes great with ham.

Jerusalem Artichoke Relish
5 quarts Jerusalem artichokes, chopped
2 cups non-iodized salt
3 lbs. green cabbage, chopped
1 1/2 lbs. onions, chopped
6 large red and green bell peppers, chopped
3/4 cup flour
1 (24-oz.) jar prepared mustard
2 quarts apple cider vinegar
3 lbs. sugar
3 Tbsp. mustard seed
2 Tbsp. tumeric
2 Tbsp. celery seed
1 Tbsp. black pepper
1 tsp. hot sauce
Soak artichokes overnight in 1 gallon water and 1 cup of salt. In another container, soak the cabbage, onion and bell peppers in the remaining gallon of water and 1 cup of salt.
Drain all the vegetables, and spread them on separate towels to remove excess water.
Combine flour and prepared mustard in a bowl. Set aside.
In a 10-quart or larger pot, add the vinegar, sugar, mustard seed, tumeric, celery seed and black pepper. Bring to a boil, and add the cabbage, onion and peppers. Cook for 10 minutes over medium heat. Reduce heat to low.
Add 1 cup of cooking liquid to floor and mustard mixture, and then add the thinned mixture to the pot of vegetables. Add hot sauce and artichokes. Raise the heat and stir until almost boiling (about 5 minutes). Remove pot fro heat, and ladle hot relish into sterilized jars. Process for 15 minutes in a hot water bath. Makes 17-18 pints.
Note: I have no idea why anyone would make a batch of 18 pints of something they've never tried, much less knew about prior to Internet searches. The only logical answer I have would be Christmas gifts. 'Tis the season.
Jerusalem Artichoke Pickles
I'll admit I'm a bit dubious about this creation, but I felt obligated to do something with at least a portion of my Jerusalem artichokes. The majority of people with whom I discussed Jerusalem artichokes incorrectly assumed they were the same artichokes used in the gooey rich artichoke dips. (OK, discussed is probably a strong word when in fact the conversations all lasted about two minutes.) Jerusalem artichokes, also called sunchokes, are the tubers of sunflower-type plants.
We roasted some of our artichokes and used others in a stew. That barely made a dent in them, and they reportedly don't freeze well (as if we have spare space in our freezer). So, I searched online and came to the conclusion of Jerusalem artichoke pickles.
Once I open a jar, I'll let you know how they taste.

Jerusalem Artichoke Pickles
2-3 lbs. Jerusalem artichokes
Juice of 2-3 lemons
4 cups water
1/3 cup canning salt
3 Tbsp. tumeric
4 cups cider vinegar
1 cup white wine vinegar
1 cup water
1-2 cups sugar (depending on how sweet you want them)
2 Tbsp. dry mustard seed
1 tsp. dry mustard
1 Tbsp. chili flakes
1 clove per quart
1 bay leaf per quart
Cut artichokes into 1/2-inch pieces, and place in a bowl of water with the lemon juice. Once all sunchokes are cut, mix the 4 cups water with 1 Tbsp. tumeric and the salt. Soak the sunchokes in this mixture for one day.
To make pickling liquid, mix the vinegars, sugar, 1 cup water, remainder of the tumeric, mustard seed, dry mustard and chili flakes. Bring to a boil, stir well, and let it cool to room temperature.
Place 1 clove and 1 bay leaf in each sterilized quart jar. Rinse the artichokes, and fill jars to 1/4-inch headspace. Cover artichokes with cooled vinegar mixture, again leaving 1/4-inch headspace.
Process in a hot water bath for 15 minutes. Let jars cool, and check the seals. Wait at least a week before eating to let the flavors develop. Makes 3 quarts.
Vanilla Pear Jam
Jam, in my mind, is a summer creation. I associate the sticky process of making jam with fresh berries, but that's not always the case. Frozen berries can make excellent jam. And jam is not reserved just for berries.
I certainly broadened my jam repertoire this summer with new creations involving tomatoes, basil and ground cherries (not all in the same jam). This fall, I fell in love with my cranberry jam creation. And a surplus of pears led to my latest jam, Vanilla Pear Jam.
This jam retains the distinct texture of the pears and combines their sweetness with flecks of vanilla. This jam was an experiment for me with whole vanilla beans, which might become a staple in my kitchen. There's something satisfying about using ingredients in their purest form.

Vanilla Pear Jam
8 cups chopped pears
4 cups sugar
2 vanilla beans
Chop the pears into fairly uniform pieces, removing the cores but leaving the skins intact. Split vanilla beans down the center, and scrape out the tiny seeds. Combine pears and sugar in a large, heavy-duty pot. Add both the vanilla bean shells and the seeds. Cook over medium heat, stirring often, until the pears are soft enough to mash with the back of a spoon.

Remove pears from heat, and remove the vanilla bean shells. Puree the pear mixture in a food processor or blender to reach desired texture. A potato masher may also be used.
Return the pear mixture to the pot, and continue to cook over medium heat until the pears are fairly thick (approximately 20 minutes). Remember, the jam will thicken slightly once you remove it from the heat. There are various ways to test jam, such as a plate method or spoon test. The nice thing about jam is that even if it's thicker or thinner than intended, it still tastes delicious.
Ladle jam into sterilized jars, leaving 1/4-inch headspace. Cover with sterilized lids and bands. Process in a hot water bath 10 minutes. Cool completely. Check to ensure each jar is sealed. Any jars that aren't sealed should be refrigerated.
Lesson learned while putting my jars in the basement: dropping jars on a concrete floor may pop the seal. I figured that's better than the jar itself cracking and ruining a jar of jam.
Notes: I used several varieties of pears (Bosc, Red Anjou, Green Anjou and Bartlett) for my jam, but one would also work. This recipe should yield approximately 3 half-pints of jam.
November 14, 2011
Sourdough Currant Rye Bread
This sourdough bread doesn't require much additional work, but it is a three-day process. Trust me, the time delay in bread only enhances the flavor.
Rye Sourdough Starter
1/2 cup sourdough starter
1/2 cup lukewarm water
1 cup rye flour
1/4 tsp. active dry yeast
Combine all ingredients in a non-reactive bowl. Cover tightly, and let stand 24 are room temperature.
 Sourdough Currant Rye Bread
2 tsp. yeast
2/3 cup water
1 1/3 cups rye sourdough starter
2 tsp. salt
1 1/2 cups dark rye flour
2 1/2 cups bread flour
1 1/2 cups currants
Heat the water until warm, between 105ºF and 115ºF. Pour into warmed mixing bowl, and add yeast and room temperature rye sourdough starter. Let stand 5 minutes.
Add salt, rye flour and half the bread flour. Beat well. Cover, and let stand 15 minutes.
Add remaining bread flour. Knead the dough until soft and springy but soft to the touch. Knead in currants. Remove the dough hook, cover the bowl and let rise until doubled, about 1 hour.
Turn dough onto lightly greased or floured surface, and punch dough down. Shape dough into a round loaf, and place in a greased pie plate. Cover, and let rise until doubled, about 45 to 60 minutes.
Preheat oven to 375ºF. Slash loaf with a sharp knife. Bake 45 minutes, until golden. Cool on a wire rack.
Rye Sourdough Starter
1/2 cup sourdough starter
1/2 cup lukewarm water
1 cup rye flour
1/4 tsp. active dry yeast
Combine all ingredients in a non-reactive bowl. Cover tightly, and let stand 24 are room temperature.

2 tsp. yeast
2/3 cup water
1 1/3 cups rye sourdough starter
2 tsp. salt
1 1/2 cups dark rye flour
2 1/2 cups bread flour
1 1/2 cups currants
Heat the water until warm, between 105ºF and 115ºF. Pour into warmed mixing bowl, and add yeast and room temperature rye sourdough starter. Let stand 5 minutes.
Add salt, rye flour and half the bread flour. Beat well. Cover, and let stand 15 minutes.
Add remaining bread flour. Knead the dough until soft and springy but soft to the touch. Knead in currants. Remove the dough hook, cover the bowl and let rise until doubled, about 1 hour.
Turn dough onto lightly greased or floured surface, and punch dough down. Shape dough into a round loaf, and place in a greased pie plate. Cover, and let rise until doubled, about 45 to 60 minutes.
Preheat oven to 375ºF. Slash loaf with a sharp knife. Bake 45 minutes, until golden. Cool on a wire rack.
Old-Fashioned Rye Bread
This recipe uses less yeast than a traditional bread but requires an extra 12 to 24 hours of patience. You don't have to do anything special during those 12 to 24 hours, just be patient. If you can handle that, then you can handle this rye bread.

Old-Fashioned Rye Bread
1 1/2 cups bread flour
1/4 cup stone-ground rye flour
3/4 tsp. yeast
3/4 cup water, between 105ºF and 115ºF
Make sponge by combining the above ingredients together in a warm non-reactive bowl. Cover, and let stand 12 to 24 hours until the sponge is bubbly and has a sweet and lightly sour aroma.
1/2 cup water, between 105ºF and 115ºF
1 1/2 cups bread flour
1/4 cup stone-ground rye flour
2 tsp. salt
To finish the dough, stir the sponge, and the remaining ingredients listed above. Knead the dough until smooth and springy. Cover, and let rise until doubled, about 1 hour.
Punch down the dough, and shape into two round loaves. Cover, and let rise until doubled, about 45 minutes. Preheat the oven to 375ºF. Slash the loaves with a sharp knife, and brush with water. Bake 30 to 35 minutes until the loaves are golden brown and crusty. Remove from pan, and cool completely on a wire rack.
Whole Wheat Sourdough Raisin Bread
This bread is slightly sour, studded with sweet raisins. It makes excellent toast.
Sourdough Starter
1 cup warm water, between 105ºF and 115ºF
1 cup flour
1/8 tsp. active dry yeast
Combine all ingredients in a non-reactive bowl. Cover tightly, and let stand 24 to 36 hours, until the starter is bubbly and has a sweet-sour aroma. Cover and refrigerate for storage or use immediately. Replenish after each use with a mixture of half water and half flour. Let stand at room temperature 1 to 2 hours, until bubbly. Cover tightly and refrigerate.
2/3 cup water
1 1/3 cups sourdough starter
2 tsp. salt
1 1/2 cups wheat flour
2 1/2 cups bread flour
2/3 cup raisins
Heat the water until warm, between 105ºF and 115ºF. Pour into warmed mixing bowl, and add yeast and room temperature sourdough starter. Let stand 5 minutes.
Add salt, wheat flour and half the bread flour. Beat well. Cover, and let stand 15 minutes.
Add remaining bread flour. Knead the dough until soft and springy but soft to the touch. Knead in the raisins. Remove the dough hook, cover the bowl and let rise until doubled, about 1 hour.
Turn dough onto lightly greased or floured surface, and punch dough down. Divide dough into two pieces, and shape each into a round loaf. Place on prepared baking sheet. Cover, and let rise until doubled, about 60 to 90 minutes.
Preheat oven to 375ºF. Using a sharp knife, slash the top of each loaf. Bake 30 to 35 minutes, until golden.Cool on a wire rack.
Sourdough Starter
1 cup warm water, between 105ºF and 115ºF
1 cup flour
1/8 tsp. active dry yeast
Combine all ingredients in a non-reactive bowl. Cover tightly, and let stand 24 to 36 hours, until the starter is bubbly and has a sweet-sour aroma. Cover and refrigerate for storage or use immediately. Replenish after each use with a mixture of half water and half flour. Let stand at room temperature 1 to 2 hours, until bubbly. Cover tightly and refrigerate.
Whole Wheat Sourdough Raisin Bread
2 tsp. yeast2/3 cup water
1 1/3 cups sourdough starter
2 tsp. salt
1 1/2 cups wheat flour
2 1/2 cups bread flour
2/3 cup raisins
Heat the water until warm, between 105ºF and 115ºF. Pour into warmed mixing bowl, and add yeast and room temperature sourdough starter. Let stand 5 minutes.
Add salt, wheat flour and half the bread flour. Beat well. Cover, and let stand 15 minutes.
Add remaining bread flour. Knead the dough until soft and springy but soft to the touch. Knead in the raisins. Remove the dough hook, cover the bowl and let rise until doubled, about 1 hour.
Turn dough onto lightly greased or floured surface, and punch dough down. Divide dough into two pieces, and shape each into a round loaf. Place on prepared baking sheet. Cover, and let rise until doubled, about 60 to 90 minutes.
Preheat oven to 375ºF. Using a sharp knife, slash the top of each loaf. Bake 30 to 35 minutes, until golden.Cool on a wire rack.
Finnish Sour Rye Bread
I've already cracked through the misconception that sourdough bread takes too long because of the starter. That said, I find myself home nearly every day since my son was born. That means I'm making much progress on my sourdough breads.
This rye bread has a nice texture, slightly sour flavor and just a bit of crunchy crust. In other words: delicious.
Sourdough Starter
1 cup warm water, between 105ºF and 115ºF
1 cup flour
1/8 tsp. active dry yeast
Combine all ingredients in a non-reactive bowl. Cover tightly, and let stand 24 to 36 hours, until the starter is bubbly and has a sweet-sour aroma. Cover and refrigerate for storage or use immediately. Replenish after each use with a mixture of half water and half flour. Let stand at room temperature 1 to 2 hours, until bubbly. Cover tightly and refrigerate.
 Finnish Sour Rye Bread
2 tsp. yeast
2/3 cup water
1 1/3 cups sourdough starter
2 tsp. salt
3 cups dark rye flour
2 Tbsp. gluten
1 cup bread flour
Heat the water until warm, between 105ºF and 115ºF. Pour into warmed mixing bowl, and add yeast and room temperature sourdough starter. Let stand 5 minutes.
Add salt, rye flour and half the bread flour. Beat well. Cover, and let stand 15 minutes.
Add remaining bread flour. Knead the dough until soft and springy but soft to the touch. Remove the dough hook, cover the bowl and let rise until doubled, about 1 hour. For a more intense sourdough flavor, place the dough in a plastic bag, and refrigerate overnight.
Allow dough to return to room temperature. Turn dough onto lightly greased or floured surface, and punch dough down. Shape dough into a round loaf about 12 inches in diameter. With floured fingers, make a hole in the center of the loaf, then stretch and pull that hole to about 3 inches in diameter. Place on prepared baking sheet. Cover, and let rise until doubled, about 45 to 60 minutes.
Preheat oven to 375ºF. Pierce the loaf with a fork. (See photo above.) Bake 30 to 35 minutes, until golden. Cool on a wire rack.
This rye bread has a nice texture, slightly sour flavor and just a bit of crunchy crust. In other words: delicious.
Sourdough Starter
1 cup warm water, between 105ºF and 115ºF
1 cup flour
1/8 tsp. active dry yeast
Combine all ingredients in a non-reactive bowl. Cover tightly, and let stand 24 to 36 hours, until the starter is bubbly and has a sweet-sour aroma. Cover and refrigerate for storage or use immediately. Replenish after each use with a mixture of half water and half flour. Let stand at room temperature 1 to 2 hours, until bubbly. Cover tightly and refrigerate.

2 tsp. yeast
2/3 cup water
1 1/3 cups sourdough starter
2 tsp. salt
3 cups dark rye flour
2 Tbsp. gluten
1 cup bread flour
Heat the water until warm, between 105ºF and 115ºF. Pour into warmed mixing bowl, and add yeast and room temperature sourdough starter. Let stand 5 minutes.
Add salt, rye flour and half the bread flour. Beat well. Cover, and let stand 15 minutes.
Add remaining bread flour. Knead the dough until soft and springy but soft to the touch. Remove the dough hook, cover the bowl and let rise until doubled, about 1 hour. For a more intense sourdough flavor, place the dough in a plastic bag, and refrigerate overnight.
Allow dough to return to room temperature. Turn dough onto lightly greased or floured surface, and punch dough down. Shape dough into a round loaf about 12 inches in diameter. With floured fingers, make a hole in the center of the loaf, then stretch and pull that hole to about 3 inches in diameter. Place on prepared baking sheet. Cover, and let rise until doubled, about 45 to 60 minutes.
Preheat oven to 375ºF. Pierce the loaf with a fork. (See photo above.) Bake 30 to 35 minutes, until golden. Cool on a wire rack.
November 7, 2011
Pumpkin Butter
Warning: This isn't the jarred jammy spread. This is good old-fashioned dairy butter mixed with pumpkin and seasonings to create a new holiday topping for toasts and sweet breads. I found the recipe in a Food Network magazine and thought it was the perfect way to use up the last bit of pumpkin in the fridge.
Pumpkin Butter
1/4 cup pumpkin puree
1 stick butter, softened
1/4 tsp. orange zest
1/2 tsp. sugar
1/2 tsp. pumpkin pie spice
Mash all ingredients together. Spread on parchment paper, and shape into a roll. Refrigerate until serving. May be frozen for later use.
Pumpkin Butter
1/4 cup pumpkin puree
1 stick butter, softened
1/4 tsp. orange zest
1/2 tsp. sugar
1/2 tsp. pumpkin pie spice
Mash all ingredients together. Spread on parchment paper, and shape into a roll. Refrigerate until serving. May be frozen for later use.
November 3, 2011
The Triple Pumpkin Threat

And that was my inspiration for these cupcakes. I used both frosting and cupcake recipes found on my favorite blog Cupcake Project. I decided to match Maple and Rum Pumpkin Cupcakes with Pumpkin Cheesecake Frosting and sprinkled the cupcakes with roasted pumpkin seeds immediately prior to serving. As weird as the pumpkin seed sprinkles sound, there's something oddly satisfying about the salty crunch they add.
Maple and Rum Pumpkin Cupcakes
1 1/2 cups flour
1 tsp. cinnamon
1/2 tsp. ginger
1/2 tsp. nutmeg
1/2 tsp. allspice
1 tsp. baking soda
1/2 tsp. salt
1 1/2 cups sugar
3/4 cup pumpkin puree
2 eggs
1/2 cup vegetable oil
1/4 cup dark rum
1/4 cup maple syrup
Preheat oven to 350ºF. Whisk together dry ingredients. In separate bowl, beat the sugar, pumpkin and eggs together until smooth. Mix in the oil, rum and syrup until smooth. Slowly add the flour mixture, and mix until fully incorporated. Fill cupcake liners 3/4 full. Bake for 20 to 25 minutes. Makes 12-14 cupcakes.

8 oz. cream cheese, room temperature
1/4 cup butter, room temperature
1/2 cup pumpkin puree
3 cups powdered sugar, sifted
Beat cream cheese and butter together until smooth. Mix in the pumpkin puree. Slowly mix in powdered sugar. Note: The frosting will likely not be stiff enough to pipe. Any leftover frosting would be a delicious "dip" for crunchy gingersnap cookies (if you feel guilty just eating frosting by the spoonful).
November 2, 2011
BBQ Turkey Smokey Joes
This slow cooker recipe requires minimal effort, which is the point of slow cooker recipes. The cayenne adds a bit more heat than I personally prefer, but I have one of the wimpiest tongues I know. My husband probably wouldn't even notice the cayenne.
BBQ Turkey Smokey Joes
3 lbs. ground turkey
1 onion, finely chopped
1 green pepper, finely chopped
16 oz. tomato sauce
3/4 cup ketchup
1/4 cup brown sugar
3 Tbsp. cider vinegar
1 Tbsp. liquid smoke
1 Tbsp. Worcestershire sauce
1 tsp. cayenne pepper
1/4 tsp. freshly ground black pepper
1/4 tsp. garlic powder
Brown turkey, and drain grease. Place turkey in slow cooker with remaining ingredients. Cook on low for 8 to 10 hours or high for 3 to 4 hours. Serve the meat mixture on buns. Makes at least 10 servings.
Stuffing
This is a tried and true recipe from my husband's family. It's a staple at their Thanksgiving and Christmas gatherings. I made it for my family's Thanksgiving one year, and now I'm suckered into it every year. Even though this is the third year I'm making it, I always have to ask my mother-in-law for the recipe. So, I'm posting it here in hopes that I can find it next year.
Stuffing
1 cup celery, chopped
1 onion, chopped
1 lb. ground beef or pork
14 oz. bag seasoned croutons
2 cans cream of chicken soup
3/4 stick of butter
2 cups milk
1 tsp. salt
1 tsp. sage
1/4 tsp. pepper
Preheat oven to 350ºF. Brown celery, onion and meat together. Drain excess fat. Combine with remaining ingredients. Bake in a 13 x 9 pan for one hour.
October 28, 2011
Roasted Pumpkin Seeds
They're so simple to make, and you can switch up the variations from the traditional salt to more adventurous flavors. Our first three pumpkins became salted seeds, but I think I'm going to try a sweeter variety for a cupcake idea.

Roasted Pumpkin Seeds
Pumpkin seeds
Oil
Salt
Preheat oven to 325ºF. Toss pumpkin seeds lightly with oil. Bake until golden, about 20 minutes, checking frequently. Sprinkle with salt. Cool completely before storing in airtight container.

Roasted Pumpkin Seeds
Pumpkin seeds
Oil
Salt
Preheat oven to 325ºF. Toss pumpkin seeds lightly with oil. Bake until golden, about 20 minutes, checking frequently. Sprinkle with salt. Cool completely before storing in airtight container.
October 27, 2011
Beef and Button Mushroom Stroganoff
As we're approaching winter (it's already snowed in parts of Wisconsin), it's time to utilize the crock pot for warm meals again. Who am I kidding-it's time to use the crock pot because I can cook without needing to be hovering over the stove or oven, which doesn't always work with a 6-week old.
This recipe for stroganoff turned out well, and we liked the addition of onions.
Beef & Button Mushroom Stroganoff
3 lbs. beef stew meat
1/2 cup flour
2 tsp. salt
1 tsp. pepper
2 medium onions, sliced
20 button mushrooms, sliced
1 1/2 cups beef broth
1/4 cup dry white wine
1 tsp. Worcestershire sauce
1 1/2 cups sour cream
1/4 cup flour
4 cups egg noodles, cooked and drained
Combine flour, salt and pepper. Coat beef in flour mixture, and then place in slow cooker. Add remaining ingredients, except sour cream, 1/4 cup flour and egg noodles. Cook on low 8 to 10 hours or high 4 to 5 hours. Combine sour cream and flour together, and add to beef mixture. Cook an additional 10 minutes. Serve over noodles.
Buttermilk-Apple Spice Bread
This is a new recipe that I'm trying this year from Farm Fresh Recipes from Lapecek's Orchard. The orchard is located near Madison, Wisconsin and always has plenty of fun activities and a family environment.

Buttermilk-Apple Spice Bread
4 cups flour
2 cups oats
1 cup brown sugar
2 Tbsp. baking powder
1 tsp. baking soda
1 tsp. salt
1 tsp. cinnamon
1/2 tsp. nutmeg
6 cups apples, peeled and chopped
3 eggs, beaten
2 1/4 cups buttermilk
1/4 cup oil
2 tsp. vanilla
Preheat oven to 375ºF. Combine dry ingredients in a large bowl. Add apples, and toss to coat. Beat eggs in separate bowl, and beat in buttermilk, oil and vanilla. Pour egg mixture into dry ingredients, mixing until just blended.
Spoon batter into two greased 9x5 bread pans. Bake for 70 minutes until done. Cool for 10 minutes before removing from pans. Cool completely on wire racks.
Graham Apple Coffee Cake
This is amazingly delicious! It reminds me of graham cracker cake, which was a treat in my husband's family for birthdays. I prefer it warm, although it is still tasty at room temperature.

Graham Apple Coffee Cake
1 cup graham cracker crumbs
1 cup flour
1/2 cup brown sugar
2 tsp. baking powder
1 tsp. cinnamon
1/4 tsp. nutmeg
1/4 tsp. allspice
1/8 tsp. orange peel
1/3 cup butter, softened
1 cup milk
2 eggs
3 apples, peeled and chopped
Crumb Topping
1/4 cup butter, melted
3/4 cup brown sugar
1 tsp. cinnamon
1/4 tsp. nutmeg
1/4 tsp. allspice
1/2 cup graham cracker crumbs
Preheat oven to 350ºF. In large bowl, combine the dry cake ingredients through the spices. Add the butter and milk, and beat two minutes with an electric mixer. Add eggs, and beat two more minutes. Spread batter into greased 9-inch pan. Sprinkle evenly with chopped apples.
Combine all crumb ingredients together, and spread evenly over apples. Bake for 35 to 40 minutes, until cake is set.
October 25, 2011
Apple Cinnamon Coffee Cake
This year, I've decided to explore several coffee cake recipes with my plethora of apples. I don't have a favorite of the three I've tried because they're all delicious, this one included.
Apple Cinnamon Coffee Cake
1/2 cup butter, softened
1 cup sugar
2 eggs
2 tsp. vanilla
2 2/3 cup flour
1 1/2 tsp. baking powder
1/2 tsp. baking soda
1/2 tsp. salt
1 cup buttermilk
2 cups finely chopped, peeled apples
Crumb Mixture
1 1/4 cup brown sugar
1/2 cup chopped nuts
1/3 cup flour
2 tsp. cinnamon
1/3 cup butter, melted
Topping
1/2 cup chocolate chips
1 tsp. shortening
Preheat oven to 350ºF. Mix butter and sugar. Add eggs and vanilla. Combine flour, baking powder, baking soda and salt in separate bowl. Alternately add the flour mixture and the buttermilk to the butter mixture. Beat until combined. Stir in the apples.
Then combine all the crumb ingredients together. Place about two cups of batter into a greased 10-inch tube pan. Sprinkle 1/3 of the crumb mixture, and then alternate layers with the batter. Bake for 60 to 70 minutes or until done. Cool for 10 minutes, and then remove from pan. Cool on wire rack an additional 30 minutes.
Melt chocolate chips and shortening together. Drizzle over the top of the cake.
October 19, 2011
Cranberry Apple Bread
This bread has a lot of texture and is packed with the flavors of fall. Unlike many other quick breads, it uses a mere 2 Tbsp. of oil. My husband threatened to take an entire loaf in his lunch, so that at least tells you his opinion of it.
As an added bonus, it's a simple enough recipe to be the first bread I baked while home alone with my 1-month-old son. (And he even held his first kitchen spoon!)

Cranberry Apple Bread
2 cups peeled, chopped apples
3/4 cup sugar
2 Tbsp. oil
2 eggs
1 1/2 cups flour (I used 1/2 cup barley flour)
1 1/2 tsp. baking powder
1/2 tsp. baking soda
1 tsp. cinnamon
1 cup cranberries
1/2 cup chopped nuts
Preheat oven to 350ºF. Combine apples, sugar and oil. Add eggs. In separate bowl, mix flour, baking powder, baking soda and cinnamon. Add to apple and egg mixture. Stir in cranberries and nuts. Pour into greased 8 1/2 by 4 1/2-inch pan. Bake 1 hour.
Brandied Apples
I deviated from my Ball Blue Book of Canning on this recipe, probably because I used Wolf River Apples rather than a firm red apple. Wolf River Apples turned to mush when cooked, so I used raw apples rather than cooking them. Here's the version of my Brandied Apples.

Brandied Apples
4 1/2 lb. apples, cored and evenly sliced 1/4-inch thick
3 cups water
4 cups sugar
1 cup brandy
Pack apples into hot jars, leaving 1/4-inch headspace. Bring water and sugar to a boil over medium heat, and cook until sugar is fully dissolved. Remove from heat, and stir in brandy. Pour syrup into jars, leaving 1/4-inch headspace. Process in hot water bath 15 minutes.
Tipsy Applesauce
I have made applesauce for the past several years. This was the first year I experimented with Brandied Apples (post coming soon), and I had a bit of brandy syrup left after that project. Rather than wasting good brandy, I decided to make Brandied Applesauce. Here's my rough recipe since I never measure anything when making applesauce.
Brandied Applesauce
As many apples as can fit into your heavy cooking pot (cored and cut into chunks)
About 2 inches of water in the bottom of your pot
1/2 cup brandy
Sugar to taste
Cinnamon to taste
Cook until apples are mushy. Process through a food mill to remove skins and turn the apples into a pulp. Stir in sugar and cinnamon. Pack into hot jars leaving 1/2-inch headspace. Process in hot water bath 20 minutes.
Chicken Booyah
Booyah!
I had never heard of Booyah prior to moving to Northeast Wisconsin, where it is a staple at church picnics and family gatherings. The easiest (and probably most sacrilegious) way to describe booyah is glorified chicken soup.
This is my husband's family recipe, which makes approximately 20 gallons of soup. One important aspect of booyah is that it is cooked outside in a 50-gallon drum for the majority of a day. Normally leftovers are frozen into ice cream pails, but we are short on freezer space. That resulted in us canning approximately 17 pints, with one ice cream pail remaining in freezer storage for us.
Chicken Booyah
16 lb. stewing chickens
3 lb. stewing beef
3 lb. onions, diced
2 bunches of celery, diced
20 carrots, peeled and diced
3 cans mixed vegetables
1 can corn
1 head cabbage, shredded
12 lb. potatoes, peeled and cubed
1 quart tomato juice
2 cans tomato soup
3/4 cup salt
5 Tbsp. pepper
Boil meat in water for two hours until chicken falls off of bones. Remove skin and bones. (Note: This can be done in roasters ahead of time. Just freeze the meat in the liquid until you're ready to make the batch of booyah.)
Bring meat and liquid mixture back to a rolling boil. Add onions, celery and carrots. Boil for another two hours, and then add remaining ingredients. Return to a boil, and cook for an additional two hours.
Note: You can continue to cook the booyah longer. The longer it cooks in the day, the better it tastes.
Rice Casserole
This is something my mom always made for holidays by baking it in the oven. However, I discovered it cooks just as well in a slow cooker. It's easy to put together and makes a fairly large amount.
Rice Casserole
1 can French onion soup
1 can beef broth
1 cup rice
1 package slivered or sliced almonds
1/2 stick butter
Combine all ingredients in a crock pot. Cook on high until liquid is mostly absorbed (about 3 hours), and then turn to low until liquid is completely absorbed (about 1 hour).
Rice Casserole
1 can French onion soup
1 can beef broth
1 cup rice
1 package slivered or sliced almonds
1/2 stick butter
Combine all ingredients in a crock pot. Cook on high until liquid is mostly absorbed (about 3 hours), and then turn to low until liquid is completely absorbed (about 1 hour).
October 17, 2011
Peanut Butter Caramel Corn
This is addictive.
To quantify how addictive it is, I made 5 batches in less than a week. My 89-year-old grandfather ate his entire quart bag himself without sharing with anyone. My father stole the remainder of the gallon bag at the end of his visit. Once you start eating it, you cannot stop until the bag is empty or you have stuffed yourself silly (or I suppose you possess far more self control than anyone in my family).
For those peanut butter fans, you don't taste an overwhelming peanut butter flavor in the final treat. However, it provides a subtle enhancement to typical caramel corn.
This is a Cooking Light recipe that I have modified slightly. However, it is only remotely good for you when you treat a serving size as 3/4 cup, which means 20 servings per batch. Good luck with that.

Peanut Butter Caramel Corn
2 Tbsp. canola oil
1/2 cup popcorn
1/2 cup unsliced almonds (I also used macadamia nuts for a batch)
2/3 cup brown sugar
2/3 cup light-colored corn syrup
2 1/2 Tbsp. butter
1/2 tsp. salt
1/2 cup creamy peanut butter
1 tsp. vanilla (I also used maple extract for a batch)
Preheat oven to 250ºF. Line jelly roll pan with parchment paper.
Pop popcorn using 2 Tbsp. oil. Add nuts to popped popcorn. Meanwhile, combine sugar, syrup, butter and salt in a medium saucepan. Bring to a boil. Cook 3 minutes, stirring occasionally. Remove from heat, and add peanut butter and vanilla. Stir until smooth.
Pour syrup mixture over popcorn, and stir to evenly coat popcorn. Spread evenly onto jelly roll pan. Bake for 1 hour, stirring every 15 minutes. Let cool completely before breaking apart and devouring.
Note: I am out of corn syrup, so I'm going to use that to prevent me from making more of this in the immediate future.
October 4, 2011
Tomato Butter
I think the last tomatoes of our garden are now officially canned. We have some green tomatoes, but I'm not sure that I have the right combination of the perfect recipe, enough ambition and sufficient time to make those a priority right now. The last of the tomatoes met their fate as Tomato Butter, an idea I found on my new favorite blog Food in Jars. I followed the recipe from this blog, minus the lemon zest as I didn't have any fresh lemons on hand.

Tomato Butter
5 pounds tomatoes, peeled and pureed (approximately 10 cups)
1 1/3 cups honey
1/2 cup brown sugar
2 teaspoons cinnamon
1/2 teaspoon nutmeg
1/4 teaspoon cloves
1/8 teaspoon cayenne pepper
2 tablespoons bottled lemon juice
Put the tomato puree in a slow cooker. Cook on low, with the lid propped on a chopstick or wooden spoon laid across the rim of the cooker, for 12-18 hours, until the tomato puree has reduced by more than half. I actually cooked mine for probably 20+ hours, but I also did a slightly larger batch than this recipe.
When most the liquid has cooked off and the tomato puree is quite thick, add the honey, brown sugar, spices and lemon juice and zest. Transfer the butter into a blender or bowl of a food processor and carefully puree.
Fill jars, wipe rims, apply lids and rings and process in a boiling water canner for 10 minutes (start time when water has returned to a boil).
When time is up, remove jars from canner and let cool on a towel-lined counter. When jars are cool, remove rings and test seals. Store in a cool, dark place for up to one year.
Note: I used Linskens Honey for this recipe. I think the quality of the honey shines through particularly with the large amount used in this recipe. Linskens Honey is produced locally by a friend and his family and is available at Woodman's Foods.
October 2, 2011
Broccoli Frittata
My husband brought me a magazine page (after one of our late-night/early-morning feedings for our son) and said he'd like to try a broccoli frittata. So, our breakfast this morning was a spinoff of the magazine's Spinach, Red Onion and Feta Frittata. It came together fairly quickly and tasted delicious. Although the recipe says it serves four, it was our breakfast for the two of us. (We need our energy with our newborn!)
Broccoli Frittata
1 Tbsp. olive oil
1/2 cup broccoli, chopped
1/2 small onion, chopped
2 cloves garlic, chopped
4 eggs
1/2 cup cheese
Pepper to taste
Heat olive oil over in ovenproof non-stick skillet over medium heat. Saute broccoli, onion and garlic until desired tenderness is reached. Meanwhile, whisk eggs well, and add cheese and pepper. Add vegetables to egg mixture. Clean nonstick pan, and return all ingredients to the pan.
Stir gently with a spatula until you feel the eggs start to set at the bottom of the pan. Remove from heat, and place in oven under the broiler for 2 to 3 minutes or until completely set. Serve warm or cold.
Cheddar-Beer Sauce
After a long but enjoyable pregnancy (my baby boy was two weeks overdue), I finally had my first sips of beer today. And they were delicious, as was the Cheddar-Beer Sauce I made for our steamed broccoli. Simple recipe that leaves you with more than half a bottle of beer to enjoy!
Cheddar-Beer Sauce
1/2 cup beer, divided
1 1/2 Tbsp. flour
3/4 cup milk
3/4 cup shredded Cheddar
1/4 tsp. salt
Parsley to garnish
Whisk 1/4 cup beer and flour together. Combine remaining beer and milk in a non-stick pan over medium heat. Simmer, then add flour mixture. Bring to a boil, reduce heat and simmer two minutes. Stir in cheese, salt and parsley. Serve warm over steamed vegetables.
September 12, 2011
Basil Jelly
It's amazing what waiting for Baby translates to in the kitchen. It seems like I'm trying to convert all my eagerness for Baby into culinary canning creations. Tonight's adventure was Basil Jelly.
Yes, I realize Basil Jelly sounds odd. However, our basil did well with the "survival of the fittest" aspect of our garden. There's no way we'll use it all fresh, dried basil loses flavor and we certainly don't have room to freeze all our basil. (Bread takes up way too much freezer space.) Plus, I'm on a canning kick, so I settled on a Basil Jelly recipe. It turned out quite well ...all 7 1/2 pints of my double batch.

Basil Jelly
4 cups water
2 cups packed basil leaves
1 package powdered pectin
5 cups sugar
Combine water and basil in large saucepan. Bring to a boil, remove from heat, cover and let stand 10 minutes. Strain out basil leaves, reserving water. Combine 2 2/3 cups of water with the pectin. Return to a rolling boil, and add sugar. Bring to a rolling boil for one minute, stirring constantly.
Remove from heat. Skim foam. Pack jelly into hot sterilized jars leaving 1/4-inch headspace. Boil in a hot water bath 15 minutes.
September 10, 2011
Tomato Basil Jam
We've done plenty of tomatoes into salsa already this year, so I wanted to try something different. I had found a recipe for Tomato Basil Jam. Although I should have used the tomatoes from our garden, I wanted a different variety. We picked up some yellow cherry tomatoes at the farmers' market to use with our basil for this jam.
 I'm not sure what to pair with this jam ... probably would be good for a version of bruschetta. It's definitely sweet and jammy with hints of savory from the basil.
Tomato Basil Jam
4 lbs. yellow tomatoes (the sweeter, the better)
1/2 cup lemon juice
3 cups sugar
1/4 cup basil
Cut tomatoes in half, and let them sit an hour to release their juices. Add lemon juice and sugar. Cook over medium-high heat until mixture comes to a boil. Boil 30 to 35 minutes until tomatoes reach consistency of jam. Remove from heat, stir in chopped basil and pack into hot sterilized jars. Boil in a hot water bath 10 minutes.
Note: My yield was 9 quarter pints.
Extra Note: I made a second batch using red tomatoes, which looks just as pretty. I don't believe this batch is quite as sweet as the yellow.

Ground Cherry Jam
I discovered ground cherries at the farmers' market last year, so I at least knew what they were when I received a free seed package with some of my other garden seeds. We planted them in our garden, forgot about them as our tomato plants crowded into the ground cherry space and assumed we were out of luck for ground cherries as they must need at least a bit of sunshine and space to grow. So, we were quite surprised to discover ground cherries underneath our tomato plants last weekend!
The apparent hardiness of the plants led me to devise a master plan to plant them along our house next year to harvest crops large enough for jamming. However, I wanted to ensure we actually liked ground cherry jam before committing to my master plan. We picked up about 4 cups of husked ground cherries today at the farmers' market. Let's just say that ground cherries will be planted and jammed next year!

Ground Cherry Jam
4 cups ground cherries, husked and washed
1/4 cup + 4 tsp. lemon juice
8 Tbsp. pectin
3 1/2 generous cups sugar
Combine cherries, lemon juice and pectin. Cook over medium heat until ground cherries are bursting. Mash ground cherries, and then add sugar. Stir to dissolve, and bring to a boil. Boil while stirring one minute. Remove from heat, and pack into hot sterilized jars. Boil in a hot water bath 10 minutes.
Note: My yield was 10 quarter pints ... the cutest little jars!
September 4, 2011
Labor Cookies
Yes, you read that correctly. These are not Labor Day Cookies. They are Labor Cookies. These cookies are rumored to induce labor for pregnant women. I made them not because I'm unbearably uncomfortable, but rather because I'll take any excuse to eat a cookie (or four).
As my husband said, they taste quite reminiscent of gingersnap cookies. He, of course, does not taste the cayenne pepper that registers on my more sensitive taste buds .

Labor Cookies
2 1/2 cups flour
1 1/2 tsp. baking soda
3/4 tsp. cinnamon
1 tsp. ground ginger
1/2 tsp. ground cloves
1/2 tsp. salt
1/2 tsp. cayenne pepper
8 Tbsp. butter
1/2 cup sugar
1 cup brown sugar
1/3 cup molasses
1/4 cup egg whites
Preheat oven to 350ºF. Combine flour, baking soda and spices and set aside. Cream the butter and sugar together. Add the molasses to the creamed butter, and then add the egg whites until combined. Add the dry ingredients slowly.
Once all ingredients are incorporated, roll dough into 1-inch balls and place onto a baking tray lined with parchment paper. Bake 8 to 10 minutes. Makes approximately 3 dozen cookies.
Note: The original recipe I found online suggests eating as many cookies as you can possibly stomach, lay down for a nap and wait for labor to begin. Such an optimistic (and unrealistic) attitude!
Canned Beets
I realize canned beets are not nearly as exciting as Pickled Beets, but I'm also optimistic that my offspring will enjoy smashed beets next year before they're in season. Since I plan to make most of our food for our baby, I figured beets were a good starting point.

Canned Beets
Beets (amount is easily adjustable since all you need is boiling water)
Boiling water
Wash and drain beets. Cook beets, and submerge in cold water to peel. Slice, dice or leave beets whole.
Pack beets into hot jars, leaving 1-inch headspace. Ladle boiling water over beets, leaving 1-inch headspace. Adjust two-piece caps. Process pints 30 minutes or quarts 35 minutes in a steam-pressure canner at 10 lbs. pressure.
Pickled Beets
I love the earthy smell and flavor of beets, but my absolute favorite way to enjoy beets is pickled into sweet sublimeness. Oddly enough, it seems I thinned out most of my traditional beets early this summer after planting way too many beets. So, that left me with some striped beets, golden beets and some oddly albino beets. Here's the traditional pickling recipe, straight from the Ball Blue Book of Preserving.

Pickled Beets
3 quarts beets
2 cups sugar
2 sticks cinnamon (Note: I was able to use cinnamon my brother bought back from India to make these extra special.)
1 Tbsp. whole allspice
1 1/2 tsp. salt
3 1/2 cups vinegar
1 1/2 cups water
Wash and drain beets. Cook beets, and submerge in cold water to peel. Combine all ingredients except beets in a large pot. Bring to a boil, reduce heat and simmer 15 minutes. Remove cinnamon.
Pack beets into hot jars, leaving 1/4-inch headspace. Ladle hot liquid over beets, leaving 1/4-inch headspace. Adjust two-piece caps. Process 30 minutes in a hot water bath.
September 3, 2011
Dilly Beans
These little gems are among the easiest of all canning projects, and they taste delicious. We tend to eat all our fresh purple beans. (Yes, we plan purple beans. They grow well and are more entertaining than green beans, although they turn green when cooked.) So, with beans $1/pound at the farmer's market, it's hard to pass up the opportunity to make dilly beans.

Dilly Beans
2 lbs. green beans
1/4 cup canning salt
2 1/2 cups water
2 1/2 cups vinegar
1 tsp. cayenne pepper, divided
4 cloves garlic
4 heads dill
Trim ends off green beans. Combine salt, water and vinegar in medium pot, and bring to a boil. Pack beans lengthwise into pint jars, leaving 1/4-inch headspace. Add 1/4 tsp. cayenne, 1 clove garlic and 1 head of dill to each jar. Ladle hot liquid over beans, leaving 1/4-inch headspace. Adjust two-piece caps. Process 10 minutes in a hot water bath.
August 30, 2011
Dill Pickles
Pickles are among the easiest things to can, as long as you can stomach the smell of the brine. Here's the recipe I use for our garden-fresh cucumbers and dill. Although pickles should sit several weeks for best flavor, I have had co-workers inadvertently open a jar the weekend after they were canned. The verdict was they were good, but I think it's best to demonstrate a bit of patience.

Dill Pickles
8 lbs. cucumbers, cut into pickle-size pieces
3/4 cup sugar
1/2 cup canning salt
1 quart vinegar
1 quart water
3 Tbsp. pickling spices
Dill (enough to use 1 head per jar)
Wash cucumbers, and drain. Combine sugar, salt, vinegar and water in a large saucepot. Tie spices in a spicebag (otherwise known as a coffee filter and twistie tie in my kitchen). Simmer spices 15 minutes in vinegar mixture.
Meanwhile pack cucumbers into hot jars with one head of dill in each jar, leaving 1/4-inch headspace. Ladle hot brine into jars, removing any air bubbles. Adjust two-piece caps. Process pints and quarts 15 minutes in hot water bath.
Basil-Garlic Tomato Sauce
My synopsis of this project is as follows: this better be the best tasting tomato sauce I've eaten. Otherwise, it's simply not worth the effort.
It's not that canning tomato sauce is difficult, but it is a time-consuming task that requires far more tomatoes than you would imagine for the end result of sauce. However, I am still excited to try this sauce as it contains tomatoes and basil all grown in our garden.

Basil-Garlic Tomato Sauce
20 lbs. tomatoes
1 cup onion, chopped
8 cloves garlic, minced
1 Tbsp. olive oil
1/4 cup fresh basil, minced
Bottled lemon juice
Wash tomatoes, and drain. Remove core, and cut into quarters. Set aside.
Saute onion and garlic in olive oil until translucent. Add tomatoes, and simmer 20 minutes, stirring occasionally. Process mixture through a food mill to remove seeds and skins. Combine tomato puree with basil. Cook over medium-high heat until sauce is reduced by one half, stirring to prevent sticking.
Add 1 Tbsp. lemon juice to each pint jar. Ladle in hot sauce, leaving 1/2-inch headspace. Adjust two-piece caps, and process in hot water bath 35 minutes.
Honey-Spiced Nectarines
This is an adaptation of Honey-Spiced Peaches, but my taste for nectarines overpowers the appeal of peaches. I saw this recipe and was immediately enticed. I cannot wait to crack open one of these jars and devour the deliciousness.

Honey-Spiced Nectarines
8 lbs. nectarines
1 cup sugar
4 cups water
2 cups honey
3 sticks cinnamon
1 1/2 tsp. whole allspice
3/4 tsp. whole cloves
Wash nectarines, and drain them. Cut into quarters, and remove pits. Treat nectarines to prevent browning. Pack nectarines tightly into pint jars, leaving 1/2-inch headspace.
Combine sugar, water and honey over medium heat. Heat until sugar is dissolved. Cook nectarines, one layer at a time, three minutes or until heated. Pack hot nectarines into jars, leaving 1/2-inch headspace.
Fill jars with syrup, making sure to remove any air bubbles. Adjust two-piece caps, and process pints 25 minutes in hot water bath.
Nectarines in Jars
Nectarines are gloriously in season and are reasonably priced at 88 cents/pound. That inspired me to purchase them now, so my husband doesn't get mocked for trying to find nectarines out of season for his pregnant wife. (Granted, I don't have plans to be pregnant again this winter, but that's only a minor flaw in my logic.)
So, I canned 3 quarts of nectarines in a light syrup. My measurements are more of guesstimates, which is how I tend to handle proportions of items stuffed into jars and hot liquid for canning. I just cross my fingers that I have enough hot liquid to fill all my jars.
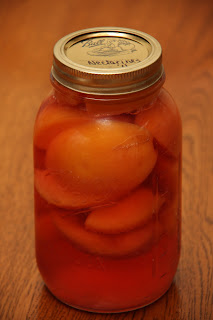
Nectarines in Jars
2 to 2 1/2 nectarines per quart
Sugar
Water
Wash nectarines, and drain them. Cut into quarters, and remove pits. Treat nectarines to prevent browning. Pack nectarines tightly into jars, leaving 1/2-inch headspace.
Make a light syrup by combining 1 part sugar to 5 parts water. Heat until sugar is dissolved. Fill jars with syrup, making sure to remove any air bubbles. Adjust two-piece caps, and process quarts 20 minutes or pints 25 minutes in hot water bath.
Note: I added a cinnamon stick, some cloves and allspice to one jar to liven up the flavors.
Nesting Cookies

Although this is technically a sugar cookie, I prefer to call them nesting cookies. What else would someone who is due within the week call the 120 cookies she bakes ... all while realizing how much she hates making sugar cookies?!?! The cookies are delicious (of course, they're the famous recipe from my hubby's grandma), and the decorations turned out as cute as I had hoped.

Nesting Cookies
4 cups flour
2 cups sugar
1/2 tsp. baking powder
1/2 tsp. salt
2 eggs
1 cup butter
1 tsp. vanilla
1/2 cup sour milk
1 tsp. baking soda
Preheat oven to 350ºF. Sift flour, sugar, baking powder and salt together. Add butter, and mix in to form a pre-dough. Add the other ingredients, first dissolving the baking soda in the milk. Roll thin using no more flour than needed (which is an awful lot of flour and equal portions of muttering under your breath as your dough sticks to your counter). Cut with cookie cutter. Bake on silipat or parchment paper for 8 minutes or until golden.
Cool cookies completely on parchment paper or wire racks. Once cool, frost in desired manner. My preferred method of frosting is now the chocolates used for making candies. I prefer not only the flavor over icing, but they are quite easy to manipulate.

August 27, 2011
Peanut Butter Cookie Dough Frosting
I managed to leave work early enough Friday to get cupcakes made and frosted by the time our friends arrived at 6 p.m. (even with the need to run to the store for cocoa and brown sugar ... it's a good thing I still had my shoes on from work, though, otherwise I think I would have forgotten to put on shoes for the store since I was in a bit of a hurry).

I made one of my standby chocolate cupcake recipes and frosted them with a recipe I found at Cupcake Project for Peanut Butter Cookie Dough frosting. The frosting is made from edible cookie dough, edible meaning no raw eggs, so you can eat the entire 2 cups at once without worrying about dying from salmonella.
Peanut Butter Cookie Dough Frosting
3/4 cup all-purpose flour
pinch of salt
1/4 cup unsalted butter, room temperature
1/2 cup peanut butter
1/4 cup granulated sugar
1/4 cup brown sugar
1/4 cup milk
1 teaspoon vanilla exract
Mix everything in a mixing bowl, and pipe onto your favorite cupcakes.
August 21, 2011
Apricot & Nectarine Tart
The farmer's market had fresh apricots from Door County, which seemed like the perfect thing to buy with my final dollars. (I always shop the farmer's market with small bills and stop buying only when I run out of money or arm space. Since I had my wonderful husband accompany me, the money ran out first!) I've also been buying nectarines because they're fantastically priced right now and my unborn, hungry child still loves them.
I decided to combine the two into a tart for brunch. My tart pastry was a bit hodgepodge as I didn't have any shortening in the house, but it still turned out well. It was a delicious addition to brunch with a good friend.


I decided to combine the two into a tart for brunch. My tart pastry was a bit hodgepodge as I didn't have any shortening in the house, but it still turned out well. It was a delicious addition to brunch with a good friend.


Golden Oat Saffron Bread
Saffron is not an ingredient normally found in my kitchen (perhaps the price tag is the reason for that). However, I picked up saffron this summer with the intention of making this Golden Oat Saffron Bread. I was a bit distraught I didn't have oat flour in my arsenal, until I realized I just needed to grind my oats into a powder.
The bread is delicious warm, perfect for a Sunday brunch. The saffron contributes a unique flavor, along with a pretty yellow tinge.
 Golden Oat Saffron Bread
2 eggs plus scalded milk equal to 1 1/3 cups
2 tsp. dry yeast
1/2 cup sugar
1/4 tsp. pulverized saffron
1 cup oat flour
1/2 cup butter
3 cups bread flour
Cool the milk until warm, between 105ºF and 115ºF. Pour into warmed mixing bowl with eggs and yeast. Let stand 5 minutes. Add sugar, saffron oat flour, butter and half the bread flour. Mix well, cover and let stand 15 minutes.
Add remaining bread flour. Knead until a dough forms that is smooth and springy but soft to the touch. Remove the dough hook, cover the bowl and let rise until doubled, about 1 hour.
Turn dough onto lightly greased surface, and punch dough down. Divide dough into three equal pieces, and shape each into skinny log. Braid together the three strands of dough. Place braided bread on prepared baking sheet. Cover, and let rise until doubled, about 45 minutes.
Preheat oven to 375ºF. Glaze with an egg and milk mixture, and sprinkle with raw sugar. Bake 15 to 25 minutes, until golden and a wooden skewer comes out clean.Serve warm.
The bread is delicious warm, perfect for a Sunday brunch. The saffron contributes a unique flavor, along with a pretty yellow tinge.

2 eggs plus scalded milk equal to 1 1/3 cups
2 tsp. dry yeast
1/2 cup sugar
1/4 tsp. pulverized saffron
1 cup oat flour
1/2 cup butter
3 cups bread flour
Cool the milk until warm, between 105ºF and 115ºF. Pour into warmed mixing bowl with eggs and yeast. Let stand 5 minutes. Add sugar, saffron oat flour, butter and half the bread flour. Mix well, cover and let stand 15 minutes.
Add remaining bread flour. Knead until a dough forms that is smooth and springy but soft to the touch. Remove the dough hook, cover the bowl and let rise until doubled, about 1 hour.
Turn dough onto lightly greased surface, and punch dough down. Divide dough into three equal pieces, and shape each into skinny log. Braid together the three strands of dough. Place braided bread on prepared baking sheet. Cover, and let rise until doubled, about 45 minutes.
Preheat oven to 375ºF. Glaze with an egg and milk mixture, and sprinkle with raw sugar. Bake 15 to 25 minutes, until golden and a wooden skewer comes out clean.Serve warm.
The Very Best French Bread Made at Home
I didn't name this bread, so please don't think I'm that egotistical. I'm also slightly skeptical since I've made some pretty dang tasty French bread already. My husband will be the true taste tester of the bread's name when he is permitted to pull the loaves from the freezer for sampling. (I've been baking so much that I can only leave one loaf out at a time for eating.)
 The Very Best French Bread Made at Home
1/2 cup whole wheat flour
1 1/4 cups bread flour
3/4 tsp. dry yeast
3/4 cup warm water, 105ºF and 115ºF
Combine sponge ingredients listed above together. Cover, and let stand 12 to 24 hours until sponge is bubbly and has a sweet and lightly sour aroma. Stir the sponge down. Then proceed with remaining ingredients:
1/2 cup water
1 cup wheat berries
2 1/2 cups bread flour
1 1/2 tsp. salt
Heat the water until warm, between 105ºF and 115ºF. Pour into warmed mixing bowl, and sponge and remaining ingredients. Knead until a dough forms that is smooth and springy but soft to the touch. Remove the dough hook, cover the bowl and let rise until doubled, about 1 hour.
Turn dough onto lightly greased or floured surface, and punch dough down. Divide dough into two pieces, and shape each into a round loaf. Place on prepared baking sheet. Cover, and let rise until doubled, about 45 minutes.
Preheat oven to 375ºF. Using a sharp knife, slash the top of each loaf. Brush the loaves with water. Bake 30 to 35 minutes, until golden.Cool on a wire rack.
Light Wheat Berry Bread
As far as I can ascertain, the "Light" in the title refers to the color of the bread, although there is no fat added to this bread. The bread has a light color and texture, and I'm sure the wheat berries contribute to the texture.
 Light Wheat Berry Bread
1 1/2 cups bread flour
3/4 tsp. dry yeast
3/4 cup warm water, 105ºF and 115ºF
Combine sponge ingredients listed above together. Cover, and let stand 12 to 24 hours until sponge is bubbly and has a sweet and lightly sour aroma. Stir the sponge down. Then proceed with remaining ingredients:
1/2 cup water
1 cup wheat berries
2 cups bread flour
1 1/2 tsp. salt
Heat the water until warm, between 105ºF and 115ºF. Pour into warmed mixing bowl, and sponge and remaining ingredients. Knead until a dough forms that is smooth and springy but soft to the touch. Remove the dough hook, cover the bowl and let rise until doubled, about 1 hour.
Turn dough onto lightly greased or floured surface, and punch dough down. Divide dough into two pieces, and shape each into a round loaf. Place on prepared baking sheet. Cover, and let rise until doubled, about 45 minutes.
Preheat oven to 375ºF. Using a sharp knife, slash the top of each loaf. Spritz the top of each loaf with water prior to placing in the oven. Bake 25 to 30 minutes, until golden.Cool on a wire rack.
August 16, 2011
Almond Raisin Monkey Bread
One of the highlights of our productive weekend at home was this amazing Almond Raisin Monkey Bread. I'm sure this is supposed to make way more than eight servings, but it was that delicious!
 Almond Raisin Monkey Bread
2 tsp. yeast
2 large eggs plus undiluted evaporated milk to equal 1 1/3 cups
1 1/2 tsp. salt
2/3 cup sugar
8 Tbsp. butter
1/2 cup whole wheat flour
3 1/2 cups bread flour
1/2 cup raisins
1/2 cup slivered or chopped almonds
4 Tbsp. sugar
2 tsp. cinnamon
4 Tbsp. melted butter
Heat the evaporated milk until warm, between 105ºF and 115ºF. Pour into warmed mixing bowl with eggs, and add yeast. Let stand 5 minutes.
Add salt, sugar, butter, wheat flour and half the bread flour. Beat well. Cover, and let stand 15 minutes.
Add remaining bread flour. Knead the dough until soft and springy but soft to the touch. Knead in raisins and almonds. Remove the dough hook, cover the bowl and let rise until doubled, about 1 hour.
Turn dough onto lightly greased or floured surface, and punch dough down. Divide dough into 32 pieces. Combine remaining sugar with cinnamon. Dip each piece of dough in melted butter, and roll in sugar mixture. Place dough pieces into greased 10-inch fluted tube pan. Cover, and let rise until doubled, about 45 to 60 minutes.
Preheat oven to 375ºF. Bake 30 to 35 minutes, until golden and a wooden skewer comes out clean. Cool 10 minutes, and then invert onto a serving plate. Devour!
Whole Wheat Berry Bread
This was one of five batches of bread I created this past weekend since my husband complained our freezer was empty of bread. My loaves fell a bit flat, and again I'll attribute that to my starter swap mishap. (See my post on Oatmeal Sourdough Bread.) Still, the bread has good flavor, and I think it will be delicious for grilled sandwiches.

Whole Wheat Berry Bread
1 1/2 cups whole wheat flour
3/4 tsp. dry yeast
3/4 cup warm water, 105ºF and 115ºF
Combine sponge ingredients listed above together. Cover, and let stand 12 to 24 hours until sponge is bubbly and has a sweet and lightly sour aroma. Stir the sponge down. Then proceed with remaining ingredients:
1/2 cup water
1 cup wheat berries
2 cups whole wheat flour
1 1/2 tsp. salt
Heat the water until warm, between 105ºF and 115ºF. Pour into warmed mixing bowl, and sponge and remaining ingredients. Knead until a dough forms that is smooth and springy but soft to the touch. Remove the dough hook, cover the bowl and let rise until doubled, about 1 hour.
Turn dough onto lightly greased or floured surface, and punch dough down. Divide dough into two pieces, and shape each into a round loaf. Place on prepared baking sheet. Cover, and let rise until doubled, about 45 minutes.
Preheat oven to 350ºF. Using a sharp knife, slash the top of each loaf. Bake 30 to 35 minutes, until golden.Cool on a wire rack.
Wheat Sourdough French Bread
The trick to engaging my husband in bread-making adventures is to promise the reward of French bread. Although this isn't the crustiest, chewiest bread I've made, it still had enough promise in its name that my husband willingly traveled up and down the basement stairs to help me gather supplies. (It was worth it!)

Sourdough Starter
1 cup warm water, between 105ºF and 115ºF
1 cup flour
1/8 tsp. active dry yeast
Combine all ingredients in a non-reactive bowl. Cover tightly, and let stand 24 to 36 hours, until the starter is bubbly and has a sweet-sour aroma. Cover and refrigerate for storage or use immediately. Replenish after each use with a mixture of half water and half flour. Let stand at room temperature 1 to 2 hours, until bubbly. Cover tightly and refrigerate.
Wheat Sourdough French Bread
2 tsp. yeast
2/3 cup water
1 1/3 cups sourdough starter
2 tsp. salt
1 1/2 cups wheat flour
2 1/2 cups bread flour
Heat the water until warm, between 105ºF and 115ºF. Pour into warmed mixing bowl, and add yeast and room temperature sourdough starter. Let stand 5 minutes.
Add salt, wheat flour and half the bread flour. Beat well. Cover, and let stand 15 minutes.
Add remaining bread flour. Knead the dough until soft and springy but soft to the touch. Remove the dough hook, cover the bowl and let rise until doubled, about 1 hour.
Turn dough onto lightly greased or floured surface, and punch dough down. Divide dough into two pieces, and shape each into a round loaf. Place on prepared baking sheet. Cover, and let rise until doubled, about 60 to 90 minutes.
Preheat oven to 375ºF. Using a sharp knife, slash the top of each loaf. (One of my loaves collapsed when I slashed it, so I left the other untouched.) Bake 30 to 35 minutes, until golden.Cool on a wire rack.
Oatmeal Sourdough Bread
The idea of sourdough bread is appealing, but I had the misconception that it would take too long to make the starter. The starter for this bread (and the next post) only required 24 hours to create, which is perfectly doable in a weekend. My loaves turned out dense, and I'm going to attribute that to accidentally using a portion of the wrong starter. Lesson learned: sourdough and whole wheat starters are extremely difficult to accurately scoop out of a recipe when you use the wrong one.
Sourdough Starter
1 cup warm water, between 105ºF and 115ºF
1 cup flour
1/8 tsp. active dry yeast
Combine all ingredients in a non-reactive bowl. Cover tightly, and let stand 24 to 36 hours, until the starter is bubbly and has a sweet-sour aroma. Cover and refrigerate for storage or use immediately. Replenish after each use with a mixture of half water and half flour. Let stand at room temperature 1 to 2 hours, until bubbly. Cover tightly and refrigerate.
 Oatmeal Sourdough Bread
2 tsp. yeast
2/3 cup water
1 1/3 cups sourdough starter
2 tsp. salt
1 1/2 cups oats
2 1/2 cups bread flour
Heat the water until warm, between 105ºF and 115ºF. Pour into warmed mixing bowl, and add yeast and room temperature sourdough starter. Let stand 5 minutes.
Add salt, oats and half the bread flour. Beat well. Cover, and let stand 15 minutes.
Add remaining bread flour. Knead the dough until soft and springy but soft to the touch. Remove the dough hook, cover the bowl and let rise until doubled, about 1 hour.
Turn dough onto lightly greased or floured surface, and punch dough down. Divide dough into two pieces, and shape each into a round loaf. Place on prepared baking sheet. Cover, and let rise until doubled, about 60 to 90 minutes.
Preheat oven to 375ºF. Using a sharp knife, slash the top of each loaf. Bake 30 to 35 minutes, until golden.Cool on a wire rack.
Sourdough Starter
1 cup warm water, between 105ºF and 115ºF
1 cup flour
1/8 tsp. active dry yeast
Combine all ingredients in a non-reactive bowl. Cover tightly, and let stand 24 to 36 hours, until the starter is bubbly and has a sweet-sour aroma. Cover and refrigerate for storage or use immediately. Replenish after each use with a mixture of half water and half flour. Let stand at room temperature 1 to 2 hours, until bubbly. Cover tightly and refrigerate.

2 tsp. yeast
2/3 cup water
1 1/3 cups sourdough starter
2 tsp. salt
1 1/2 cups oats
2 1/2 cups bread flour
Heat the water until warm, between 105ºF and 115ºF. Pour into warmed mixing bowl, and add yeast and room temperature sourdough starter. Let stand 5 minutes.
Add salt, oats and half the bread flour. Beat well. Cover, and let stand 15 minutes.
Add remaining bread flour. Knead the dough until soft and springy but soft to the touch. Remove the dough hook, cover the bowl and let rise until doubled, about 1 hour.
Turn dough onto lightly greased or floured surface, and punch dough down. Divide dough into two pieces, and shape each into a round loaf. Place on prepared baking sheet. Cover, and let rise until doubled, about 60 to 90 minutes.
Preheat oven to 375ºF. Using a sharp knife, slash the top of each loaf. Bake 30 to 35 minutes, until golden.Cool on a wire rack.
Subscribe to:
Posts (Atom)