This Cooking Light frittata comes together quickly and is healthy enough to split between 2 people for a satisfying breakfast. Otherwise, it would serve 4 as part of a larger meal. It was the perfect way to use up some of my egg whites left from my ice cream ... need to balance the healthy with the unhealthy, of course.
Mushroom Frittata
8 oz. mushrooms, sliced
1/2 cup shredded mozzarella
1/2 tsp. thyme
3 large egg whites
2 large eggs
Preheat broiler to low. Heat an 8-inch ovenproof skillet over medium-high heat. Coat pan with non-stick spray, and saute mushrooms until lightly browned. In a separate bowl, combine mushrooms, mozzarella, thyme, egg whites and eggs, stirring until whisked.
Spray skillet again with non-stick spray, and pour in egg mixture. Cover, and cook without stirring for 3 minutes or until almost set. Remove cover, and broil 3 minutes or until egg is set. Slide frittata out of pan onto a serving plate. Serve warm or room temperature.
April 24, 2012
Pasta with Asparagus, Bacon & Pine Nuts
Our asparagus has magically appeared, which means I can try some of the recipes I've flagged in my Cooking Light magazines. It's difficult at times to try new asparagus recipes because it's so delicious simply tossed with olive oil and salt and roasted in the oven or grilled. And I'm not sure there's anything better than asparagus drizzled with olive oil, wrapped in prosciutto, sprinkled with pepper and roasted.
But, I'll never know that for sure unless I try new recipes. This pasta dish comes together quickly with the modifications I made and is a satisfying simple spring dinner.
Pasta with Asparagus, Bacon & Pine Nuts
8 oz. uncooked penne pasta
1 1/2 lbs. asparagus, trimmed and cut into 1 1/2-inch pieces
1 tsp. minced garlic
3 Tbsp. pine nuts
2 oz. bacon, chopped
2 Tbsp. lemon juice
2 tsp. olive oil
1/2 tsp. salt
1/4 tsp. pepper
1/4 cup shredded mozzarella cheese
Cook pasta according to package directions, omitting salt and fat. Add asparagus during the last 3 minutes of cooking. Drain, and return to pan. Sprinkle with garlic, and toss to coat.
Meanwhile, heat skillet over medium heat. Add pine nuts, and stir constantly until toasted, about 1 to 2 minutes. Remove pine nuts from skillet, and set aside. Add bacon to skillet, and cook until desired consistency. Drain grease.
In a small bowl, combine lemon juice, olive oil, salt and pepper, whisking until combined. Drizzle over pasta, and toss with pine nuts, bacon and cheese. Serve warm. Makes 4 servings.
April 19, 2012
Dark Chocolate Peanut Butter High Hats
These cupcakes are downright messy to eat, leaving you with chocolate on your face and both hands smeared with chocolate. And it's worth every brown smudge.

These cupcakes certainly are a treat, not meant for everyday consumption unless you run at least 6 miles on a daily basis. (I'm grateful for my 8-mile run this morning to negate the cupcake I savored this evening.) However, they were an instant favorite for my husband and me.
I'll admit the High Hats are a bit more work than the traditional cupcake, but they look quite impressive for a relatively simple process. As I got near the bottom of my dipping chocolate, I actually ended up spreading the chocolate on the last cupcake using my finger. (Don't worry, that was the cupcake my husband ate.)
These cupcakes are a hybrid of Bakers Royale's Peanut Butter and Chocolate Cupcake and Betty Crocker The Big Book of Cupcakes Peanut Butter High Hats. I was going to follow both recipes to make each cupcake separately, but I thought it was crazy that Betty Crocker did not use a chocolate cupcake in its version.
Dark Chocolate Peanut Butter High Hats
Cupcakes
1 cup butter
4 oz. bittersweet chocolate
1 cup cocoa powder
1 1/2 cups flour
1 tsp. baking soda
1 1/2 tsp. baking powder
4 eggs
1 1/2 cups sugar
2 tsp. vanilla
1/2 tsp. salt
1 cup sour cream
24 miniature peanut butter cups
Frosting
1 1/2 cups butter, softened
1 1/2 cups peanut butter
7 oz. marshmallow fluff
3 cups powdered sugar
2 tsp. vanilla
Topping
3 cups chocolate chips
6 Tbsp. shortening
Preheat oven to 350° F. Line 24 cupcake tins. Combine butter and chocolate in a heatproof bowl, and microwave on medium power, stirring every 30 seconds, until smooth. Stir in cocoa until smooth. Set aside until mixture cools to near room temperature.
Whisk flour, baking soda and baking powder in small bowl to combine. In separate bowl, whisk eggs, and then add sugar, vanilla and salt until fully incorporated. Add cooled chocolate mixture, and beat until combined. Add 1/3 of the flour mixture, and mix on low until combined. Beat in sour cream until combined, and then add remaining flour mixture. Beat on low until batter is combined. (Batter will be thick.)
Fill cupcake line 1/4 full. Add a peanut butter cup to each cupcake, and then finish scooping cupcake batter on top until batter is evenly divided. Bake until skewer inserted into center of cupcakes comes out clean, 18 to 20 minutes. Cool cupcakes on wire racks to room temperature before frosting.
To prepare frosting, beat together butter and peanut butter until smooth. Whip in marshmallow fluff. Gradually add powdered sugar and then vanilla. Beat on high 3 minutes until fluffy. Use a large piping tip to frost cupcakes, making sure you have a large dome similar to an ice cream cone on each cupcake. Place cupcakes in the refrigerator or freezer for at least 45 minutes to harden the frosting.
Melt chocolate chips and shortening together in a heatproof bowl in the microwave, stirring at least every 30 seconds. Dip cupcakes into chocolate to coat frosting completely, shaking off extra chocolate. Chill cupcakes at least 5 minutes to set frosting. Makes 24 awesome cupcakes!
Chewy Chocolate Chip Granola Bars
The more I read Brown Eyed Baker, the more I realize her tastes in food are quite similar to mine. That explains why the majority of recipes I have flagged are from her site. These granola bars are simple to make and quite tasty. They don't taste identical to Quaker Oats Chewy Chocolate Chip Granola Bars as they have a more distinct honey flavor, but they are in the ballpark.
The only issue I had with these granola bars is they didn't seem to compact properly, which is probably my own fault as I was a bit skittish about burning myself while pressing them into the pan. I'm going to try flattening them next time (and there will be a next time) with an old-fashioned bacon press.

Chewy Chocolate Chip Granola Bars
1/3 cup brown sugar
1/4 cup honey
4 Tbsp. butter
2 cups oats
1 cup crispy rice cereal
1/2 tsp. vanilla extract
3 Tbsp. mini chocolate chips
Lightly grease an 8-inch pan. In a small saucepan, combine brown sugar, honey and butter over medium-high heat until it begins to bubble. Reduce heat to low, and cook for 2 minutes, stirring often. Remove from heat, and stir in vanilla extract.
Combine oats and rice cereal together in a large bowl, and cover with liquid. Stir well to thoroughly coat the dry ingredients. Pour the mixture into the prepared pan, and press down to ensure the bars are tightly compacted. Sprinkle the top evenly with chocolate chips, and press down lightly with the back of a spoon.
Cool at room temperature at least 2 hours, until chocolate chips are set, prior to cutting into bars. Store in an airtight container at room temperature for up to 5 days. Makes 10 bars.
Chocolate Chip Cookie Dough Brownies
I'm truly not on a cookie dough kick right now. I was on a cookie dough kick during Lent when I couldn't eat chocolate, so I bookmarked all these cookie dough recipes for the future. Well, now is the future, and it's mighty tasty.

Eating these brownies feels slightly naughty like you're sneaking the cookie dough you're not supposed to eat. I think that makes them taste even better. These would be a quick seller at a bake sale and are not difficult to prepare. I had bookmarked these brownies from both Brown Eyed Baker and Recipe Girl, and here's my variation:
Chocolate Chip Cookie Dough Brownies
Brownie
4 oz. unsweetened chocolate
1 cup butter
2 cups brown sugar
4 eggs
2 tsp. vanilla
1 cup flour
Edible Cookie Dough
2 cups flour
1/2 tsp. salt
1/2 cup butter, melted
1 cup brown sugar
1/2 cup sugar
1 Tbsp. vanilla
1/4 cup milk
1/4 cup mini chocolate chips
Garnish
1/4 cup chocolate chips
Preheat oven to 325° F. Line a 9 x 13 pan with foil, with enough to hang over all four sides. Spray the foil with nonstick spray.
In a medium glass bowl, melt the chocolate in the microwave in 30-second increments, stirring after each, until melted and smooth. Set aside to cool slightly.
In a large mixing bowl, mix the butter and sugar together until fluffy. Beat in the eggs and the vanilla. Mix in the melted chocolate until combined. Reduce the speed to low, and gradually mix in flour until just combined. Spread the batter into the prepared pan. Bake 25 to 35 minutes or until a toothpick inserted into the center comes out clean. Cool completely on a wire rack.
Meanwhile, combine all cookie dough ingredients together. Scoop out a heaping cup of dough, and add mini chocolate chips. Spread the cookie dough evenly over the cooled brownies.
Melt the remaining chocolate chips, and use a fork to drizzle chocolate over the cookie dough. Refrigerate until dough is firm, about an hour. Cut the brownies, and store in an airtight container in the refrigerator. Makes 32 brownies (but not if I'm cutting them!).
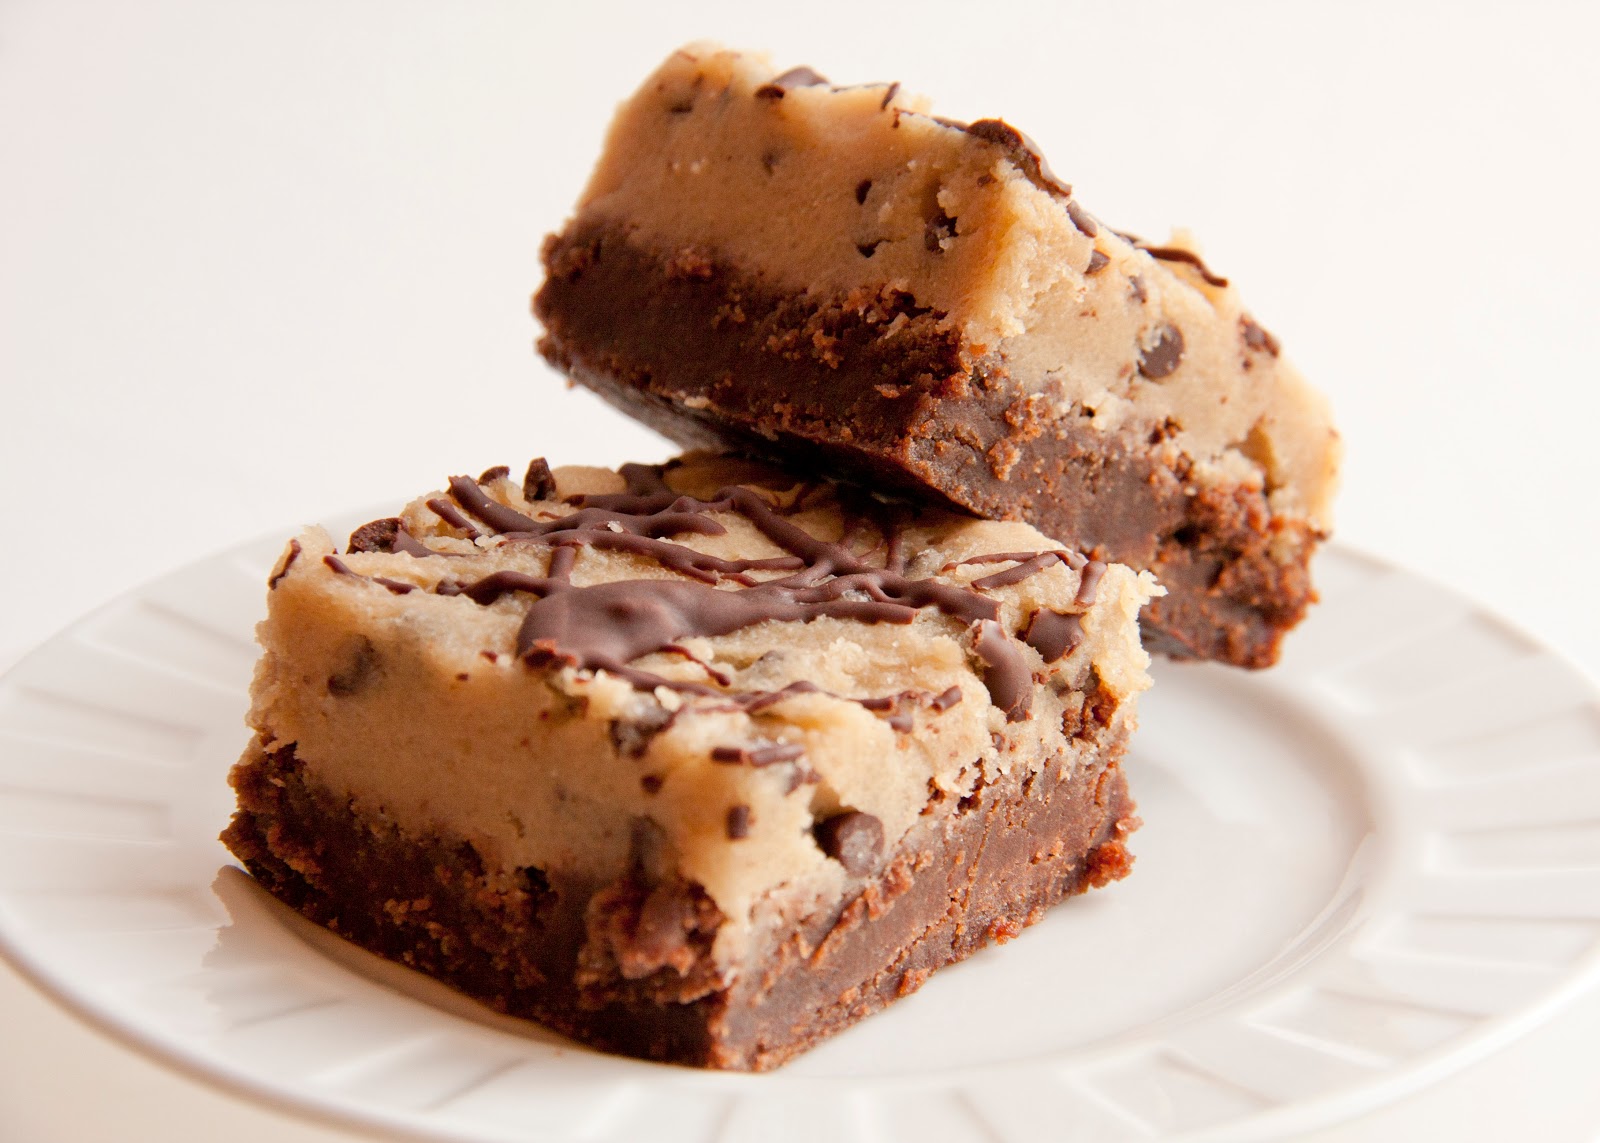
Multigrain Bread
This is a dense, slightly chewy bread that is the perfect accompaniment to a salad for dinner. It would also be delicious slathered in peanut butter, but honestly, what wouldn't?

Multigrain Bread
2 tsp. dry yeast
1 1/4 cups water
2 cups flour
1 1/2 cups wheat flour
3/4 cup multigrain cereal, ground
2 tsp. salt
2 Tbsp. flaxseed oil
2 Tbsp. honey
1 cup cooked multigrain cereal, cooled
Oats for topping
Grease an 8 x 4 pan, and set aside. Sprinkle yeast into water, and let stand 5 minutes until dissolved. In separate bowl, combine flours, ground cereal and salt together. Stir in yeast, oil, honey and cooked grains until a stiff dough forms. Turn the dough onto a lightly floured surface, and knead until the dough becomes smooth and elastic. Place the dough in a greased bowl, cover and let rise until doubled, about 1 hour.
Punch down the dough, and let rest 10 minutes while covered. Shape the dough to fit the loaf pan, and place in the pan seam side down. Cover loosely with a clean towel, and let rise until doubled, about 30 minutes. Meanwhile, preheat the oven to 400° F.
Brush the top of the loaf with water, and sprinkle with oats. Bake 40 minutes. Remove loaf from pan, and return to oven with the bottom of the loaf facing up for an additional 5 minutes. Cool completely on a wire rack. Makes 1 loaf.
April 12, 2012
Chocolate Chip Cookie Dough Cupcakes
If you want to see grown adults act like little children, make these Chocolate Chip Cookie Dough Cupcakes. That's what I discovered when I brought these cupcakes to work. The only suggestion I received to improve these cupcakes was to make the entire cupcake out of cookie dough (i.e. shape a mass of cookie dough into a cupcake shape).

Chocolate Chip Cookie Dough Cupcakes
Cupcake
3 sticks butter, softened
1 1/2 cups light brown sugar, packed
4 large eggs
2 2/3 cups flour
1 tsp. baking powder
1 tsp. baking soda
1/4 tsp. salt
1 cup milk
2 tsp. vanilla extract
1 cup chocolate chips
Edible Cookie Dough
2 cups flour
1/2 tsp. salt
1/2 cup butter, melted
1 cup brown sugar
1/2 cup sugar
1 Tbsp. vanilla
1/4 cup milk
1/4 cup mini chocolate chips
1 to 4 Tbsp. half and half
Preheat the oven to 350° F. Combine butter and brown sugar. Cream together on medium-high speed until light and fluffy, approximately 3 minutes. Add eggs one at a time, beating well after each addition and scraping down the sides of the bowl.
In separate bowl, whisk together the flour, baking powder, baking soda, and salt. Alternately add the dry ingredients to the mixer bowl with the milk on low speed, beginning and ending with the dry ingredients, mixing each addition just until incorporated. Blend in the vanilla. Fold in the chocolate chips with a spatula.
Divide the batter evenly between 24 cupcake liners. Bake for 18-20 minutes, until a toothpick inserted in the center comes out clean. Allow to cool in the pan for 5-10 minutes, and then transfer to a wire rack to cool completely.
Meanwhile, combine all cookie dough ingredients together. Scoop out a heaping cup of dough, and add mini chocolate chips if desired. Shape this dough into 24 itty bitty cookies. Set aside for topping cupcakes.
Add half and half as needed to blend the remaining cookie dough into a spreadable consistency. Slather the cupcakes with cookie dough frosting, and top with a mini unbaked cookie. Keep cupcakes chilled until serving. Makes 24 cupcakes.
(I based the cupcake on Tidy Mom's cookie dough cupcake and adapted the cookie dough recipe from Cupcake Project.)
April 11, 2012
Cherry Scones
My mother-in-law had a nifty connection with a caterer, which is how I ended up with a rather fancy baby shower complete with made-to-order crepes, delicious frittatas and unbelievable scones. I pretty much wiped out all the leftover scones by myself.
I finally made scones for the first time this morning, and they turned out wonderfully. I used a recipe from a Farmgirl's Dabbles and modified it slightly. These scones are light, slightly crisp on the exterior and just sweet enough. The bonus is these are not at all time consuming ... the batch can be made within 20 minutes, 30 if you're toting a 6-month old.
 Cherry Scones
I finally made scones for the first time this morning, and they turned out wonderfully. I used a recipe from a Farmgirl's Dabbles and modified it slightly. These scones are light, slightly crisp on the exterior and just sweet enough. The bonus is these are not at all time consuming ... the batch can be made within 20 minutes, 30 if you're toting a 6-month old.

2 cups flour
2 tsp. baking powder
1/4 tsp. baking soda
1/2 tsp. salt
4 Tbsp. sugar, divided
6 Tbsp. cold, unsalted butter, cut into small pieces
3/4 c. dried cherries
1/2 c. buttermilk
2 tsp. baking powder
1/4 tsp. baking soda
1/2 tsp. salt
4 Tbsp. sugar, divided
6 Tbsp. cold, unsalted butter, cut into small pieces
3/4 c. dried cherries
1/2 c. buttermilk
1 large egg, lightly beaten
1 Tbsp. milk
1 Tbsp. milk
Preheat oven to 425ºF. Line a baking sheet with a silipat or parchment paper. In a bowl, stir together flour, baking powder, baking soda, salt, and 3 tablespoons sugar.
With a pastry blender or two knives, cut in butter until mixture resembles coarse meal. Stir in dried cherries. Make a well in the center; add buttermilk and egg, and stir just until combined (do not overmix).
Transfer dough to a lightly floured work surface; knead 5 or 6 times. Pat into an 8″ disk. With a floured 1-1/2″ biscuit cutter, cut out rounds. Reroll and cut scraps once more.
Transfer to baking sheet, about 1-1/2″ apart. Brush rounds with milk, and sprinkle with 1 tablespoon of sugar. Bake until scones are golden brown, 10 to 12 minutes. Let cool on a wire rack. Serve warm or at room temperature.
Per a Farmgirl's Dabbles, the scones are best eaten the same day. Cut all the dough into scones, but place any "leftovers" in the freezer prior to baking. To bake frozen scones, brush with milk and sprinkle with sugar. Adjust baking time by adding about 3 to 5 minutes. Just think, fresh scones every morning ... mmmm.
Pesto Spirals
Typically when I pull out a cookbook, I remember how much I wanted to bake several recipes from that book. Such was the case with Breaking Bread with Father Dominic. His recipe for Pesto Spirals finally gave me the opportunity to use some pesto from the freezer. This was quite tasty with our spaghetti last night.

Pesto Spirals
2 cups warm water
2 tsp. yeast
2 Tbsp. sugar
2 tsp. salt
1/4 cup vegetable oil
6 to 6 1/2 cups bread flour
1 cup pesto
Combine water and yeast, and let stand 5 minutes until yeast is dissolved. Add sugar, salt and vegetable oil, and stir to mix. Add 5 cups of bread flour, and beat together. Gradually add remaining bread flour as needed, kneading until a smooth dough forms. Cover dough, and let stand until doubled, about 1 hour.
Punch down dough, and knead lightly 1 minute. On a lightly floured surface, roll dough into a rectangle 24 by 18 inches. Spread pesto on dough, leaving a 1-inch border on all sides. Roll up dough, jelly roll style, starting from the long end. Pinch the edges of the dough together to seal the spiral. Cut dough into 1-inch pieces.
Grease 2 9-inch round baking pans. Place pieces, cut side down, on prepared pan. Start at the center and work outward layering pieces to form a spiral. Cover pans, and let dough rise until nearly doubled, about 30 to 45. Meanwhile, preheat oven to 350ºF. Bake bread 30 to 40 minutes, until lightly browned and bread sounds hollow when tapped. Makes 24 servings.
English Muffin Bread
My husband loves English muffins. He's even left me a note saying, "True love sometimes comes in the form of a 6-pack of English muffins left in the fridge for my breakfast."
Although I've made and thoroughly enjoy homemade English muffins, they are a bit time consuming considering you can buy a package for less than $1 at the store. I've also made English muffin bread, but to be honest, I'd forgotten about that recipe until I just searched my blog as I was typing this post.
So, when I came across Brown Eyed Baker's recipe for English Muffin Bread, it was immediately bookmarked. It came together super fast, so we'll see how much my husband loves me for this loaf of bread.

English Muffin Bread
3 cups all-purpose flour
1 Tbsp. sugar
1 1/2 tsp.salt
1/4 tsp. baking soda
1 Tbsp.instant yeast
1 cup milk
1/4 cup water
2 Tbsp. vegetable oil or olive oil
Cornmeal, to sprinkle in pan
Whisk together the flour, sugar, salt, baking soda, and instant yeast in a large mixing bowl. Combine the milk, water, and oil in a separate, microwave-safe bowl, and heat to between 120°F and 130°F. Be sure to stir the liquid well before measuring its temperature as you want an accurate reading. Pour the hot liquid over the dry ingredients in the mixing bowl. Beat at high speed for 1 minute. (The dough will be very soft.)
Lightly grease an 8 1/2 x 4 1/2 loaf pan, and sprinkle the bottom and sides with cornmeal. Scoop the soft dough into the pan, leveling it in the pan as much as possible. Spray a piece of plastic wrap with nonstick cooking spray, cover the dough, and let the dough rise until it’s just barely crowned over the rim of the pan, no more than 1/4-inch over the rim. This will take about 45 minutes to 1 hour.
While the dough is rising, preheat the oven to 400°F. Remove the plastic wrap, and bake the bread for 22 to 27 minutes, until it’s golden brown and its interior temperature is 190°F. Remove the bread from the oven, and after 5 minutes, turn it out of the pan onto a rack to cool. Let the bread cool completely before slicing. Makes 1 loaf.
Lemon-Limoncello Cupcakes
We have a surplus of limoncello (and limecello and orangecello), so these Lemon-Limoncello cupcakes from Brown Eyed Baker caught my eye. Although the cupcakes were tasty, I thought the cupcake itself was a bit dense and prefer a "softer" cupcake. The combination of frosting, lemon curd and cupcake does work well together.

Lemon-Limoncello Cupcakes
Cupcakes1 1/2 cups all-purpose flour
1 tsp. baking powder
1/2 tsp. salt
1/4 cup butter, at room temperature
2 oz. cream cheese, at room temperature
1 cup granulated sugar
3 large eggs
2 Tbsp. limoncello
1/2 cup buttermilk
1/4 cup lemon juice
Zest of one lemon
Filling
1/3 cup lemon curd
Cream Cheese Limoncello Frosting
1/4 cup unsalted butter, at room temperature
4 oz. cream cheese, at room temperature
1 Tbsp. limoncello
2 cups powdered sugar, sifted
Preheat the oven to 350ºF. In a medium bowl, combine the flour, baking powder and salt. In a separate bowl, beat the butter, cream cheese and sugar on medium speed until light and creamy, 2 to 3 minutes. Add the eggs, one at a time, beating well after each addition. Add the limoncello, and beat an additional minute.
On low speed, add flour mixture and buttermilk alternatively, beginning and ending with the flour mixture. Add the lemon juice and zest and mix on low speed just until incorporated. Divide the batter between 12 cupcake tins. Bake for 20 minutes or until a toothpick inserted near the middle comes out clean. Let cool completely.
In the bowl of an electric mixer fitted with the paddle attachment, beat the butter and cream cheese on medium speed until light and creamy, about 2 to 3 minutes. Add the limoncello, and beat for an additional minute. Reduce the speed to low, and gradually add the sifted powdered sugar, beating until fully incorporated and smooth.
Cut a hole into each cupcake with the large end of a melon baller or the back end of a large pastry tip. Fill each hole with the lemon curd. Fill a pastry bag with a star tip with the cream cheese limoncello frosting, and pipe onto each cupcake.
Snickerdoodle Cupcakes
For some reason, I flagged Snickerdoodle Cupcakes when I first received the Betty Crocker Big Book of Cupcakes. I say "for some reason" because it didn't look as enticing when I reread the recipe. However, it was on my list, still looked tasty and I figured it would be a good excuse to bake Snickerdoodle cookies as well.

Snickerdoodle Cupcakes
Cupcakes
2 3/4 cups flour
3 tsp. baking powder
1/2 tsp. salt
1 tsp. cinnamon
3/4 cup shortening
1 2/3 cups sugar
5 egg whites
2 1/2 tsp. vanilla
1 1/4 cups milk
Cinnamon Frosting
6 cups powdered sugar
2 tsp. cinnamon
2/3 cup butter
1 Tbsp. vanilla
2 to 4 Tbsp. milk
Garnish
24 Snickerdoodle cookies
2 tsp. sugar
1/2 tsp. cinnamon
Preheat oven to 350ºF. Grease 24 cupcake tins.
In a medium bowl, combine flour, baking soda and salt. In large mixing bowl, beat shortening 30 seconds. Add sugar, about 1/3 cup at a time, beating well after each addition. Beat 2 additional minutes on medium speed. Beat in egg whites, one at a time, until fully incorporated. Beat in vanilla extract.
Beat in flour and milk, alternating with portions of each, starting and ending with flour.
Divide batter evenly among cupcake liners, filling to about 2/3 full.
Bake 18 to 20 minutes or until lightly golden. Cool in pans 5 minutes, and then cool completely on wire racks.
To prepare frosting, beat sugar, cinnamon and butter together on low speed. Add vanilla and 2 Tbsp. milk. Gradually beat in remaining milk as needed to reach desired consistency.
Frost cupcakes. Mix together remaining sugar and cinnamon, and sprinkle on cupcakes. Immediately prior to serving, garnish each cupcake with a Snickerdoodle. Makes 24 cupcakes.
Snickerdoodles
I've never made Snickerdoodles. This was evidenced by the fact my husband thought Snickerdoodle Cucpakes would contain Snickers candy bars. So, I decided to rectify the situation by baking Snickerdoodles, including some tiny Snickerdoodles perfect for topping my next cupcake creation. I found my recipe from Brown Eyed Baker.
Snickerdoodles
2 3/4 cups flour
2 tsp. cream of tartar
1 tsp. baking soda
1/4 tsp. salt
1 cup (2 sticks) unsalted butter, at room temperature
1 1/2 cups sugar
2 eggs
1 tsp. vanilla extract
3 Tbsp. sugar
1 Tbsp. cinnamon
Preheat oven to 350°F. Line baking sheets with parchment paper or a Silipat, and put in refrigerator to chill. Meanwhile, whisk together the flour, cream of tartar, baking soda and salt in a medium bowl. Set aside.
Cream together the butter and sugar until pale and fluffy. Add the eggs, one at a time, beating well after each addition. Beat in the vanilla. Gradually stir in the flour mixture, beating on low speed just until the flour is blended.
Chill the dough for at least 30 minutes. In the meantime, mix together the sugar and cinnamon in a small bowl. Scoop 1-inch balls of dough and roll in the cinnamon and sugar mixture to coat. Place on chilled cookie sheet about 2 inches apart, and bake for 10 minutes. Chill the dough and cookie sheets between batches. Let cookies set on baking sheet for 2 to 3 minutes, and then remove to a cooling rack. Store cookies in an airtight container.
I halved the recipe, but the original makes about 4 dozen cookies.
Nut Rolls
While browsing through food blogs, I found I am Baker's recipe for Nut Rolls and immediately thought of my grandfather. He loves nut rolls, so I decided to make a batch for his Easter package. They are sweet, salty and satisfyingly sticky ... I'm just hoping he doesn't break his dentures on them! Here's the recipe with my minor adaptations.

Nut Rolls
1 7 oz. jar marshmallow creme
1/2 tsp. almond extract
3 cups powder sugar
1 14 oz. bag caramels
3 cups salted nuts
Put marshmallow creme, extract, and powder sugar in a bowl and combine with your hands. This can take a few minutes, and the dough will be very stiff. Divide into a minimum of 10 pieces depending on how big you want your nut roll to be, and then roll into the cylinder shape. Wrap each cylinder in wax paper, and place in freezer for at least 2 hours.
Melt caramels in microwave for about 3minutes, removing to stir at 30 second intervals. Make sure they are completely melted.
Place salted peanuts (or whatever variety you would prefer) on baking sheet. Remove rolls from freezer, then dip into caramel and coat completely. Try not to use your fingers as the caramel is hot and sticky. You can use two forks to dip and remove. Place caramel covered roll onto salted nuts, and cover completely.
Transfer nut covered roll onto wax paper, then store in the refrigerator. They should retain their quality for at least a month, but they won't last that long.
Gingerbread Cupcakes with Cream Cheese Frosting
I realize gingerbread is traditionally more of a Christmastime treat, but these Gingerbread Cupcakes disappeared quickly at my workplace. I tasted both the cupcakes and the frosting separately and enjoyed them, but the combination of the two is near perfect.
Gingerbread Cupcakes
Cupcakes
1/2 cup sugar
1/2 cup butter
1/2 cup molasses
2 eggs
2 cups flour
1 tsp. baking soda
1/2 tsp. salt
1 1/2 tsp. ground ginger
1/2 tsp. cinnamon
1/2 tsp. allspice
3/4 cup water
Cream Cheese Frosting
8 oz. cream cheese, softened
1 stick butter, softened
2 tsp. lemon zest
1 tsp. cinnamon
1 tsp. vanilla
4 cups powdered sugar
1 to 2 tsp. milk
Preheat oven to 375ºF. Line pans with 18 cupcake liners. In large bowl, beat together sugar, butter, molasses and eggs. Stir in flour, baking soda, salt, ginger, cinnamon, allspice and water. Divide batter evenly among cupcake liners.
Bake 15 to 18 minutes or until a toothpick inserted into the center comes out clean . Cool 5 minutes in the pans and then completely on wire racks.
To make the frosting, beat cream cheese, butter, lemon zest, cinnamon and vanilla together until smooth. Gradually add powdered sugar. When mixture gets thick, slowly incorporate milk 1/2 tsp. at a time as needed to keep frosting desired consistency.
Pipe frosting liberally onto cupcakes using a large tip. Makes 18 cupcakes.
Chocolate Cheesecake Cake
While I gave up chocolate during Lent, I came across some amazing recipes that involved chocolate. When I found this Chocolate Cheesecake Cake on Recipe Girl, I knew immediately that I wanted to make this for dessert for Easter dinner. (In reality, I wanted to make this for Easter dinner, but my family is a bit more traditional and prefers ham and kugelis for the meal itself.)

This is every bit as decadent as it looks and sounds. This is probably one of my favorite creations as it looks as impressive as a dessert from a fancier restaurant and tastes incredibly rich. The recipe involves several steps, but it's relatively easy to put together. (This was my first time making a layered cake, cutting cakes to stack evenly and making chocolate curls. None of it was difficult.)

Below is the recipe, but please check out Recipe Girl for her step-by-step instructions.
Chocolate Cheesecake Cake
Cheesecake
5 oz. bittersweet chocolate (70% cocoa), chopped
16 oz. cream cheese, at room temperature
1/2 cup + 3 Tbsp. sugar
2 Tbsp. unsweetened cocoa powder
2 large eggs
Chocolate Cake
1 3/4 cups all-purpose flour
1 1/2 cups sugar
2/3 cup unsweetened cocoa powder
1 1/2 tsp. baking soda
1/2 tsp. baking powder
1/2 tsp. salt
1 tsp. instant espresso powder
3 large eggs, at room temperature
1 1/4 cups buttermilk, divided
1 1/2 sticks butter, at room temperature
1 tsp. vanilla extract
Chocolate Sour Cream Frosting
2 cups semisweet chocolate chips
1 stick unsalted butter, at room temperature
1 cup sour cream
2 Tbsp. light corn syrup
Garnish
Chocolate curls
To prepare the cheesecake, preheat oven to 325ºF. Place a large roasting pan on the lower third rack of the oven. Bring approximately 4 cups of water to a boil. Spray a 9-inch springform pan with nonstick spray, and line the bottom with a round of parchment paper. Wrap a double layer of foil around the bottom and up the sides of the pan to seal the pan from the water. Place chocolate in a medium glass bowl. Melt in the microwave in 30 second bursts until the chocolate is melted and smooth, stirring after each burst. Set the chocolate aside, and let it cool off until it is lukewarm but still pourable. In a large bowl, use an electric mixer to mix the cream cheese to blend until smooth and creamy. Mix in sugar and cocoa powder, and blend until incorporated, scraping down sides of the bowl as needed. Add eggs, one at a time, blending after each addition. Mix in the lukewarm chocolate until smooth. (The batter will be very thick.) Scrape it into the prepared pan, and smooth the top.
Set the pan into the roasting pan in the preheated oven. Carefully pour the boiling water into the roasting pan (it will fill the pan surrounding the cheesecake) so there is about an inch of water coming up the foil along the sides of the cheesecake pan. Bake the cheesecake for 45 minutes. It should be set to the touch and not jiggly. Remove the cheesecake from the roasting pan, and let it cool on a wire rack for at least an hour. When it has cooled, place the pan into the freeze,r and let the cheesecake freeze completely. This can be done in several hours or overnight.
To prepare the cakes, preheat oven to 350ºF. Grease and flour two 9-inch round metal baking pans. Line the bottom with rounds of parchment paper. In a large bowl, whisk together flour, sugar, cocoa powder, baking soda, baking powder and salt. Add espresso powder, eggs, 1/4 cup of the buttermilk, butter and vanilla to the flour mixture. Using an electric mixer on medium-low speed, beat for 1 minute, until blended. Scrape sides and bottom of bowl with a rubber spatula. Beat on high speed for 2 minutes. Add the remaining buttermilk, and beat on low speed for 15 to 30 seconds, until just blended. Spread the batter evenly into the prepared pans, dividing equally. Bake 30 to 35 minutes or until a toothpick inserted in the center comes out with a few moist crumbs attached. Let cool in pans on a wire rack for 10 minutes. Run a knife around the edge of the pans, then invert cakes onto a rack and remove parchment paper rounds to cool completely.
To prepare the frosting, in a large microwave-safe bowl, combine the chocolate chips and butter. Microwave 1 to 2 minutes, stopping every 30 seconds to stir, until melted and smooth. Whisk the sour cream and corn syrup into the chocolate mixture until smooth. Cover, and refrigerate for at least 30 minutes or until firm enough to spread.
To assemble the cake, place one cake layer into the center of a cake plate or platter. Remove the cheesecake from the freezer, take off the sides of the pan, and slide a knife under the parchment to remove the cheesecake from the pan. Peel off the parchment. Measure your cheesecake layer against the cake layers. If the cheesecake layer turns out to be a slightly larger round than your cake, move it to a cutting board and gently shave off some of the exterior of the cheesecake (with a sharp knife) to get it to the same size as your cake layers. Place the cheesecake layer on top of the first cake layer. Place the second cake layer on top of the cheesecake.
Apply a crumb coat layer of frosting to the cake using a long, thin spatula to cover the cake completely with a thin and even layer of frosting. Be sure to wipe off your spatula each time you are about to dip it back into the bowl to get more frosting to avoid transferring crumbs. Don't worry at this point about the crumbs being visible in the frosting on the cake. When your cake has a thin layer of frosting all over it, place it into the refrigerator for 30 minutes to "set" the frosting.
Once the first layer of frosting is set, apply the second layer. Start by adding a large scoop of frosting onto the top of the cake. Use a long, thin spatula to spread the frosting evenly across the top and then spread it down the sides of the cake too. Because you applied a crumb-coat layer, you shouldn't have any crumbs floating around in the final frosting layer. Garnish with chocolate shavings.
Keep this cake refrigerated until it is devoured!
April 9, 2012
Whiteout Cocoa
I realize spring has sprung, but I happened to have the half and half required for this Whiteout Cocoa recipe from Sprinkle Bakes. I brought a mug to my husband one evening, and he came back inquiring what that deliciousness was and whether there was any more. This would be a nice treat for a winter evening ... or a spring evening.
Whiteout Cocoa
6 cups skim milk
2 cups fat-free half and half
12 oz. package white chocolate chips
1 Tbsp. vanilla
Place skim milk, half and half, vanilla and white chocolate chips in a large pot, and place over medium heat. Stir occasionally until chocolate chips begin to melt, and then reduce heat to medium-low. Cook, stirring occasionally until mixture is very hot and chips are melted. Divide mixture between mugs serve immediately. Makes 8 to 10 servings.
Subscribe to:
Posts (Atom)