My brother-in-law isn't one to pass along compliments easily. His response when my husband brought these cookies up north for deer hunting: "Drop whatever you are doing and make 2 more buckets of those cookies for next weekend ... They are f-ing good."
These cookies require a bit of patience in terms of chilling the dough, but the positive is that you can have freshly baked cookies several days in a row. This recipe from Brown Eyed Baker is definitely a repeat!
Note: This is one of those recipes where it truly is best to weigh the dry ingredients, but other measurements are included.
Peanut Butter Cup Cookies
8½ oz. (2 cups) bread flour
8½ oz. (2 cups + 2 Tbsp.) cake flour
1½ tsp. baking powder
1½ tsp. salt
1¼ tsp. baking soda
1¼ cups unsalted butter, at room temperature
½ cup creamy peanut butter
10 oz.(1⅓ cups) light brown sugar
8 oz. (1 cup + 2 Tbsp.) sugar
2 eggs
2 tsp. vanilla
1½ cups (8 oz.) mini peanut butter cups, halved
¾ cup milk chocolate chips
¾ cup peanut butter chips
Fleur de sel, for sprinkling
Whisk both flours, the baking powder, salt and baking soda together in a medium bowl, and set aside.
In the bowl of a stand mixer fitted with the paddle attachment,
beat the butter and peanut butter together on medium speed until light
and fluffy, about 2 minutes, stopping to scrape down the sides of the
bowl as necessary. Add both sugars, and continue beating on medium speed
until very light, about 3 to 4 minutes.
Mix in the eggs, one at a time, until well combined, and then beat in
the vanilla. Reduce the mixer speed to low, and gradually add the dry
ingredients, mixing just until combined. Use a rubber spatula to stir in
the chocolate chips, peanut butter chips and peanut butter cups by hand
until evenly distributed.
Press plastic wrap against dough and refrigerate for 24 to 72
hours. When ready to bake, preheat oven to 350ºF. Line baking sheets with parchment paper or a silicon baking mat.
Divide the dough into 2 1/2 oz. balls, and place on the prepared
baking sheet, leaving at least 2 inches of space between the cookies.
Sprinkle lightly with sea salt, and then bake for about 15-17 minutes or
until the edges are set and golden brown.
Transfer the baking sheet to a wire rack, and allow the cookies to
cool for a few minutes before removing the cookies to the rack to cool
completely. Repeat with remaining dough. (Allow the baking
sheet to cool between batches or use additional baking sheets.) The
cookies can be stored at room temperature in an airtight container for
up to 4 days. Makes 30-32 giant cookies.
December 7, 2015
December 4, 2015
Turtle Layer Cake
This cake was my sweet treat from Life, Love and Sugar for my family for Thanksgiving. (Check out the link for pictures of the beautiful cake.) It was a huge hit with everyone because although it's definitely sweet, it's not over the top. This is great for times when you're busy but want an impressive dessert because most of the work can be done ahead of time for a rather quick assembly.
For example, I baked my cakes and stuck them in the freezer. Then I made the caramel sauce and put that in the refrigerator. (Or you could buy a jar, too, I suppose.) You could even toast your pecans ahead of time, but I did that while I assembled the cake.
Bottom line: looks impressive with relatively little effort and tastes great!
Turtle Layer Cake
Chocolate Cake
2 cups flour
2 cups sugar
3/4 cup dark cocoa powder
2 tsp. baking soda
1 tsp. salt
2 eggs
1 cup buttermilk
1 cup vegetable oil
1 tsp. vanilla
1 cup boiling water
Caramel Sauce and Frosting
1 1/2 cups sugar
9 Tbsp. salted butter, cubed, room temperature
3/4 cup heavy whipping cream, room temperature
4 cups powdered sugar
2-3 Tbsp. milk
Chocolate Ganache
9 oz. semi-sweet chocolate chips
3/4 cup heavy whipping cream
Additional
3/4 cup chopped pecans, toasted
Prepare three 8-inch cake pans with parchment paper circles in the bottom, and grease the sides. Preheat oven to 300ºF.
Add all dry ingredients to a large bowl, and combine. Add eggs, buttermilk, vegetable oil and vanilla to the dry ingredients, and mix well. Slowly add water, and mix well.
Divide batter evenly between cakes pans, and bake for about 30-33 minutes, or until a toothpick comes out with a few crumbs. Remove cakes from oven, and allow to cool for about 10 minutes, and then remove to cooling racks to cool completely.
While the oven is warm, place pecans on a baking sheet, and toast in the oven for 10 minutes. Set aside to cool.
While cakes cool, make the caramel sauce and icing by pouring sugar into an even layer in a large saucepan.
Heat on medium-high heat, whisking the sugar until melted. The sugar
will clump up first but will eventually completely melt. This will take
about 10 minutes.
Once the sugar has melted, stop whisking, and allow to cook until the
sugar has turned to a little darker amber color. You may notice a nutty
aroma. The change in color will happen quickly, so don't let it go too
long or get too dark and burn. Remove caramel from the heat.
Add butter, and whisk until combined. The mixture will bubble up, but
keep whisking until all the butter has melted and combined. Slowly pour the heavy cream into the caramel, and whisk until incorporated. Cool for about 10-15 minutes before using.
Set aside about 1/3 cup of caramel sauce, and then transfer remaining caramel sauce to a mixing bowl.
Slowly add powdered sugar and milk, and mix until smooth. You can add
more or less milk to get the right consistency for the icing.
Make the ganache by adding the chocolate chips to a metal or glass bowl.
Microwave the heavy whipping cream until boiling, and then pour over the
chocolate chips. Let stand 5 minutes, and whisk chocolate until smooth. Microwave in 5-10 second increments as needed, if chocolate isn't fully smooth and melted.
When the cakes are cool, remove the tops of the cakes with a large serrated knife so they are flat.
Place the first layer of cake on cake stand. Top with 1 cup of the
caramel icing, and spread into an even layer. Top icing with about 1/4
cup of chopped pecans, and then drizzle with some chocolate ganache and
caramel sauce.
Add second layer of cake, and add another 1/4 cup of chopped pecans, caramel sauce and chocolate ganache. Top cake with remaining cake layer.
Pour remaining ganache over the cake, and allow it to drizzle down the
sides of the cake. Refrigerate until the ganache is firm. (Otherwise your frosting will slide right off, not that I had that happen at first.) Pipe
caramel icing around the top edges of the cake, then sprinkle with
remaining chopped pecans and drizzle with caramel sauce.
November 18, 2015
Pumpkin Bread
When I came across this recipe from Yammie's Noshery, I immediately bookmarked it because it's nearly hunting season in Wisconsin. And hunting season has become synonymous with me baking all sorts of goodies for my family and our out-of-state friends who join us for the week. And one of those friends has gluten intolerance, which means I always need a few tasty treats for him since he can't partake in a portion of what I prepare.
Hence this bread, which said it worked equally well with flour or rice flour. And I had a bag of rice flour on hand, so I made two loaves with my toddler. It was extremely easy to make a double batch in separate bowls to keep one gluten free. Both baked up beautifully, and we cannot wait to dig into them. (My toddler has been repeatedly asking, but they're currently tucked in the freezer for safe keeping.)
Pumpkin Bread
1 cup pumpkin puree
2 eggs
1/2 cup vegetable oil
1 tsp. vanilla
1 cup sugar
1 cup flour (or rice flour)
1/2 tsp. salt
3/4 tsp. baking soda
1/2 tsp. baking powder
1 tsp. cinnamon
1/2 tsp. ginger
1/4 tsp. nutmeg
1/8 tsp. cloves
Preheat oven to 350ºF. Line a standard-size loaf pan with foil. Combine the pumpkin, eggs, oil and vanilla. Add the sugar, and mix well.
In a separate bowl, combine the flour, salt, baking soda, baking powder and spices. Add to the wet ingredients, and mix until just combined. Pour into the loaf pan, and bake for about 45 minutes or until a toothpick comes out clean. Allow to cool before removing from the pan. Peel off foil, and serve. Makes 1 loaf. (You can easily double it or convert it to one dozen muffins baked at 375ºF for 20 minutes.)
Beef Stew with Pearl Couscous
Two savory recipes in a row on my blog. Two recipes that are essentially beef stew on my blog. I guess weirder things could happen.
This version from How Sweet It Is gets the nod of appreciation for the technique of cooking the roast. Regardless of whether I make this stew again, I need to cook a roast in this manner and devour it. I'm certain my 4-year-old and I could have eaten nearly the entire roast if we tried (or showed a lack of self control). So note to my future self who forgets about this: buy beef, and cook it this way.
Oh, and the stew was tasty. And I miraculously got both my boys to eat bowls of it. (I added a few potatoes and carrots and eliminated the squash from the original version.)
Beef Stew with Pearl Couscous
3 lbs. beef chuck roast
1 tsp. coarse sea salt
1 tsp. black pepper
2 Tbsp. olive oil
3 Tbsp. unsalted butter, divided
1 cup pumpkin beer
1 onion, diced
4 garlic cloves, minced
16 oz. sliced mushrooms
1/4 tsp. nutmeg
4 cups low-sodium beef stock
1/2 Tbsp. fresh thyme, chopped
1 tsp. fresh rosemary, chopped
2 cups cold water
2 Tbsp. flour
1 cup whole wheat pearl couscous
Heat a large stock pot over medium high
heat. Season the roast with the salt and the pepper evenly (adding a bit
more if needed). Place olive oil and 2 Tbsp. butter in the
skillet. Add the roast, and sear on all sides until golden brown. Reduce
the heat, and pour in the beer. Cover the pot, and cook on low heat for 3 to 4 hours,
turning once or twice, until the beef is falling apart. Keep an eye on
the beef, and add more liquid if you need it. You want the liquid to be
slightly simmering the entire time.
When the roast is falling apart, transfer it to a large bowl with the remaining liquid in the pot. Set the heat to medium-low, and add the remaining tablespoon of butter. Add the onion and garlic, stirring to coat. Cook until the onion is translucent, about 5 minutes. Stir in the mushrooms. Cook until the mushrooms are slightly soft, another 5 minutes. Add in the nutmeg, shredded beef (and liquid), stock and herbs to the pot. Bring the mixture to a boil, then cover and reduce the heat to low. Cook for 20 minutes, or until the vegetables are just softened.
Combine the flour and water to make a slurry. Add the slurry to the stew, and stir well. Increase the heat a bit until the stew is simmering. Let it cook for 30 more minutes, stirring occasionally. Taste and season additionally if needed. 15 minutes before serving, stir in the pearl couscous. Cook for 10 or 15 minutes, just until the couscous softens. Serve with freshly chopped herbs on top. Serves 6.
Steak and Ale Pie
Even though we've escaped the winter weather thus far, comfort food like this has been at the top of my list. I made this recipe from Foodness Gracious. When my husband says I could make it again even without the puff pastry (sacrilege!), you know the inside is goodness.

I followed the recipe nearly exactly, with the exception of transferring the completed meat and vegetables into individual ramekins. Perhaps next time I'd switch up the veggies and add a few potatoes and carrots, but it was excellent as is.
Steak and Ale Pie
2 lbs. chuck roast steak
1/4 cup flour
3 Tbsp. canola oil
1 cup sliced onion
4 oz. diced prosciutto
1 large garlic clove, minced
1½ cups dark ale beer or stout, divided
1/4 cup Worcestershire sauce
2 Tbsp. tomato paste
1 Tbsp. sugar
1 Tbsp. fresh chopped rosemary
1 Tbsp. fresh chopped thyme
1 cup beef broth (I used water and a splash of liquid smoke)
1/2 tsp. salt
1/4 tsp. black pepper
7 oz. mushrooms, quartered
1 Tbsp. cornstarch
1 Tbsp. water
1 egg beaten
1 sheet frozen puff pastry, thawed
Preheat the oven to 300°F. Cut the chuck roast into cubes about 1½-2 inches, and place in a bowl. Toss the beef until covered evenly in the flour.
Heat the oil in a large pan, at least 10-inches wide, over a high heat. (I used my cast iron skillet for the entire cooking process.) Gently drop in half of the beef, and sear on each side until brown and crispy around the edges (about 2 minutes per side). Transfer to a plate, and sear the remaining meat, transferring it to rest with the rest of the meat.
Once the beef is out of the skillet, add the onion, garlic and Pancetta. Cook until the onion starts to get soft over a medium heat. Add a half cup of the beer, and deglaze the pan by scraping the bottom with a wooden spoon. Simmer for 2 minutes.
Add the Worcestershire sauce, tomato paste, sugar and herbs, and stir. Add the remaining 1 cup beer and the beef broth. Season with the salt and pepper.
Mix in the mushrooms, and the seared beef and stir to combine. Transfer the filling to a pie dish (or continue cooking if you use an oven-safe skillet. Bake in the oven for 2 hours, covered with foil. After 2 hours, cook for a further 30 minutes uncovered.
Take the pie out of the oven, and raise the oven temperature to 400°F. Dissolve the cornstarch with the water. Add it to the pie filling, and gently stir through. If desired, transfer to individual ramekins at this point.
Unroll the pastry from its package into a square. Lift the pastry onto the pie, and brush it with the beaten egg. Place the pie back into the oven, and bake for another 30 minutes or until the pastry is a deep golden color and has risen up a little. It may take less time, but that's OK because your filling is already cooked.
Let rest for 5 minutes before serving. Serves 4-6.
October 26, 2015
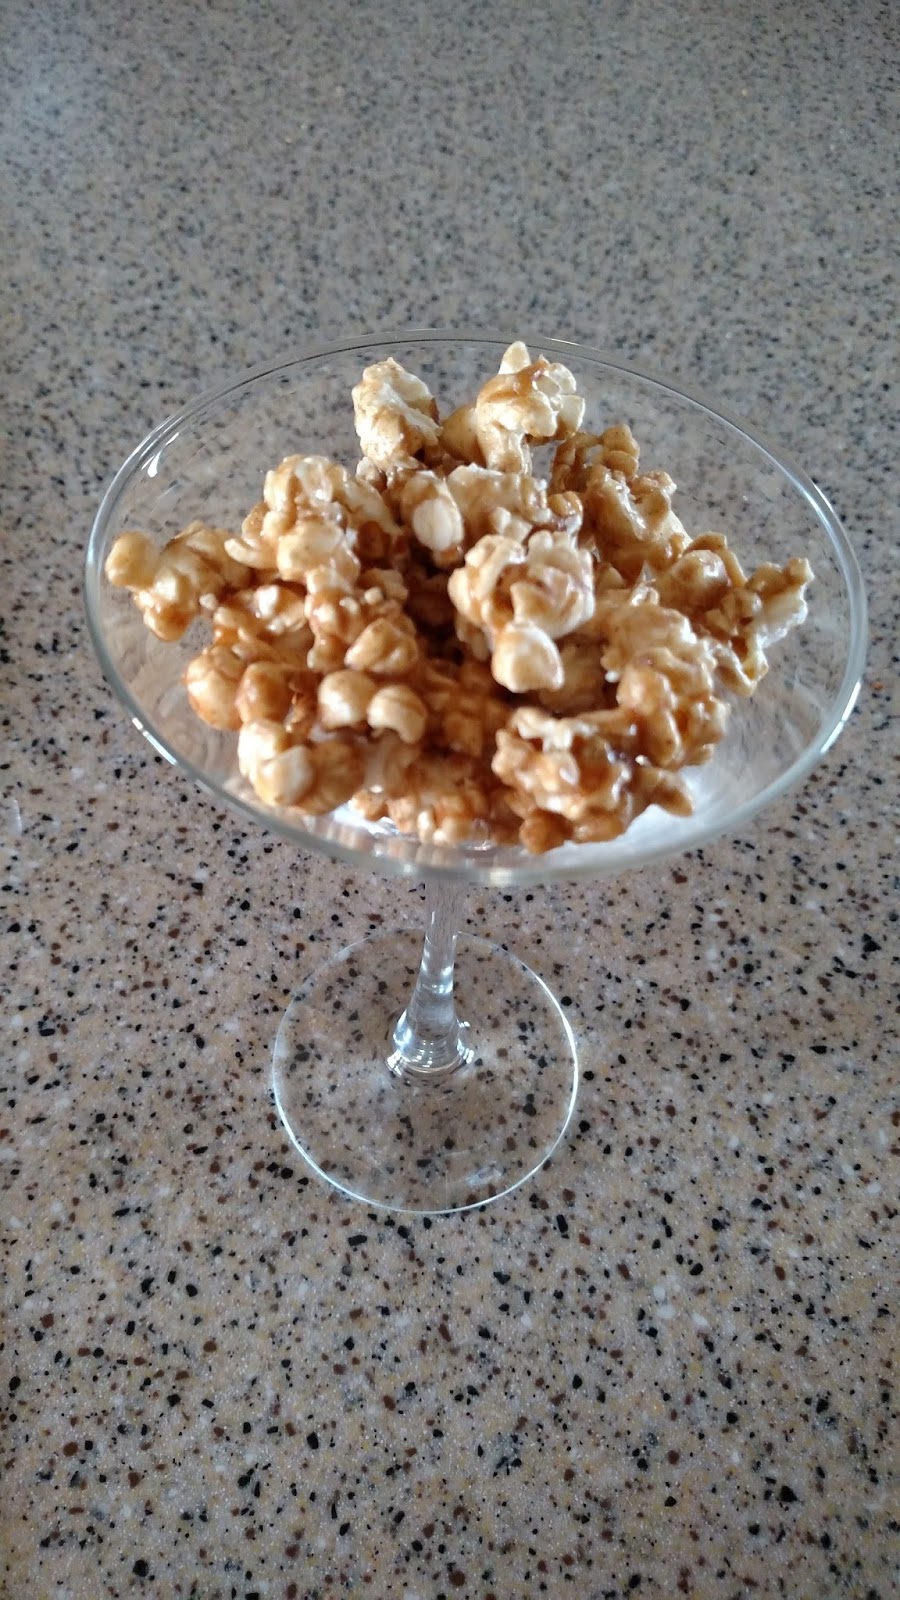
Pumpkin Pie Spice Caramel Corn
My addiction to homemade caramel corn is well documented through the years on my blog, so it wasn't surprising to me that I bookmarked this recipe from Cookies and Cups. I made it, consumed it in place of a few meals and then took it to a Halloween party. (I'm smart enough to know by now that caramel corn is much like an open bottle of alcohol ... it should only be transported stowed securely in the trunk. Otherwise it disappears on the drive. The caramel corn, I mean, not the alcohol.)
Like most caramel corns I've made, this is so easy to make. It's a nice twist for fall, especially for those of us who can't stand coffee, regardless of how much you spice it with pumpkin.

Pumpkin Pie Spice Caramel Corn
1 cup butter
1 cup brown sugar
1/3 cup corn syrup
2 tsp. salt
2 tsp. vanilla
3 tsp. pumpkin pie spice
16 cups popped corn
Preheat oven to 300°F. Line a large baking sheet with parchment paper or a silicone mat, and set this aside.
In a small saucepan, melt butter, brown sugar, corn syrup salt together over medium heat. Bring to boil. Boil for 4 minutes without stirring.
Remove from the heat, and stir in the vanilla and pumpkin pie spice. Place popcorn in a giant bowl, and pour the caramel mixture over the popcorn, stirring to coat evenly.
Spread popcorn onto prepared baking sheet. Bake 30 minutes, stirring every 10 minutes. Allow the popcorn to cool completely. Makes about 16 cups.
Like most caramel corns I've made, this is so easy to make. It's a nice twist for fall, especially for those of us who can't stand coffee, regardless of how much you spice it with pumpkin.
Pumpkin Pie Spice Caramel Corn
1 cup butter
1 cup brown sugar
1/3 cup corn syrup
2 tsp. salt
2 tsp. vanilla
3 tsp. pumpkin pie spice
16 cups popped corn
Preheat oven to 300°F. Line a large baking sheet with parchment paper or a silicone mat, and set this aside.
In a small saucepan, melt butter, brown sugar, corn syrup salt together over medium heat. Bring to boil. Boil for 4 minutes without stirring.
Remove from the heat, and stir in the vanilla and pumpkin pie spice. Place popcorn in a giant bowl, and pour the caramel mixture over the popcorn, stirring to coat evenly.
Spread popcorn onto prepared baking sheet. Bake 30 minutes, stirring every 10 minutes. Allow the popcorn to cool completely. Makes about 16 cups.
Bourbon Salted Caramels
I've made caramels only once before, these Apple Cider Caramels, which I remember being so delicious that I wanted to make them again this fall. But when I saw these caramels with bourbon from Spicy Perspective, I knew I had to make them for my friend's birthday because she's a bourbon girl.
They are good, although it's a bit tedious to wrap an entire batch of caramels by yourself. (Thankfully my husband helped cut more wrappers as I wrapped, which helped.) It's still worth the effort, considering I filled an entire quart jar for my friend, took a bunch into work, kept a few at home and took a bunch to my brother when I visited him in Iowa.
I still think I need to pull out a jug of apple cider to thaw for the other caramels.
 Bourbon Salted Caramels
They are good, although it's a bit tedious to wrap an entire batch of caramels by yourself. (Thankfully my husband helped cut more wrappers as I wrapped, which helped.) It's still worth the effort, considering I filled an entire quart jar for my friend, took a bunch into work, kept a few at home and took a bunch to my brother when I visited him in Iowa.
I still think I need to pull out a jug of apple cider to thaw for the other caramels.

2 cups packed brown sugar
1 cup granulated sugar
1 1/2 cups heavy cream
1 cup salted butter
1 cup granulated sugar
1 1/2 cups heavy cream
1 cup salted butter
1 cup light corn syrup
1/2 cup bourbon
1 Tbsp. vanilla
1/2 cup bourbon
1 Tbsp. vanilla
Course or flake sea salt
Place the sugars, heavy cream, butter, corn syrup and bourbon in a
large (and I mean large) sauce pot. (My pot was on the verge of boiling over, so I had to switch pots mid-process.) Attach a candy thermometer to the edge of the pot with
the tip touching the ingredients, and then place over medium heat.
Bring to a boil, stirring occasionally, and then reduce the heat to
medium-low. Allow the mixture to simmer until it reaches 245-250°F and is the desired color you like for caramel. If the
temperature starts rising faster than the caramel is browning, lower the
heat even more to give it time to caramelize.
Meanwhile, line a 9 X 13 baking dish with parchment paper. Spray the parchment
with non-stick cooking spray. (The original recipe calls for testing the caramel and you can find instructions how in the original link, but I did it by temperature when it was about 248°F.) Once it's ready, remove from heat, and stir in the
vanilla extract.
Carefully pour the caramel into the prepared dish, and allow
it to cool completely. You can speed up the cooling process by placing
the dish in the refrigerator. Once cooled, sprinkle generously with sea salt. Lift the parchment paper out of the dish by the edges, and
cut caramels into 1-inch squares. Wrap
each candy in small pieces of wax paper. Makes approximately 80 caramels.
October 19, 2015
Whole-Grain Apple Cake
This is another Cooking Light recipe as I'm trying to make recipes rather than stashing them forever. This isn't our favorite apple coffee cake or apple recipe, but it's a nice pleasant cake. It's not overly sweet, and it's much healthier than our favorites (that involve Snickers for coffee cakes: http://nonesuchexists.blogspot.com/2012/08/snickers-coffee-cake-with-salted.html).
When I repeat this recipe, I'd increase the spices for more flavor and warmth.

Whole-Grain Apple Cake
Cake
2/3 cup brown sugar
2/3 cup non-fat buttermilk
1/3 cup canola oil
1 tsp. vanilla
2 large eggs
7.5 oz. whole-wheat pastry flour
1 tsp. baking powder
1/2 tsp. baking soda
1/2 tsp. cinnamon
1/2 tsp. salt
1/8 tsp. ginger
2 cups shredded apple
Streusel
3 Tbsp. quick oats
2 Tbsp. chopped walnuts
1 Tbsp. brown sugar
1 1/2 Tbsp. frozen butter, grated
Preheat oven to 350°F. Combine first 5 ingredients in a large bowl. Beat on medium speed 30 seconds or until well combined. Add all the dry ingredients after pre-mixing them together, and beat on low until combined. Stir in the apple. Spread batter into 9-inch spring-form pan coated with cooking spray.
Combine all the streusel ingredients, and sprinkle evenly over the cake. Bake 45 minutes or until a toothpick inserted in the center comes out clean. Cool in pan 10 minutes, remove sides of pan and serve. Serves 10.
October 13, 2015
Broccoli Bacon Mac 'n' Cheese
This Cooking Light recipe is worth repeating at least once in my family, if for no reason other than to get my kiddos to eat more vegetables. I found it to be a healthier version of comfort food, one that I enjoyed eating the leftovers. My kiddos required a bit of convincing, but I think that was more of the toddler aspect of "I want pancakes for every meal."
My version modified the process slightly but not the ingredients.
Broccoli Bacon Mac 'n' Cheese
2 slices bacon, chopped
3 cloves garlic, minced
2 cups unsalted chicken stock
1 cup low-fat milk
10 oz. frozen butternut squash puree, thawed
10 oz. elbow macaroni
3 cups chopped broccoli florets
1/2 tsp. salt
1/2 tsp. pepper
5 oz. sharp cheddar cheese, shredded
In a large skillet over medium-high heat, cook the bacon until crispy. Add garlic, and saute 30 seconds. Add stock, milk and squash, and bring to a boil while stirring occasionally. Add pasta and broccoli, cover and reduce heat. Simmer 10 minutes, stirring occasionally, until pasta and broccoli are done and sauce is thickened. (I actually added water to ensure enough liquid as it cooked.)
Stir in salt, pepper and cheese. Serves 6.
October 1, 2015
Chocolate Peanut Butter Pretzel Ice Cream
I love planning my kiddos' birthday parties, not because I'm the over-the-top Pinterest mom who feels everything needs to be absolutely perfect. I love it because baking and playing around with desserts is so much fun for me, so I use it as an opportunity to pull out all the dessert stops (as in homemade cookies, cake and ice cream!).
I found this recipe from How Sweet It Is while on vacation, and my husband picked this from a handful of flavors I proposed. You could eat this as a spoon without churning it into ice cream, and it would be a delicious pudding.
My only complaint is I used the exact pretzels listed in the original recipe. I love that they won't get soggy, but I am disappointed at the price I paid only to discover they are malted milk chocolate coating. Despite my love of chocolate and nearly all things sweet, malted milk chocolate is on my short list of things that include chocolate and the word disgusting in the same sentence.
Chocolate Peanut Butter Pretzel Ice Cream
3 cups whole milk
1 1/2 cup sugar
1/2 cup unsweetened cocoa powder
Pinch of salt
4 Tbsp. cornstarch
3/4 cup heavy cream
10 oz. dark chocolate, chopped
2 tsp. vanilla (whoops, I missed this in my version)
1 cup creamy peanut butter, slightly melted
1 bag of Lindt HELLO pretzel bites
Heat a large saucepan over medium heat, and add 2 1/2 cups of milk. Whisk in the sugar, salt and cocoa powder until dissolved and combined. Keep it over low heat, stirring often for a minute or two.
In a bowl, whisk together the remaining 1/2 cup milk and cornstarch until smooth. Slowly whisk it into the warmed milk mixture, and increase the heat to medium. Whisking the entire time (especially the bottom), bring the mixture to a boil. Cook it for 2 to 3 minutes until it has slightly thickened. Remove the pan from the heat.
Heat the heavy cream just until bubbles appear around the edges. Place the chopped chocolate in a bowl, and pour the cream over top. Let it sit for 1 minute. Stir until a thick and smooth ganache forms and all the chocolate has melted. Stir the ganache into the milk mixture. Transfer the entire thing to a bowl, and let it chill in the fridge until completely cold, a few hours.
Once cold, pour the mixture into your ice cream maker and churn according to the directions. Right before it's done churning, drizzle in 1/2 cup of the peanut butter. Finish churning, and remove the bowl. Stir in the remaining peanut butter and the HELLO pretzel bites. Place in a freezer safe dish or container. Freeze for 4 to 6 hours before serving. Makes about 1 quart.
September 1, 2015
Nectarine-Lime Jam
When I spotted nectarines for $1/lb., I knew I was going to make this jam from Food in Jars despite the fact that we leave for vacation in a week. (And vacation is a 3-week road trip with two toddlers, a feat that requires much planning and mental fortitude.)
I modified the recipe just a bit based on what I had on hand, and it worked out well. I love nectarines and am excited to have quite a few jars of this tasty jam.
Nectarine-Lime Jam
10 cups pitted and chopped nectarines
5 1/2 cups sugar
Zest and juice of 3 limes
1 packet liquid pectin
Combine nectarines and sugar in a large bowl. Cover, and refrigerate for at least 4 hours, up to 48 hours. (This speeds up the jamming process.) When ready to make the jam, prepare a hot water bath for canning the jam as well as the jars and lids.
In a large pot (as this jam foams and bubbles a lot), place the nectarine mixture. Bring to a boil, and then keep at a low boil. Cook about 20 minutes, more as needed, until fruit is softened and syrup is a bit thicker. Blend using an immersion blender (or other blender, carefully) to desired consistency. Return to heat, and add pectin. Stir while cooking another 3-5 minutes until desired consistency. (I cooked about 3 minutes for a softer set.)
Remove from heat, and ladle into prepared jars with 1/4-inch headspace. Can in a hot water bath for 10 minutes. Makes approximately 5 pints.
August 29, 2015
Maple Bourbon Brown Butter Peach Pie
Oh my, this pie! I want to accidentally fall and land face-first into this pie. Before I pick myself up and deal with the crowd of laughing onlookers, I'll eat all the crumb topping and caramel sauce. Then I'll be the one laughing.
I've said it before, probably with most pie recipes I post, but pies are pretty sparse in my kitchen. This one makes me want to bake pie more often. Particularly this one from Host the Toast. Probably in an apple variety as well.
The crust ended up slightly chewy, for lack of a better description, but still with great flavor. (And chewy is better than soggy for me in pie crust.) The caramel sauce is so good I had to restrain myself from licking my plate at my mother-in-law's house, just a hint of bourbon. And the crumb topping is fantastic!
This pie requires a bit of time and love, as many do. The steps break down fairly easily, so you can do things in between like go to the farmers' market, make lunch and such. It's absolutely worth the effort!

Maple Bourbon Brown Butter Peach Pie
Crust
1 cup water
2 1/2 cups flour
1 Tbsp. sugar
1 tsp. salt
1 cup unsalted butter, very cold
Filling
3 lbs. ripe peaches (about 6 peaches)
2 Tbsp. cornstarch
1 1/2 Tbsp. flour
1/2 tsp. cinnamon
1/4 tsp. salt
Pinch of allspice
1/2 cup sugar
1/4 cup maple syrup
3 Tbsp. bourbon
1 Tbsp. water
3 Tbsp. butter
Streusel
1/3 cup pecans
1/2 cup butter
1 cup plus 2 Tbsp. flour
1/2 cup sugar
3 Tbsp. dark brown sugar
1/4 tsp. salt
Pinch cinnamon
Begin by making crust, unless using a pre-made one. Pour one cup of cold water into a bowl, and add a few ice cubes. Set aside.
In a large bowl, whisk together dry ingredients until well-combined. Cut butter in 1/2-inch pieces, and use a pastry cutter to cut into pea-size pieces in the dry ingredients. Drizzle half the cold water (not ice cubes) into the mixture, and use a rubber spatula to mix together. Gradually drizzle in more water as needed to form a dough. Use hands to then knead it into one smooth ball. Divide in half, shape into balls and then flatten slightly, wrap in plastic wrap and refrigerate. (The second one can be frozen or will last one week in the refrigerator.) Chill at least 1 1/2 hours before rolling.
To roll dough, flour everything generously. Roll dough into a 12-inch circle, working quickly. Carefully place dough into pie pan, and fold any excess underneath (or cut off any large excess). Crimp the edges using your fingers. Chill shaped pie crust another 30 minutes.
Slice peaches (peel if desired), and toss in a large bowl with the cornstarch, flour, cinnamon, salt and allspice.
Preheat oven to 350˚F. (I know this seems weird here, but trust me, it's helps things flow.)
In a medium saucepan over medium-high heat, combine the sugar, maple syrup, bourbon and water. Stir only until the sugar dissolves, and then let it come to a boil. Swirl the pan, but do not stir. Cook until mixture turns a deep amber brown, remove from heat and add the butter, swirling until melted. Pour the caramel mixture over the peaches, and mix well. Pour this filling into prepared shell, and return to the refrigerator.
Sprinkle pecans for streusel on a baking sheet, and toast 5 minutes. Increase oven temperature to 425˚F.
In the same saucepan you used for the caramel, melt a stick of butter over medium heat, stirring frequently. Cook until the butter turns golden-brown. Set aside.
Whisk together the dry ingredients for the streusel. Chop the pecans, and stir into dry ingredients. Combine with the browned butter until crumbs form. Cover pie evenly with streusel.
Cover the pie crust edges with foil, and bake 15 minutes. Reduce heat to 350˚F, and bake another 30-40 minutes. Crust should be golden and filling bubbly when done. Cool at least three hours before slicing. (Don't worry ... it will still be slightly warm if you wait three hours but will at least not be a pile of goop to slice and scoop.)
August 24, 2015
PB & J Multigrain Pancakes
Now that I've made these Cooking Light pancakes, I'm intrigued on how else I can impart peanut butter flavor using the powdered peanut butter. These pancakes, particularly the first ones of the batch, were delicious. They tasted like warm peanut butter and jelly sandwich perfection.
The "but" statements: But they didn't rise much especially the later ones I cooked, probably due to the batter resting a bit too much. But I wouldn't make a double batch again just for that reason. But they are a bit of work that makes them more of a weekend treat. But they are worth trying.
PB & J Multigrain Pancakes
3.4 oz. whole wheat flour
3 Tbsp. cornmeal
3 Tbsp. oats, finely ground
1/4 cup peanut butter powder
2 Tbsp. sugar
1/2 tsp. baking soda
1/2 tsp. baking powder
1/4 tsp. salt
1 2/3 cups buttermilk
1 egg
6 Tbsp. jam (I used raspberry)
Butter, as desired
Powdered sugar, as desired
Preheat oven to 350˚F. Heat a large non-stick griddle (or grease your griddle) to medium-high heat.
Combine flour through salt in a large bowl. Add buttermilk and egg, and stir until combined. Spoon 3 Tbsp. batter onto griddle for each pancake. Once pancakes begin to bubble, spoon 1 Tbsp. jam onto the top of half of the pancakes. Gently flip the un-jammed pancakes onto the jammed pancakes, so the browned sides face outside. Carefully transfer the pancake sandwich to a baking sheet.
Bake for 12 minutes or until pancakes are cooked through. Serve warm, topped with butter and powdered sugar.
The recipe said it makes 6 pancakes, but I ended up with nearly double that. They are supposed to freeze well, reheating in the microwave. (I have frozen our leftovers but haven't tried any yet and likely won't remember to update this when I do.)
August 17, 2015
Peach Jam
I combined two recipes from Food In Jars to make this peach jam. I was extremely pleased with how this jam turned out. It's a slightly softer set, but that makes it perfect for spreading easily. I could picture this used in tarts or between vanilla cakes. I tested it on pancakes, and it was amazing!
Peach Jam
4 cups peeled, pitted and chopped peaches
2 1/2 cups sugar
1 vanilla bean, sliced
3 Tbsp. lemon juice
1 packet liquid pectin
Combine the fruit and sugar in an airtight container, and refrigerate for 2 to 48 hours. (Note: An easy way to peel peaches is to halve and pit them, drop them in boiling water for 60 seconds and then place them in ice water. The peels will slide right off.)
When you're ready to make jam, prepare a boiling water bath and 4 half-pint jars and lids. Bring the fruit mixture to a boil after you add the lemon juice. Cook it about 20 minutes until it's thickened somewhat and starts to reach a runny jammy consistency. (Note: Use a large pot as my pot almost boiled over many a times.) Smash fruit as you go or use an immersion blender if desired. Stir in liquid pectin, and bring to a rapid boil for one minute. Remove from heat.
Ladle into jars with 1/4-inch headspace, making sure to leave out the actual vanilla bean. Process in a hot water bath for 10 minutes. Makes approximately 4 1/2-pint jars.
Olive Oil and Sea Salt Lindt Truffle Brownies
Lindt truffles came into our house last winter, specifically with the purpose of making killer hot chocolate in a variety of flavors. I seriously had a jar with about 6 different flavors and would pop 3 into a mug of hot milk for delicious hot chocolate. (I also yelled at people when they stole ones just to eat.)
When I saw this brownie recipe from How Sweet It Is, I was immediately captivated by the truffles and used that as an excuse to go buy a few bags in the summer. Fortunately, I stopped snacking on them in time to have enough left for the brownies.

These are delicious brownies, but they don't quite take the spot for my favorite brownies. Worth repeating, perhaps with other truffle flavors.
Olive Oil and Sea Salt Lindt Truffle Brownies
1/3 cup boiling water
1/4 cup dark cocoa powder
1/3 cup + 2 Tbsp. olive oil
2 oz. high-quality dark chocolate, chopped
1 large egg
2 large egg yolks
1 tsp. vanilla extract
1 1/2 cups sugar
1 cup flour
1/4 tsp. salt
10 LINDOR dark chocolate caramel sea salt truffles, coarsely chopped
1 tsp. flaked sea salt
Preheat the oven to 350˚F. Line an 8 x 8 pan with foil, and spray with non-stick spray. (I didn't line my pan with foil and had to pry out every brownie.)
In a large bowl, whisk the boiling water and cocoa powder until combined. Whisk in the chopped chocolate until melted, and then whisk in the olive oil. Whisk in the egg, yolks and vanilla extract until combined. Whisk in the sugar until combined. Use a rubber spatula to fold in the flour and 1/4 tsp. salt, stirring until the flour is just mixed in. Stir in the chopped truffles. Sprinkle the top with the flaked sea salt.
Bake the brownies for 32 to 38 minutes or until the middle is set. Let the brownies cool completely before cutting. They will cut best if refrigerated first. Makes 8 x 8 pan of brownies.
Summer Garden Hummus
So I went to take a photo of this recipe from How Sweet It Is for the blog. I went as far as scooping some into a cute little dish and then realized it would look horrible if I photographed it. I opted for no photo instead of an unappealing one. Check out the original post for far more creative and stylistic photos than I can do with two toddlers helping.
This was a tasty meal for me for quite a few days. It makes a huge batch, which is only problematic if you're the only person in your house who will dig into this. I was extremely excited, though, to find a recipe that used some of our many herbs.
Summer Garden Hummus
This was a tasty meal for me for quite a few days. It makes a huge batch, which is only problematic if you're the only person in your house who will dig into this. I was extremely excited, though, to find a recipe that used some of our many herbs.
Summer Garden Hummus
3 (15-ounce) cans cannellini beans, drained and rinsed
1 tsp. garlic powder
1/4 tsp. smoked paprika
1/4 tsp. salt
1/4 tsp. pepper
1/4 cup olive oil, plus extra for drizzling
2 Tbsp. ice water
2 Tbsp. chopped fresh rosemary, plus extra for garnish
2 Tbsp. chopped fresh thyme, plus extra for garnish
2 Tbsp. fresh chopped chives, plus extra for garnish
2 ears grilled corn, cut from cob
2 scallions, thinly sliced
1 cup cherry tomatoes, halved
Basil leaves for garnish
Place the beans in a food processor, and blend until pureed and creamy. Add in the garlic powder, salt and pepper, then continue to blend while streaming in the olive oil and ice water. Spoon the dip into a large bowl, and stir in the rosemary, thyme and chives. Drizzle with a bit of olive oil.
Top the dip with layers of the grilled corn, tomatoes and scallions. Finish by topping with some basil leaves and extra herbs. Add another sprinkle of salt and pepper, and serve. Makes probably 6-8 cups of hummus.
July 29, 2015
Peanut Butter Ice Cream
As a fellow peanut butter lover, I knew I had to try Brown Eyed Baker's recipe for peanut butter ice cream. This is a good, creamy ice cream. If I were to make it again, I would like to swirl this ice cream with a good chocolate ice cream to have a delicious chocolate peanut butter ice cream.

Peanut Butter Ice Cream
1 cup whole milk
3/4 cup granulated sugar
1/2 cup creamy peanut butter
2 cups heavy cream, divided
Pinch of salt
6 egg yolks
2 tsp. vanilla extract
Swirl
1/2 cup creamy peanut butter, melted and cooled
Warm the milk, sugar, peanut butter, 1 cup of the heavy cream and the salt in a medium saucepan over medium-low heat, stirring until the sugar is dissolved and the peanut butter has melted. Continue cooking until the mixture comes to a slight simmer, bubbling around the edges of the pan.
Meanwhile, pour the remaining 1 cup heavy cream into a large bowl, and place a fine-mesh sieve on top. Whisk the egg yolks in a medium bowl. Slowly pour the warmed milk mixture into the egg yolks, whisking constantly. Scrape the mixture back into the saucepan.
Place the saucepan over medium heat, and stir constantly with a rubber spatula, being sure to scrape the bottom of the pan as you stir, until the mixture thickens and coats the back of the spatula, a few minutes. The mixture should register 170 to 175 degrees F on an instant-read digital thermometer.
Pour the custard through the fine-mesh sieve, and stir it into the cream. Stir in the vanilla extract, and place the bowl over an ice bath. Stir occasionally, until the mixture is cool. Cover, and transfer the custard to the refrigerator until completely chilled, at least 8 hours or overnight. (Note: I sped up the process because I had to make this all in one day to use up heavy cream before vacation. I stuck the bowl in the freezer, and stirred it periodically and then tossed it in the refrigerator after it was completely cold.)
Freeze the mixture in your ice cream maker according to the manufacturer's instructions. As you remove the ice cream to a freezer-safe container, drop dollops of the melted peanut butter over each layer of ice cream. Once all of the ice cream and peanut butter has been placed in the container, use a butter knife to gently swirl the mixture. Store the ice cream in the freezer. Makes about 1 quart.
July 21, 2015
Double Dough Ice Cream
I always seem to have a few ice cream recipes bookmarked, so I took the opportunity to make this one from Take a Megabite for my son's second birthday party. The flavor profile of cookie dough seemed like it would be a pretty good crowd pleaser rather than some of the more unique ice cream flavors I want to try (like sweet corn).
This is the first time I've used the cornstarch and cream cheese method. It's a bit icy if you don't let it thaw a bit, but a little thawing yields a smooth, creamy ice cream. It's not my all-time favorite, but it was good. I'm not a big fan of this type of cookie dough where everything melts together, but it worked for this ice cream.

Double Dough Ice Cream
2 cups milk
1 Tbsp. plus 1 tsp. cornstarch
1 1/2 oz. cream cheese, softened
Pinch fine sea salt
1 1/4 cups heavy cream
2/3 cup brown sugar
2 Tbsp. light corn syrup
1 vanilla bean, split
Cookie Dough
5 Tbsp. butter, melted
Pinch of salt
1/3 cup light brown sugar
1/4 cup flour
1/2 tsp. vanilla extract
3/4 cup semisweet chocolate chips, or chunks
Mix about 2 Tbsp. of the milk with the cornstarch in a small bowl to make a smooth slurry. In a medium bowl, stir together the cream cheese and salt until smooth.
Combine the remaining milk, cream, sugar, corn syrup, vanilla bean in a 4-quart saucepan. Bring to a rolling boil over medium-high heat, and boil for 4 minutes. Remove from heat, and gradually whisk in the cornstarch slurry. Bring the mixture back to a boil over medium-high heat and cook, stirring with a heatproof spatula until slightly thickened, about 1 minute. Remove from heat. Gradually whisk the hot milk mixture into the cream cheese mixture until smooth. Cover bowl with plastic wrap, and chill ice cream base for a few hours or overnight.
Meanwhile make cookie dough. In a medium bowl, stir together the butter, salt and sugar until smooth. Stir in the flour, vanilla and chocolate chips. Pour the “dough” onto wax paper or plastic wrap and cover with more paper/plastic wrap. Pat into a round about 1/2-inch thick, and chill until firm. Once chilled, unwrap and chop the dough into bite-sized pieces. Store the pieces in the freezer until ready to use.
When ready to churn, remove vanilla bean, and freeze in your ice cream maker according to the manufacturer’s instructions. Once fully churned, layer in a one-quart container with the cookie dough pieces. Top ice cream with plastic wrap and an airtight lid. Freeze for at least 4 hours. Makes about 1 quart of ice cream.
Blueberry BBQ Sauce
When I went to Ashville, NC for work, I ate at a rib place with a renowned blueberry BBQ sauce. It was really good, although I'm not a terribly big fan of fruit combined with meat. When I saw this recipe on Kitchen Confidant, it immediately reminded me of that sauce.
With a plethora of blueberries on hand, I made the sauce. The smell during the cooking process scared my husband away from eating the finished product, but I'm pleased with it. It was a hit with some friends we had over, as well as my mom. I'm curious how it would hold up to canning and whether it would be shelf safe because I think it would make a great gift.
Blueberry BBQ Sauce
2 cups blueberries (fresh or frozen works)
2/3 cup balsamic vinegar
1/2 cup honey
1/2 tsp. red pepper flakes
1/2 tsp. cayenne pepper, to taste
1/3 cup diced shallots
2 cloves garlic, minced
1 Tbsp. molasses
1/2 tsp. kosher salt
1/4 tsp. ground pepper
In a medium saucepan over medium heat, stir together the blueberries, honey and balsamic vinegar. Bring to a boil, then lower heat to a simmer, and cook until the blueberries have burst and released their juices, about 5 minutes. Add the red pepper flakes, cayenne pepper, shallots and garlic, and let it cook for about 5-7 minutes more. If you have an immersion blender, blend the sauce together to puree the sauce into a smoother consistency.
Stir in the molasses, salt and pepper, and continue simmering the sauce until it has thickened, about 15-20 minutes. Adjust seasoning if necessary. Remove from heat, and let it cool. It will thicken as it sits. The sauce may be used right away or stored in an airtight container in the refrigerator after cooling completely. Makes about 2 1/2 cups of sauce.
July 20, 2015
Hershey's Perfectly Chocolate Cake
It's been a while since I baked a simple chocolate cake, so I couldn't remember which recipe I really liked for basic birthday cakes. When in doubt, obviously try a new recipe, right?
Thankfully, this Hershey's Perfectly Chocolate Cake turned out wonderfully. I made it as a 1.5 batch (not a full doubling) to fill my two heart-shaped cake pans. I would likely do the same to fill my large single sheet cake pan that I use for birthday cakes as well. Moist, chocolate and delicious. Full disclosure: I did not use Hershey's cocoa.

Hershey's Perfectly Chocolate Cake
2 cups sugar
1-3/4 cups flour
3/4 cups cocoa
1 1/2 tsp. baking powder
1 1/2 tsp. baking soda
1 tsp. salt
2 eggs
1 cup milk
1/2 cup vegetable oil
2 tsp. vanilla
1 cup boiling water
Preheat oven to 350˚F. Heat oven to 350°F. Grease and flour two 9-inch round baking pans.
tir together sugar, flour, cocoa, baking powder, baking soda and salt in large bowl. Add eggs, milk, oil and vanilla. Beat on medium speed of mixer for 2 minutes. Stir in boiling water by hand. (Batter will be thin.) Pour batter into prepared pans.
Bake 30 to 35 minutes or until wooden pick inserted in center comes out clean. Cool 10 minutes, and remove from pans to wire racks. Cool completely. Frost as desired. Makes 12 servings.
July 19, 2015
Ultimate Sugar Cookies
I call these the ultimate sugar cookies, simply because they work awesome for me. You may have your own favorite recipe, but this recipe makes me not hate baking sugar cookies, which is a pretty big deal for me.
Sweet Adventures of Sugarbelle is where I found this recipe, as well as the inspiration for cookies for my younger son's second birthday party. She does amazing cookies and detailed tutorials that make crazy things like moose cookies actually fairly simple to do. Be sure to check out her site for the detailed moose tutorial. She also had posted a link to camping cookies from SemiSweet. As soon as I saw those, I was smitten. I figured if I did some of my favorites from the camping cookies, I could include the moose since we've seen moose on several of our camping adventures.

For frosting sugar cookies, I like what Bridget at Bake at 350 does. I've linked directly to her royal icing recipe and pointers. Her 20-second icing is a huge timesaver, although it doesn't work the best for super-detailed work. I used it for quite a bit of the designs in these cookies.
Ultimate Sugar Cookies
2 sticks butter, softened
1 1/2 cups powdered sugar
1 egg
1 1/2 tsp. almond extract
1 1/2 tsp. vanilla
2 3/4 cups flour
2 tsp. baking powder
1 tsp. salt
Preheat oven to 400°F. Cream together butter and powdered sugar. Crack the egg into a separate bowl, and add the flavoring. Add the egg mixture to the butter sugar mixture, and mix until the egg is thoroughly incorporated. In a separate bowl, sift together the flour, baking powder, and salt. Add it little by little to the mixture. The dough is ready when most of it sticks to the paddle but does not stick to fingers.
Roll out on parchment to about 1/4-inch thick, use flour for dusting as necessary. Chill dough briefly while not working with it (or while waiting to put cut cookies in the oven.) Then, cut and bake for 7-8 minutes. This version makes 2-2 1/2 dozen depending on how large the cookies are.


July 14, 2015
Double Chocolate Peanut Butter Stuffed Cookies
These cookies from Love and Olive Oil are great right from the oven, (Then again, aren't most cookies?) However, I wasn't a fan of how they held up over the course of a couple days nor was I overly impressed with how sticky the dough was to start. Overall, good cookie but not one I'll plan to repeat in our house.

Double Chocolate Peanut Butter Stuffed Cookies
Peanut Butter Filling
Preheat oven to 350°F. Line baking sheets with parchment paper or silicone mats.
In a bowl, whisk together flour, cocoa powder, baking powder, baking soda and salt. Set aside. In the bowl of a stand mixer, beat butter and sugars together on medium-high speed until light and fluffy, 2 to 3 minutes. Add eggs and vanilla, and mix until smooth, scraping down the sides of the bowl as needed. Add dry ingredients, and mix on low speed until incorporated. Stir in mini chocolate chips.
Chill dough slightly if needed because of stickiness. Scoop 1 1/2-inch balls of dough (about 2 tablespoons per cookie). Spread dough around a piece of frozen filling, and roll into a smooth ball. Place on prepared cookie sheet, leaving at least 2 inches of space between cookies to allow for spreading. If desired, sprinkle cookies with a pinch of flake sea salt just before baking.
Bake cookies 11 to 12 minutes or until centers are just set. Remove from oven, and let cool on pans for 10 minutes, and then transfer to wire racks to cool completely. Makes 2 dozen cookies.

Double Chocolate Peanut Butter Stuffed Cookies
Peanut Butter Filling
1/2 cup creamy peanut butter
1/4 cup powdered sugar, sifted
1/4 tsp. vanilla extract
1/8 tsp. salt
Cookie Dough
1 3/4 cup flour
1/2 cup dark cocoa powder, sifted
3/4 tsp. baking powder
1/4 tsp. baking soda
1/4 tsp. salt
1 stick butter, room temperature
1 cup packed light brown sugar
1/2 cup sugar
2 large eggs
1/2 tsp. vanilla extract
1/2 cup mini chocolate chips
Large flake salt for sprinkling
In a bowl, mix together peanut butter filling ingredients until they form a smooth paste. Dollop 24 pieces of filling mixture onto a parchment or foil-lined baking sheet. Freeze at least 30 minutes or until firm enough to handle.
In a bowl, mix together peanut butter filling ingredients until they form a smooth paste. Dollop 24 pieces of filling mixture onto a parchment or foil-lined baking sheet. Freeze at least 30 minutes or until firm enough to handle.
Preheat oven to 350°F. Line baking sheets with parchment paper or silicone mats.
In a bowl, whisk together flour, cocoa powder, baking powder, baking soda and salt. Set aside. In the bowl of a stand mixer, beat butter and sugars together on medium-high speed until light and fluffy, 2 to 3 minutes. Add eggs and vanilla, and mix until smooth, scraping down the sides of the bowl as needed. Add dry ingredients, and mix on low speed until incorporated. Stir in mini chocolate chips.
Chill dough slightly if needed because of stickiness. Scoop 1 1/2-inch balls of dough (about 2 tablespoons per cookie). Spread dough around a piece of frozen filling, and roll into a smooth ball. Place on prepared cookie sheet, leaving at least 2 inches of space between cookies to allow for spreading. If desired, sprinkle cookies with a pinch of flake sea salt just before baking.
Bake cookies 11 to 12 minutes or until centers are just set. Remove from oven, and let cool on pans for 10 minutes, and then transfer to wire racks to cool completely. Makes 2 dozen cookies.
Salted Caramel Twix Cupcakes
These Twix Brownies were so incredible that I wanted to convert them to cupcake form. My vision for a Salted Caramel Twix Cupcake turned out as well as I envisioned. My husband described them as one of my best "fancy" cupcakes, meaning one that he thought would sell well in a cupcake store. I really like how well it works to use the jumbo liners for cupcakes with layers to hold everything inside nicely.
Homemade caramel is still a work in progress for me. I tend to do better when I don't use the dry method, as I end up with quite a few clumps that never work themselves out, which is why this caramel sauce was a bit runny for me after straining it.
Definitely a repeat cupcake, although I still really want the brownies again. Cupcakes are good, but those brownies take the cake ... or cupcake?

Salted Caramel Twix Brownies
Cupcakes
24 circle-shaped shortbread cookies
2 cups flour
2/3 cup unsweetened baking cocoa
1 1/4 tsp. baking soda
1 tsp. salt
1/4 tsp. baking powder
3/4 cup shortening
1 1/2 cups sugar
2 eggs
1/2 cup sour cream
1 tsp. vanilla
1 cup water
Filling
1/4 cup salted caramel
Frosting
1 cup butter
2 cups powdered sugar
1/4 to 1/2 cup salted caramel
Garnish
1/4 cup chocolate chips
Preheat oven to 350°F. Line 24 cupcake tins with liners, and place a cookie in the bottom of each one. In a medium bowl, combine flour, cocoa, baking soda, salt and baking powder.
Cream shortening for 30 seconds. Add sugar, 1/4 cup at a time. Beat 2 minutes longer after all sugar is added. Beat in eggs, one at a time. Beat in sour cream and vanilla.
Alternately add flour mixture and water, beginning and ending with flour. Divide batter evenly among tins.
Bake 20 to 25 minutes or until a toothpick inserted into the center comes out clean. Cool 5 minutes, and then remove from tins to cool completely on wire racks.
Once cupcakes are cooled, fill with salted caramel using a pastry tip and pastry bag.
To make the frosting, beat butter until smooth, about 2 to 3 minutes. Gradually add powdered sugar, and then beat in salted caramel until desired consistency is reached. Frost cupcakes.
To garnish, melt chocolate chips on medium-power in the microwave, stirring every 30 seconds. Let cool completely to room temperature, and then drizzle over cupcakes with a fork. Makes 24 cupcakes.
July 6, 2015
Whiskey Cake
Whiskey isn't my alcohol of choice, but it is for my close friend as well as my brother-in-law. I'm not opposed to it, and I like to incorporate it into baked goods. This one-bowl cake from How Sweet It Is seemed like an easy and delicious cake to make.
My frosting/ganache didn't set right, so I'm not sure if I slightly goofed my measurements there. And I ended up with quite a bit extra, which was delicious right over the spoon and darn tasty spread warm over vanilla ice cream.The ganache is a solid idea worth repeating.
The cake itself didn't wow me, although I liked the pieces of chocolate melted into the cake. Probably not a repeat for us, as there are other whiskey recipes like Irish Car Bomb Cupcakes or Honey Whiskey Cupcakes that take the cake, so to speak.
Whiskey Cake
1/2 cup hot coffee
6 Tbsp. unsalted butter
2 large eggs
1/2 cup buttermilk
1/4 cup Irish whiskey
2 tsp. vanilla
1 cup sugar
3/4 cup flour
1/2 cup cocoa powder
1 1/2 tsp. baking powder
1/2 tsp.
1/4 tsp. salt
4 oz. semi-sweet chocolate. chopped
Ganache Frosting
10 oz. semi-sweet chocolate, chopped
1 cup heavy cream
1/4 cup Irish cream liquor
Preheat the oven to 350ºF. Grease an 8x8 inch pan with butter, and set aside. In a measuring cup, whisk the hot coffee and butter until the butter melts, and then set it aside until ready to use.
In a large bowl, whisk together the eggs, buttermilk, whiskey and vanilla. Stir in the sugar, flour, cocoa, baking powder, soda and salt. Once it's about halfway mixed, pour in the coffee/butter mixture, and stir until you have a smooth batter. Stir in the chopped chocolate. Pour the batter into the greased pan, and bake for 25 to 30 minutes, or until the cake is just set in the middle. Let cool completely before frosting.
To make the ganache, place the chocolate in a bowl. Heat the heavy cream and Irish cream in a small saucepan over low heat until it just bubbles around the edges. Pour the cream over the chocolate, and let it sit for 5 minutes. Stir continuously until the chocolate melts into the cream and comes together. Let sit for one hour at room temperature, and then spread the ganache all over the cake. (You could probably halve the ganache recipe, plan to have extra left over (which is a good thing) or have a frosting layer that's extremely thick.) Makes an 8 x 8 cake.
June 30, 2015
Tex-Mex Cobb Salad
In an effort to balance the tremendous sweet tooth I possess, I was happy to find this salad on Foodie with Family. It's a great combination of flavors, and I've made a riff of it several times already this summer. It's fun to make a nice spread on a plate like she did, but it works just as well to toss everything into a salad bowl if need be.
This will continue to be a repeat, although I love it much more than my husband who protests many of the ingredients and had a rather boring salad. (Ignore the really poor quality photo. Check out the original post for pretty photos.)

Tex-Mex Cobb Salad
1 fresh ear of corn cut from the cob, or 1 cup frozen corn, thawed
1 heart of romaine lettuce, cored, cut into bite-sized pieces
1/2 cup fresh cilantro leaves
2 hard boiled eggs, peeled and thinly sliced
3/4 cup fully cooked (canned or homemade) black beans, drained and rinsed
3/4 cup halved cherry tomatoes or chopped tomatoes
1/2 cup red bell pepper, diced
1/3 cup black olives, drained
1 cup pulled pork or chicken
2 green onions, thinly sliced
1/3 cup cheese
1 avocado, cubed and sprinkled with lime juice to prevent browning
1 fresh lime, cut into wedges
1 cup Fritos
Place a cast-iron skillet over high heat, and let it get hot enough for water to skip over the surface when sprinkled on the pan. Add the corn and a generous pinch of salt, and stir. Let the corn dry fry in the pan for three minutes, or until the corn is fragrant, has released some liquid and has some golden brown spots. Transfer the corn to a plate to cool.
On a large serving platter, arrange the romaine lettuce. Arrange the remaining ingredients on top of the lettuce in strips. Scatter lime wedges over the salad, and serve with Fritos. Makes 4 entree-sized salads.
This will continue to be a repeat, although I love it much more than my husband who protests many of the ingredients and had a rather boring salad. (Ignore the really poor quality photo. Check out the original post for pretty photos.)
Tex-Mex Cobb Salad
1 fresh ear of corn cut from the cob, or 1 cup frozen corn, thawed
1 heart of romaine lettuce, cored, cut into bite-sized pieces
1/2 cup fresh cilantro leaves
2 hard boiled eggs, peeled and thinly sliced
3/4 cup fully cooked (canned or homemade) black beans, drained and rinsed
3/4 cup halved cherry tomatoes or chopped tomatoes
1/2 cup red bell pepper, diced
1/3 cup black olives, drained
1 cup pulled pork or chicken
2 green onions, thinly sliced
1/3 cup cheese
1 avocado, cubed and sprinkled with lime juice to prevent browning
1 fresh lime, cut into wedges
1 cup Fritos
Place a cast-iron skillet over high heat, and let it get hot enough for water to skip over the surface when sprinkled on the pan. Add the corn and a generous pinch of salt, and stir. Let the corn dry fry in the pan for three minutes, or until the corn is fragrant, has released some liquid and has some golden brown spots. Transfer the corn to a plate to cool.
On a large serving platter, arrange the romaine lettuce. Arrange the remaining ingredients on top of the lettuce in strips. Scatter lime wedges over the salad, and serve with Fritos. Makes 4 entree-sized salads.
Dark Chocolate Key Lime Truffles
I've mentioned before how key lime pie became a favorite for me and my husband while on vacation in Florida. Not that we (I) ate a giant key lime pie milkshake for breakfast one morning (shortly after eating Dunkin' Donuts. How were we supposed to know we'd find milkshakes that morning at a fruit stand?)
So this recipe from Sally's Baking Addiction obviously caught my eye because not only was it key lime, but it also involved truffles and dark chocolate rather than the white that is usually associated with key lime. These little gems are good. There's a bit of a process that Sally uses, which results in truly creamy truffles. I didn't snap any pictures because I wasn't completely in love at first and then ate them all without pictures. Worth a repeat adventure, although no promises on photos then either.
Dark Chocolate Key Lime Truffles
3/4 cup heavy cream
zest of 2 limes
14 oz. white chocolate, coarsely chopped
1 Tbsp. fresh lime juice
2 Tbsp. unsalted butter, softened and cut into 4 pieces
Topping
18 oz. bittersweet chocolate
4 oz. white chocolate, coarsely chopped
3 green candy melts
Heat the cream and lime zest in a small saucepan over medium heat. Stir it until the mixture barely comes to a boil. Remove from heat, and allow the lime flavor infuse into the cream for 30 minutes.
Meanwhile, place the chopped white chocolate into a medium heatproof bowl. Add the lime juice and butter to the bowl. Do not stir yet. Set aside.
After 30 minutes, place the lime-infused cream back over heat until it barely begins simmering again. Remove from heat, and strain it through a mesh sieve into the white chocolate to remove the zest. Gently begin stirring the white chocolate mixture with a rubber spatula in one direction. Do not forcefully stir it. Use gentle, circular motions. Once all of the white chocolate is completely smooth, cover with a piece of plastic wrap pressed on the top of the ganache filling. Let it sit at room temperature for 1 hour, and then transfer to the refrigerator for 5-6 more hours or overnight.
After chilling, the ganache filling will be smooth and a little soft, but still manageable.Line two large baking sheets with parchment paper or silicone baking mats. Set aside. Make sure you have enough room in your refrigerator for the baking sheets because the truffles must chill after being rolled in the next step.
Measure 1 teaspoon of ganache filling, and roll between your hands into a ball. Place on the prepared baking sheet.(Keep wiping your hands on a paper towel or rinsing/drying them because clean hands work best for rolling the sticky stuff.) Repeat rolling remaining truffles. Refrigerate the truffles as you melt the chocolate coating.
Place the bittersweet chocolate in a medium heat-proof bowl. Melt in 30 second increments in the microwave, stirring after each increment until completely melted and smooth. Let the warm chocolate sit for 5 minutes to slightly cool before dipping.
Remove truffles from the refrigerator, and begin dipping into the chocolate. Place the dipped truffles back onto the baking sheets. Melt the white chocolate and candy melts (if using) together using 30-second intervals. Using a fork or a squeeze bottle, drizzle over the truffles. Allow truffles to set at room temperature for at least 1 hour or chill for 30 minutes. Store in the refrigerator during warmer months, but serve at room temperature. Makes about 60 small truffles.
June 26, 2015
Twix Brownies
These brownies from Bake at 350 looked to be darn near perfect, although they have no peanut butter. The layers of goodness intrigued me, so they went on the to-do list for the booyah we're going to tomorrow. My tastes have changed since I was a little girl who turned down Twix because of the cookie bar. I've learned to like a lot more chocolate and candies through the years, although I still can't handle crunch or crisp.
These brownies are amazing! They might be one of my favorite brownies, ever, which is quite the statement. They are worth every bit of work.
I had never used the caramel bits before, but I'm quite happy to have a partial bag left to play with. I could see these little guys being fun for lots of baking projects.

Twix Brownies
Brownies
3/4 cup unsalted butter
1 cup sugar
1 cup packed brown sugar
1 cup Dutch-process cocoa
2 tsp. vanilla
1 tsp. salt
1/2 tsp. baking powder
4 eggs
1 cup flour
17 (store-bought) shortbread cookies
Caramel Layer
1 (11 oz.) bag + 1/3 cup caramel bits
1/4 cup evaporated milk
Ganache
2 cups semi-sweet chocolate chips
1 cup heavy cream
Preheat oven to 325°F. Grease a 9x13” pan.
Melt butter in a saucepan over low heat. Stir in sugars, and heat while stirring until hot to touch, but not bubbling. Remove pan from heat, and whisk in cocoa powder, vanilla, salt and baking powder. Whisk in eggs, one at a time, until incorporated. Stir in flour.
Spread evenly in prepared pan, and bake for 25 minutes. Meanwhile, make caramel. Over medium-low heat, melt caramel bits and evaporated milk together, stirring frequently.
After 25 minutes, remove brownies from oven, and top with the cookies, pressing down slightly. Some brownie will still remain visible. Pour caramel sauce evenly over cookies. Return to oven, and bake for 5 more minutes.
Remove brownies from the oven, place on a wire rack and let cool completely in pan.
Once cooled, make the ganache by heating the cream to a simmer. Pour cream over chocolate chips, and let stand 5 minutes. After 5 minutes, slowly stir chocolate and cream until combined and thickened. Pour over cooled brownies, using an offset spatula to smooth. Refrigerate for at least one hour before cutting. (I found they cut best after some time in the freezer to peel off the foil.)
Store brownies in refrigerator. Cut into 24 bars using a sturdy knife with up/down motions.
Oreo Brownies
Apparently I'm in the mood for brownies since I've bookmarked a couple brownie recipes over the past few weeks. These from Cookies and Cups caught my eye because my husband loves Oreos. Don't be fazed by my orange Oreos ... they might have been purchased on clearance and tossed in my freezer. (Don't judge me for my 50 cent Oreos. There's enough preservatives I'm sure they'd still be edible this upcoming Halloween.)
I wasn't expecting to be wowed by these, but I was. I've eaten two of the corner pieces already, even though they're for a party tomorrow. (It's OK, I have a second batch of brownies baking as well, so no one will notice a few missing.) They are definitely a repeat recipe!

Oreo Brownies
1 cup butter, melted
1 cup granulated sugar
1 1/2 cups brown sugar, packed
1 Tbsp. vanilla
4 eggs
1 tsp. salt
11/2 cups flour
1 cup cocoa powder
25 Oreo cookies coarsely chopped
Preheat your oven to 350°F. Line 9x13 pan with foil, and spray with nonstick spray. Set aside.
In the bowl of stand mixer fitted with the paddle attachment combine the butter, sugar, vanilla and eggs. Mix on medium speed until combined, about 1 minute. Add in salt and the cocoa powder, and mix on medium until combined, 30 seconds to a minute. Turn the mixer to low, and add in the flour until incorporated.
Spread half of the batter into pan. Top with the Oreos, and spread the remaining batter on top. Bake 35-40 minutes until center is almost set. Cool completely before cutting. Makes 24 brownies.
June 25, 2015
Lemon Meringue Cheesecake
One of the things I enjoy now is the chance to repay my mom for all the years of making amazing birthday treats that wowed me and my friends as children. Grown-up tastes are a bit more refined, perhaps, than a big ol' ice cream pail of dirt cake. (As I type that, I realize how much my 3-year-old son would love that idea!)
I've had this recipe from Cookies and Cups bookmarked for quite some time, and my mom's birthday is the perfect occasion for it since she's a lemon lover. I never could understand the idea of lemon meringue pie as a child, but now I've some around to it especially in this cheesecake form. (See above comment about refined tastes.) This is an impressive and delicious dessert. I could envision a key lime version being equally as tasty.

Lemon Meringue Cheesecake
1/3 cup sugar
6 Tbsp. butter, melted
Cheesecake
32 oz. cream cheese, room temperature
1 1/2 cups sugar
6 egg yolks (reserve whites for meringue)
2 Tbsp. flour
1 cup sour cream
3 Tbsp. lemon zest (3 large lemons)
1 1/2 cups sugar
Preheat oven to 300°F. Combine all ingredients for crust in a bowl evenly. Press mixture into a 9" springform pan and up the sides, about one inch. Bake for 10 minutes, and allow to cool.
In bowl fitted with paddle attachment, beat cream cheese and sugar together until combined and smooth. Add in egg yolks, and beat until mixture is just combined, scraping sides as necessary.
Add in flour, sour cream and lemon zest, and mix until smooth.
Pour mixture over prepared crust. Bake for 75 minutes. Then turn off oven, and leave cheesecake in the warm oven with the door closed for 4 hours. Finally, remove it from oven, run a knife along the edges to loosen from pan, and chill for 6 hours, or overnight.
Whisk 6 reserved egg whites with sugar. Place over a double boiler, and stirring constantly, heat mixture until it reaches 140° on candy thermometer. Pour mixture immediately into bowl of stand mixer, fitted with whisk attachment, and beat for 10 minutes, until glossy and stiff peaks form.
Spread the meringue over chilled cheesecake, and with kitchen torch lightly brown the tops of the meringue. Makes one 9-inch cheesecake.
I've had this recipe from Cookies and Cups bookmarked for quite some time, and my mom's birthday is the perfect occasion for it since she's a lemon lover. I never could understand the idea of lemon meringue pie as a child, but now I've some around to it especially in this cheesecake form. (See above comment about refined tastes.) This is an impressive and delicious dessert. I could envision a key lime version being equally as tasty.

Lemon Meringue Cheesecake
Crust
2 1/2 cups biscoff cookie crumbs1/3 cup sugar
6 Tbsp. butter, melted
Cheesecake
32 oz. cream cheese, room temperature
1 1/2 cups sugar
6 egg yolks (reserve whites for meringue)
2 Tbsp. flour
1 cup sour cream
3 Tbsp. lemon zest (3 large lemons)
Meringue Topping
6 egg whites1 1/2 cups sugar
Preheat oven to 300°F. Combine all ingredients for crust in a bowl evenly. Press mixture into a 9" springform pan and up the sides, about one inch. Bake for 10 minutes, and allow to cool.
In bowl fitted with paddle attachment, beat cream cheese and sugar together until combined and smooth. Add in egg yolks, and beat until mixture is just combined, scraping sides as necessary.
Add in flour, sour cream and lemon zest, and mix until smooth.
Pour mixture over prepared crust. Bake for 75 minutes. Then turn off oven, and leave cheesecake in the warm oven with the door closed for 4 hours. Finally, remove it from oven, run a knife along the edges to loosen from pan, and chill for 6 hours, or overnight.
Whisk 6 reserved egg whites with sugar. Place over a double boiler, and stirring constantly, heat mixture until it reaches 140° on candy thermometer. Pour mixture immediately into bowl of stand mixer, fitted with whisk attachment, and beat for 10 minutes, until glossy and stiff peaks form.
Spread the meringue over chilled cheesecake, and with kitchen torch lightly brown the tops of the meringue. Makes one 9-inch cheesecake.
Oreo Chocolate Silk Pie
So this dessert was quite delicious, although I made a sloppy mess of my white chocolate layer. (The step that requires cooling the chocolate before adding it to the whipped cream is rather important.) My picture is poor at best, but there are some tantalizing photos at Bakers Royale, where I found this recipe. It's not a difficult recipe, and I was pleasantly surprised by the chocolate mousse layer. I could see the base of this recipe being a branching off point for other tasty concoctions (like a peanut butter layer perhaps).

Oreo Chocolate Silk Pie
Oreo Crust
20 Oreo cookies, finely crushed (about 2-1/4 cups)
3 Tbsp. sugar
3 Tbsp. butter, melted
Chocolate Layer

Oreo Chocolate Silk Pie
Oreo Crust
20 Oreo cookies, finely crushed (about 2-1/4 cups)
3 Tbsp. sugar
3 Tbsp. butter, melted
Chocolate Layer
4 oz. unsweetened chocolate, coarsely chopped
1 cup sugar
3/4 cup butter, softened
1 tsp. vanilla
1 cup sugar
3/4 cup butter, softened
1 tsp. vanilla
3/4 cup refrigerated or frozen egg product, thawed
Oreo Layer
3 oz. pure white chocolate, chopped
1 cup whipping cream
1/4 cup crushed Oreo cookies
1 cup whipping cream
1/4 cup crushed Oreo cookies
White Chocolate Layer
3 oz. chopped white baking bar
1 cup whipping cream
1 cup whipping cream
Preheat oven to 325°F. Combine Oreo cookies, sugar and butter for crust. Press crust into bottom of 9-inch springform pan. Bake 10 minutes, and let cool.
In a small saucepan, cook and stir unsweetened chocolate over low heat until melted. Remove from heat, and cool. In a medium mixing
bowl, beat sugar and butter with an electric mixer on medium speed about 4
minutes or until light and fluffy. Beat in melted chocolate and
vanilla. Gradually add egg, 1/4 cup at a time, beating on high speed
after each addition and scraping sides of bowl constantly. Spoon
chocolate mixture into shell, spreading evenly. Cover and chill
for 5 to 24 hours.
In a small saucepan, melt the white chocolate with 1/4 cup whipping cream. Cool completely. Whip remaining 3/4 cup whipping cream until soft peaks form. Add white chocolate mixture, and whip until stiff peaks form. Spread over chocolate layer, sprinkling with crushed Oreo cookies. Freeze at least 10 minutes to firm layer.
For the white chocolate layer, repeat the same process. Spread on top, and chill until serving.
June 16, 2015
Chocolate Mug Cake
Since it's been over two months since I blogged last, it's about time I post something spectacular here. Instead I'm posting this mug cup recipe from The Table for Two. It may not be an awe-inspiring layer cake, but it is pretty amazing to have a rather tasty cake ready to eat in a matter of minutes.
I've been a bit bogged down by life lately (and trying to eat a bit healthier), which is why my posts have been lacking. I'm hoping to get a bit more posted here until we disappear at the end of August for 3 weeks of camping and hiking in our national parks.
This is well worth the time to give it a try. I recommend using regular cocoa powder, as the dark cocoa powder I used doesn't really make the cake better. (I've done both ways.) The spoonful of peanut butter (or chocolate peanut butter) is a tasty addition, and you can get creative and drop in a truffle or something else to make it deliciously your own.

Chocolate Mug Cake
1/4 cup flour
2 Tbsp. cocoa powder
1/4 tsp. baking powder
2 Tbsp. sugar
1/8 tsp. salt
1/4 cup plus 1 Tbsp. milk
2 Tbsp. vegetable oil
1 Tbsp. peanut butter (or chocolate peanut butter)
Combine flour, cocoa powder, baking powder, sugar and salt in a large mug. In a separate small bowl, combine milk and oil. Add milk mixture to dry ingredients, and stir until combined. Add a dollop of peanut butter on top of the batter, and microwave 70 seconds. (You may need to adjust microwave time based on your microwave strength.) Let cool enough you don't scald your tongue, and dig in.
April 14, 2015
Cashew Granola
This recipe from Floating Kitchen doesn't take the top spot for granola in our house, but it's a close second for me. I wanted to make it so much that I made my own cashew butter, which tells you how much I wanted it. My variation omits the banana chips because that's just gross. Give me all the chocolate and cashews please!
Cashew Granola
4 cups oats
1 cup cashews
1/4 cup cocoa nibs
1/4 tsp. salt (Use just a dash if your cashews are salted.)
1/2 cup cashew butter
1/3 cup coconut oil
1/3 cup maple syrup
4 oz. dark chocolate, chopped
Pre-heat your oven to 350°F. Line a large rimmed baking sheet with parchment paper, and set aside.
In a large bowl stir together the oats, cashews, cocoa nibs and salt. Set aside.
In a small saucepan over medium heat, warm the cashew butter, coconut oil and maple syrup, stirring frequently until smooth. (This can be done by microwaving in intervals as well.) Remove it from the heat, and pour it over the oat mixture, stirring until everything is well coated.
Spread the oat mixture out onto your prepared baking sheet. Bake in your oven for 20 minutes, stirring once halfway through. Turn your oven off, and leave the oat mixture in your still warm oven for an additional 10 minutes. Remove from the oven, top with chocolate and set aside to cool. Makes about 6 cups of deliciousness.
Subscribe to:
Posts (Atom)