This easy recipe from My Baking Addiction eliminates the need to buy taco seasoning, which is helpful if you want to eliminate extra chemicals and additives from your diet ... or you have no taco seasoning in your pantry and a hankering for tacos. Either reason is valid.
As always, you can adjust this however you deem appropriate to make it spicier, ease the spice or change the flavor profile. It works just fine as is, though.
Homemade Taco Seasoning
4 Tbsp. chili powder
1 tsp. garlic powder
1 tsp. onion powder
1 tsp. crushed red pepper flakes
1/4 tsp. cayenne pepper
1 tsp. dried oregano
2 tsp. paprika
2 Tbsp. ground cumin
3 tsp. sea salt
4 tsp. black pepper
Combine all ingredients together, and store in an airtight container at room temperature. Makes 2/3 cup. Use 1-2 Tbsp. per pound of meat.
October 28, 2014
October 21, 2014
Butterfinger Cupcakes
Normally I'm a peanut butter cup person, but a Butterfinger will definitely catch my attention. That's why these cupcakes from Make Bake Celebrate earned a spot on my to-do list. Use your favorite chocolate cupcake recipe, and top them with this delicious and creative frosting. Yum!

Butterfinger Cupcakes
18 chocolate cupcakes
6 full-size butterfingers, plus an extra one for garnish
1 stick butter, softened
1/2 cup peanut butter
1 cup powdered sugar
2-4 Tbsp. milk
Orange food gel, optional
Unwrap your candy bars.Using a vegetable peelers, scrap the chocolate off the bars into a bowl, and set aside for topping.
Finely crush the Butterfinger, preferably using a blender, to get a finely crushed powder. Set aside. In the bowl of an electric mixer, beat the butter until soft and creamy. Then add in peanut butter, and mix until combined well. Add the crushed butterfingers crumbs. Mix until fully combined, and then slowly mix in powdered sugar.
If you would like to deepen the orange color, add a few drops of orange food coloring until you reach a nice butterfinger orange. Once all is mixed well and desired color is achieved, add in 1 Tbsp. milk at a time until desired consistency is reached.
Frost cupcakes, and sprinkle with reserved chocolate shavings and extra candy bar pieces. Makes 18 cupcakes.
October 9, 2014
Snickers Cookies
When we moved to our new house in August, my husband joked that he would run to the grocery store to have all the ingredients for cookies easily on hand, so I could bake the first cookies of the new house. I think he was actually serious, but he had to wait more than a week to get these tasty cookies from Bakers Royale. I made a batch of these, partially to share with our neighbors who gifted us a delicious casserole and bottle of win our first weekend here. (We are blessed with good neighbors ... or at least neighbors who share food with us!)
These are good cookies. If you have someone who is a fan of Snickers, these are for them!

Snickers Cookies
2 cups flour
1/2 tsp. baking soda
2 sticks butter
3/4 cup brown sugar
1/2 cup sugar
1/2 tsp. salt
2 tsp. vanilla
2 large eggs
1 1/2 cup sliced Snickers, (approximately one bag of mini size Snickers)
1 cup chocolate chips
Combine flour and baking soda in a bowl. Place 10 Tbsp. butter in 10-inch skillet over medium-high heat until melted, about 2 minutes. Continue cooking and using the handle of pan to swirl the butter around in the skillet. Swirl butter constantly until it becomes a dark golden brown in color and gives off a nutty aroma, 1 to 3 minutes. Remove skillet from heat, and transfer browned butter to large heatproof bowl. Stir remaining 6 Tbsp. butter into hot butter until completely melted.
Add both sugars, salt and vanilla to brown butter mixture, and whisk until fully incorporated. Add eggs, and whisk until mixture is smooth with no sugar lumps remaining, about 30 seconds. Rest mixture for 3 minutes, and then whisk for another 30 seconds. Repeat process of resting and whisking 2 more times until mixture is thick, smooth and shiny. Using a sturdy rubber spatula or wooden spoon, stir in flour mixture until just combined, about 1 minute. Stir in chocolate chips, and ensure no flour pockets remain.
Scoop approximately two heaping tablespoons of dough, flatten it into a round disc and place a Snickers slice on top. Fold edges over Snickers to seal it in. Place cookies 2 inches apart on parchment lined baking sheets. Press extra Snickers into the top of the cookie.
Bake cookies 1 sheet at a time until cookies are golden brown and still puffy and edges have begun to set but centers are still soft, about 10 to 14 minutes. Transfer baking sheet to wire rack to cool cookies. Makes 24 cookies.
These are good cookies. If you have someone who is a fan of Snickers, these are for them!
Snickers Cookies
2 cups flour
1/2 tsp. baking soda
2 sticks butter
3/4 cup brown sugar
1/2 cup sugar
1/2 tsp. salt
2 tsp. vanilla
2 large eggs
1 1/2 cup sliced Snickers, (approximately one bag of mini size Snickers)
1 cup chocolate chips
Combine flour and baking soda in a bowl. Place 10 Tbsp. butter in 10-inch skillet over medium-high heat until melted, about 2 minutes. Continue cooking and using the handle of pan to swirl the butter around in the skillet. Swirl butter constantly until it becomes a dark golden brown in color and gives off a nutty aroma, 1 to 3 minutes. Remove skillet from heat, and transfer browned butter to large heatproof bowl. Stir remaining 6 Tbsp. butter into hot butter until completely melted.
Add both sugars, salt and vanilla to brown butter mixture, and whisk until fully incorporated. Add eggs, and whisk until mixture is smooth with no sugar lumps remaining, about 30 seconds. Rest mixture for 3 minutes, and then whisk for another 30 seconds. Repeat process of resting and whisking 2 more times until mixture is thick, smooth and shiny. Using a sturdy rubber spatula or wooden spoon, stir in flour mixture until just combined, about 1 minute. Stir in chocolate chips, and ensure no flour pockets remain.
Scoop approximately two heaping tablespoons of dough, flatten it into a round disc and place a Snickers slice on top. Fold edges over Snickers to seal it in. Place cookies 2 inches apart on parchment lined baking sheets. Press extra Snickers into the top of the cookie.
Bake cookies 1 sheet at a time until cookies are golden brown and still puffy and edges have begun to set but centers are still soft, about 10 to 14 minutes. Transfer baking sheet to wire rack to cool cookies. Makes 24 cookies.
Salted Caramel Chocolate Chip Cookies
I'm not normally one to buy specialty jars of nut butters (because I'd eat the entire jar with a spoon without my husband realizing it existed). I made an exception for these cookies from Bakerella. I was sold at salted caramel, so I bought the spread. I've bought 2 jars and made two batches of these delicious cookies ... and ate the rest of both jars with a spoon. (And, yes, we apparently managed to eat 2 batches without capturing a single photograph. As I've taught my son to say, buggersnap!)
I think these cookies are rather tasty. I prefer to actually overbake them a bit to have crunchier edges and still a soft center. I also altered the chilling time a bit, to help the cookies keep their shape better. My aunt said these may be the best cookies she's ever eaten. They're not my personal favorite, but they are pretty darn good.
Salted Caramel Chocolate Chip Cookies
2 1/4 cups flour
1 tsp. baking soda
1/2 tsp. salt
3/4 cup butter, softened
1 cup brown sugar
1/3 cup sugar
1/2 cup Salted Caramel Hazelnut Spread
2 eggs
1 tsp. vanilla
16 oz. semisweet chocolate baking wafers (or chips)
Sea salt for sprinkling
1 tsp. baking soda
1/2 tsp. salt
3/4 cup butter, softened
1 cup brown sugar
1/3 cup sugar
1/2 cup Salted Caramel Hazelnut Spread
2 eggs
1 tsp. vanilla
16 oz. semisweet chocolate baking wafers (or chips)
Sea salt for sprinkling
Preheat oven to 350°F, and line baking sheets with parchment paper. In a medium bowl, mix flour, baking soda and salt together.
In a mixer, cream butter, sugars and hazelnut spread until light and fluffy.Add eggs and vanilla, and mix until combined. Add flour, and mix on low until incorporated. Stir in chocolate wafers. Chill dough in the freezer for 30 minutes.
Scoop dough onto parchment paper about two inches apart, and sprinkle tops with sea salt. Bake for 10 minutes. Let cool, but they are best while still melty. Makes about 30 cookies.
Chocolate Chia Ice Cream
I've made chia pudding before and enjoyed it, so when I came across this recipe from Top with Cinnamon, I was intrigued. It's easy to make, and it tastes a bit more like an adult version of ice cream to me. A more sophisticated (less cloyingly sweet) dark chocolate taste. Don't get me wrong, I like cloyingly sweet more than the next person, but this is the kind of ice cream that I would feel like I'm benefiting my body by eating immediately following a run.

Chocolate Chia Ice Cream
1/4 cup chia seeds
1 2/3 cup vanilla almond milk
2 Tbsp. cocoa powder
3 Tbsp. maple syrup
1 tsp. vanilla
1 oz. dark chocolate, melted
Stir all the ingredients together in a medium container until completely combined. Chill the mixture overnight (or for at least four hours). Pour the soaked mixture into a high-powered blender, and puree until completely smooth. Return the mixture back to the container, and chill until ready to churn.
Churn the mixture in an ice cream maker according to the manufacturers instructions. Transfer the churned mixture to a lidded container, and freeze until firm enough to scoop. Serve with desired toppings.
Caramel Sauce
This is dangerous. So dangerous there is no picture of it. The entire batch was consumed in 24 hours. Caramel sauce usually requires quite a bit of attention, not necessarily time, and I'm still hit or miss at making perfect homemade caramel sauce. When I hit, it's sheer perfection in my mouth. When I miss, I set off smoke detectors and have a very sticky pan to clean with nothing delicious to show for it. Or I have underdone caramel because I'm afraid of the situation I described above.
Cookies and Cups found an easy way to get instant gratification, and I followed her lead. This is so simple, takes no more than 5 minutes and requires no skill. The result is a caramel sauce that certainly fills that need, although it's not nearly as rich or complex as the truer versions. I find it tastes best initially and gets a bit grainy when reheating. Still, that didn't prevent us from polishing off the leftovers. (But I'm trying to help you justify the entire batch disappearing at once.)
Caramel Sauce
1/4 cup butter, melted
1 cup light brown sugar
1/2 cup heavy cream
1/2 tsp. salt (add more or less as desired)
1/2 tsp. vanilla
In a 4-cup microwave-safe glass bowl, combine melted butter, brown sugar and heavy cream, whisking until smooth. Microwave on high for 2 minutes, and remove to stir. Return to microwave, and heat for 2 more minutes until bubbly and slightly thickened.
Stir in salt and vanilla, and allow to cool until warm, not hot. Mixture will thicken as it cools. Serve warm. If caramel cools completely, reheat by placing in microwave for 20-25 seconds. Store any leftovers in the refrigerator. Makes about 1 1/2 cups of caramel.
Savory Bacon Granola
Bacon is breakfast food. Granola is breakfast food. But, I had never encountered bacon in granola until I found this recipe on Honestly Yum. I was intrigued and thought it would be right up my husband's alley.
I think I might have liked this more than my husband. There's something about the crunch of sunflower seeds, with the smoky hints of bacon and slight sweet from the apple that really worked for me. (And, it appears we ate this without taking any pictures. Or I can't locate the pictures now in the jumble that is our lives currently. Honestly Yum had pretty pictures if you need a visual.)
Savory Bacon Granola
1 1/4 cup rolled oats
4 slices thick-cut bacon
1/2 cup flax seeds
1 cup sunflower seeds
1/2 cup dried apples, diced
1 egg white
1/4 cup vegetable oil
3 Tbsp. maple syrup
Preheat oven at 325°F. Cut bacon into small cubes, and cook in a pan over medium high heat until fat renders and just begins to tan around the edges. (I used mostly pre-cooked bacon crumbles that we purchase from Neuske's. Best bacon ever.) Remove bacon from pan, and drain on paper towels.
Combine oats, sunflower seeds, flax seeds, dried apple and bacon in a large bowl, and toss to combine.
Whisk an egg white in a small bowl until frothy. Add maple syrup and oil to the bowl of the oat mixture, and add egg white. Toss to coat. Pour evenly on baking sheet lined with parchment, and bake for 25 minutes until lightly browned. Cool completely, and store in an air-tight container. Makes about 4 cups.
Minion Birthday Cake
We did a belated birthday celebration for our 1-year-old son since for some odd reason our entire family didn't join us as Crater Lake on vacation to celebrate on his actual birthday. With the hoopla of moving to a new place shortly after our 3-week vacation, we decided to combine his birthday celebration with his brother turning 3. I realize this is probably the only year I will get away with a joint celebration since their birthdays are nearly 2 months apart ... but it sure was nice to have the chaos just once.
We had a blast with the birthday and went with a "yellow minion" or Despicable Me theme. We didn't go overboard with decorations, but my favorite was the cake. I was extremely pleased how it turned out. No recipe for this post, although I used a riff of a previous graham cracker cupcake with a whipped cream cheese frosting. I followed Bakerella's post for the minions. Her work is amazing ... mine, not so much. I was still impressed with these as a first attempt at cake pops.
Here are some pics of the cake:
Smoky Shrimp and Gouda Grits
My mom spent a couple days with us, helping supervise our fledglings while we juggled a few appointments. She stayed one more day than she originally planned, citing that she wanted to be available if the boys were sick the next day and unable to go to their sitter. I personally think my husband's Tequila Sunrise Margaritas are the real reason she stayed ...
Regardless, I decided to make this recipe from How Sweet It Is the last night she was here. My mom is a huge fan of seafood and Southern food, so it worked out perfectly (since my husband omitted the shrimp and used leftover chicken to make chicken and grits ... yeah, that's not the next big thing). The shrimp pack a lot of flavor, and the grits are fantastic. I cannot wait to combine the leftover grits with a fried egg this morning for breakfast.
Smoky Shrimp and Gouda Grits
Gouda Grits
4 cups chicken stock
1 cup quick-cooking grits
8 oz. gouda cheese, freshly grated
1/4 tsp. salt
1/4 tsp. pepper
Smoky Shrimp
1 pound raw peeled and deveined shrimp
1/4 tsp. salt
1/2 tsp. pepper
1/2 tsp. smoked paprika
1/4 tsp. chili powder
1/4 tsp. ground cumin
4 Tbsp. butter
2 garlic cloves, finely minced or pressed
Bring the stock to a boil in a medium saucepan. Once boiling, add the grits, and whisk constantly until they are fully mixed into the stock, about a minute or two. Reduce the heat to low, and cover, stirring once or twice more, until the grits are thicker and creamy, about 5 minutes. Stir in the grated cheese, salt and pepper.
While the grits are cooking, pat the shrimp completely dry with paper towels. Once dry, season them with the salt, pepper, paprika, chili powder and cumin. Heat a large skillet over medium-high heat, and add the butter. Once the butter begins to sizzle, add the shrimp (in batches to avoid overcrowding), and cook on both sides until pink. When the shrimp are finished, stir in the garlic, and cook for a second. Remove shrimp from the skillet, and pour the remaining butter into the grits. Stir to combine.
Spoon the grits into a bowl, and add the shrimp on top. Makes 2-4 servings.
October 2, 2014
Blackberry Cobbler Biscuits
Oh my! These biscuits disappeared in no time ... as did the puff pastry treats I made with the leftover fillings. These are so delicious. The biscuits themselves are a perfect combination of buttery goodness with crunchy, slightly chewy edges.

I modified these from The Candied Appetite with a bag of frozen blackberries my uncle had shared with us. I don't have an exact recipe on the filling, but I'll do my best approximations. To minimize the amount of time I had to wait in the morning to shove these into my mouth, I made and refrigerated the filling and streusel overnight. Worked like a charm.
Blackberry Cobbler Biscuits
Blackberry Filling
1 quart blackberries
1/4 cup sugar
2 Tbsp. cornstarch
1 tsp. lemon zest
Streusel
1/2 cup flour
1/4 cup brown sugar
1/4 cup oats
1/4 tsp. salt
2 tsp. cinnamon
1/8 tsp. nutmeg
4 Tbsp. cold butter, diced
Biscuits
2 cups flour
3 1/2 tsp. baking powder
1/2 tsp. salt
1/2 tsp. cream of tarter
1 stick butter, cold and diced
1 Tbsp. honey
2/3 cup cold buttermilk
2 Tbsp. butter, melted for brushing
Preheat oven to 425°F. Line a baking sheet with parchment paper, and set aside. Combine all filling ingredients over medium-high heat. Cook, stirring often, until desired consistency. Chill until ready to fill biscuits.
To make the streusel topping, in a separate bowl, combine the flour, brown sugar, oats, salt, cinnamon and nutmeg. Whisk until evenly combined. Cut in the butter until it resembles coarse crumbs the size of peas. Set off to the side.
To make the biscuits, in a large mixing bowl, combine the flour, baking powder, salt and cream of tartar. Add in the butter and cut in until it resembles coarse crumbs the size of peas. Stir in the buttermilk and honey until the dough comes together and no longer appears to be dry. Transfer to a floured work surface, and knead once or twice to gather it together. Roll out the dough into a large rectangle about half an inch thick. Spread the berry mixture onto one side of the rolled dough. (You will have extra of this as well as the streusel.) Top with the streusel filling, and then fold the dough over the berries and streusel, like a book. Press down on the edges slightly. Cut into 10 even pieces, and place on the prepared baking sheet. Brush the tops liberally with melted butter.
Bake for about 10 minutes or until golden brown on the tops and edges. Allow to cool down slightly to avoid scalding yourself. Makes 10 amazing biscuits.
Marinated "Sun-Dried" Tomatoes
When my parents brought me some tomatoes before they headed on vacation, I remembered this recipe I found from Mouth From the South. These are so simple to make and taste delicious. I found myself munching on a surprising number of them before tossing them in the freezer for later, which is not my norm with tomatoes.
All of them are currently in the freezer for long-term storage, which is where they ended up before I snagged any pictures. Perhaps at some point I will manage a picture, but use your imagination or check out the original post.
Here's my ever-so-slightly modified version.
Marinated Sun-Dried Tomatoes
1 cup olive oil
1/4 cup balsamic vinegar
1 tsp. lemon juice
2 Tbsp. dried parsley
1 Tbsp. rosemary, chopped
Smoked sea salt and cracked black pepper to taste
5 cloves garlic
20 or more tomatoes, cut into slices
Mix everything together except the tomatoes in a large bowl. Add tomatoes, and marinate for at least several hours in the refridgerator. Remove tomatoes from marinade, and spread out on dehydrator trays, and dry until desired texture. I pulled mine when they were somewhat pliable but mostly dried. Since there's so much oil in the marinade, store the dried tomatoes in the freezer.
September 22, 2014
Dark Chocolate and Caramelized White Chocolate Cupcakes
Since my boys got booted from their daycare where we live, I've been using their old sitter about 45 minutes away a bit more while we find new care for them. There are a few positives to the situation, one being that they adore their old sitter so much they don't want to leave her house. The other is my co-workers at that particular office are extremely appreciative of my cupcake baking endeavors. This treat from Love & Olive Oil was a huge hit. Even if you're not a big fan of white chocolate, you might enjoy it this way. Be sure to check out their site for detailed pictures of the white chocolate through the process. These chocolate cupcakes, with the hint of cinnamon, were moist and delicious, especially for a project that requires no mixer.

Dark Chocolate and Caramelized White Chocolate Cupcakes
Dark Chocolate and Caramelized White Chocolate Cupcakes
Cupcakes
3/4 cup milk
1/3 cup canola oil
1 egg
1 tsp. vanilla
1/3 cup canola oil
1 egg
1 tsp. vanilla
3/4 cup sugar
1 cup flour
1/3 cup dark cocoa
1 cup flour
1/3 cup dark cocoa
3/4 tsp. baking powder
1/2 tsp. baking soda
1/4 tsp. salt
1/8 tsp. cinnamon
1/2 tsp. baking soda
1/4 tsp. salt
1/8 tsp. cinnamon
Frosting/Filling
8 oz. quality white chocolate, finely chopped
1/3 cup heavy cream, plus more as needed
1/2 cup butter, at room temperature
1 1/4 cups powdered sugar, sifted
1/3 cup heavy cream, plus more as needed
1/2 cup butter, at room temperature
1 1/4 cups powdered sugar, sifted
Preheat oven to 350ºF. Line cupcake pan with 12 paper liners. Whisk together the milk, oil, egg and vanilla until
incorporated. In a separate bowl, sift together the flour, sugar, cocoa
powder, baking soda, baking powder, salt and cinnamon. Make a well in
the center of dry ingredientsand pour in milk mixture. Stir just until
smooth.
Pour into liners, filling each about 2/3 full. Bake for 18 to 20 minutes or until
a toothpick inserted into the center comes out clean. Transfer to a
cooling rack and let cool completely.
Reduce oven to 225ºF. Spread chopped white chocolate onto a
baking sheet. Place in the oven for 10 minutes, then remove and
stir/smooth with a rubber spatula, spreading it back into an even layer.
Repeat the process every 10 minutes for 60 to 90 minutes or until the white chocolate is butterscotch in color.
Gently warm 1/3 cup cream in a small saucepan or the microwave until
about 100-120ºF or just warm to the touch. Add the caramelized
chocolate, and stir until smooth. Set aside, and let cool slightly to room
temperature.
Core the cupcakes either with a corer or a knife. Fill with a small spoonful of the white chocolate ganache, and replace the tops of the cupcakes. You
should still have about 1/2 cup of ganache left.
In a bowl, cream butter until smooth and fluffy, about 2-3 minutes. Add 1
cup powdered sugar, and beat until combined. Mix in remaining 1/2 cup of
white chocolate ganache until smooth. Add remaining sugar, and beat until
light and fluffy. Depending on the temperature of your ingredients, you may need more sugar or heavy cream to achieve the
proper consistency. Spread or pipe onto cooled
cupcakes, being sure to cover the seams. Makes 12 cupcakes.
September 6, 2014
Peanut Butter Cup Cookies
When you're going on a 3 1/2-week vacation with two children under three that involves 6,600 miles spent in a vehicle, you know you need cookies to keep your sanity for the first part of the trip at least. I used this recipe from Love and Olive Oil to give us something delicious to erase some of the screaming for the first 1,000 miles or so. (It worked, too. A bit of cookie bliss is necessary when your older child wakes your sleeping younger child, who then screams the remaining 45 minutes until you get to the hotel. Of course the older child wasn't bothered as he promptly fell asleep after waking his brother.)
Good cookies. They save your sanity, at least temporarily.
Peanut Butter Cup Cookies
Preheat oven to 325ºF. Line baking sheets with parchment paper or a silicone baking mat. In a microwave safe bowl, heat butter and peanut butter until melted. Stir until smooth, and let cool.
Good cookies. They save your sanity, at least temporarily.
Peanut Butter Cup Cookies
1 3/4 cups flour
1/2 tsp. baking soda
1/4 tsp. salt
1 stick unsalted butter
1/3 cup creamy peanut butter
1 cup packed brown sugar
1/2 cup sugar
1 egg plus 1 egg yolk, at room temperature
2 tsp. vanilla
1/2 tsp. baking soda
1/4 tsp. salt
1 stick unsalted butter
1/3 cup creamy peanut butter
1 cup packed brown sugar
1/2 cup sugar
1 egg plus 1 egg yolk, at room temperature
2 tsp. vanilla
1 cup mini semisweet chocolate chips
36 dark chocolate peanut butter cups
36 dark chocolate peanut butter cups
Preheat oven to 325ºF. Line baking sheets with parchment paper or a silicone baking mat. In a microwave safe bowl, heat butter and peanut butter until melted. Stir until smooth, and let cool.
Whisk together flour, baking soda and salt in a bowl and set aside.
In a large mixing bowl, stir the melted butter and peanut butter
together with sugars until it forms a thick paste. Add the egg, egg
yolk and vanilla, and stir until incorporated. Gradually add dry
ingredients, and mix until it comes together, using your hands if
necessary. The dough may seem crumbly at first but should come together
eventually. Mix in chocolate chips.
Scoop dough by the heaping tablespoon. Split and slightly flatten one half in your palm.
Place peanut butter cup on top, and then squish remaining dough around to completely encase it. Arrange on prepared baking sheets,
leaving about two inches of space between cookies.
Bake for 12 to 14 minutes, or until centers are set and edges are
light golden brown. Remove from oven, and let cool for 10 minutes (or
longer) on baking sheet, and then transfer to a wire rack to cool
completely. Makes about 36 cookies.
Peanut Butter Pie
Sorry for my nearly 3-month hiatus from the blog. Apparently taking a month-long vacation and then moving into your new home takes a bit of time away from blogging. I have a list of about 10 recipes, though, to get on the blog to get caught up but most will be without pictures unfortunately.
I found this recipe from Brown-Eyed Baker and thought it would be the perfect easy recipe to throw together for my family who came to help with projects around our new home for a day. I made sure they earned their keep before pulling this pie out of the fridge, and everyone gave this pie rave reviews. Quite delicious, especially for the ease of preparation.
Peanut Butter Pie
Beat the cream cheese, peanut butter, powdered sugar and 3 Tbsp. of heavy cream on low speed to combine, about 1 minute. Increase the speed to medium-high, and whip until fluffy, about 1 additional minute. Transfer the mixture to a large bowl, and set aside.
In the empty mixing bowl, add the remaining 3/4 cup heavy cream, and whip on medium-low speed until foamy, about 1 minute. Increase the speed to high, and whip until stiff peaks form. (Note: I had a major lapse in mind control and tried to whip my cream with the regular beater attachment rather than the whisk one. Don't try that at home. Insanely messy and ineffective.) Stir one-third of the whipped cream into the peanut butter mixture with a rubber spatula. Then add the remaining whipped cream in two additions, folding gently with a rubber spatula until no white streaks remain. Transfer the peanut butter mousse into the prepared crust, and spread into an even layer.
In the empty mixing bowl, add the heavy cream, powdered sugar and vanilla extract, and mix on medium-low speed until foamy, about 1 minute. Increase the speed to high, and whip until stiff peaks form. Spread evenly over the peanut butter filling, cover with plastic wrap and refrigerate until set, at least 2 hours. When ready to serve, garnish with peanuts. Leftovers can be stored in the refrigerator, covered with plastic wrap, for up to 3 days. Makes one 9-inch pie.
I found this recipe from Brown-Eyed Baker and thought it would be the perfect easy recipe to throw together for my family who came to help with projects around our new home for a day. I made sure they earned their keep before pulling this pie out of the fridge, and everyone gave this pie rave reviews. Quite delicious, especially for the ease of preparation.
Peanut Butter Pie
Crust
24 Nutter Butter cookies, crushed
4 Tbsp. salted butter
Filling
6 oz. cream cheese, room temperature
3/4 cup creamy peanut butter
3/4 cup powdered sugar
3 Tbsp. + 3/4 cup heavy cream, divided
Topping
1 cup heavy cream
2 Tbsp. powdered sugar
1 tsp. vanilla extract
1/4 cup chopped peanuts
Make the crust by combining crushed Nutter Butter cookies and melted butter until evenly moistened, and then press into a 9-inch pie pan. Place in the freezer while you prepare the filling.
Beat the cream cheese, peanut butter, powdered sugar and 3 Tbsp. of heavy cream on low speed to combine, about 1 minute. Increase the speed to medium-high, and whip until fluffy, about 1 additional minute. Transfer the mixture to a large bowl, and set aside.
In the empty mixing bowl, add the remaining 3/4 cup heavy cream, and whip on medium-low speed until foamy, about 1 minute. Increase the speed to high, and whip until stiff peaks form. (Note: I had a major lapse in mind control and tried to whip my cream with the regular beater attachment rather than the whisk one. Don't try that at home. Insanely messy and ineffective.) Stir one-third of the whipped cream into the peanut butter mixture with a rubber spatula. Then add the remaining whipped cream in two additions, folding gently with a rubber spatula until no white streaks remain. Transfer the peanut butter mousse into the prepared crust, and spread into an even layer.
In the empty mixing bowl, add the heavy cream, powdered sugar and vanilla extract, and mix on medium-low speed until foamy, about 1 minute. Increase the speed to high, and whip until stiff peaks form. Spread evenly over the peanut butter filling, cover with plastic wrap and refrigerate until set, at least 2 hours. When ready to serve, garnish with peanuts. Leftovers can be stored in the refrigerator, covered with plastic wrap, for up to 3 days. Makes one 9-inch pie.
June 22, 2014
Sweet Sesame Noodles with Chicken and Broccoli
This Cooking Light recipe earned such high marks from my husband that he said it could be a weekly meal. (That never happens in our house because there are way too many recipes to try to repeat that often.) You could easily leave out the chicken and amp up the broccoli in this recipe for a vegetarian dish.
Sweet Sesame Noodles with Chicken and Broccoli
8 oz. angel hair pasta
8 oz. broccoli florets
12 oz. chicken
1/8 tsp. salt
1/4 tsp. pepper
2 Tbsp. rice vinegar
2 Tbsp. dark sesame oil
2 Tbsp. soy sauce
1 Tbsp. creamy peanut butter
1 tsp. brown sugar
1/4 tsp. crushed red pepper
1 garlic clove, minced
3 green onions, chopped (optional)
2 tsp. toasted sesame seeds
Cook noodles in boiling water, adding broccoli the last 3 minutes. Drain noodles and broccoli. Heat a grill pan or cast-iron skillet over medium-high heat. Sprinkle chicken evenly with salt and pepper. Cool 6 minutes on each side or until done. Cut into 1-inch pieces.
Combine remaining ingredients, except green onions and sesame seeds. Whisk together until well mixed. Stir into noodle mixture, and add chicken. Garnish with green onions and sesame seeds. Serves 4.
French Toast Cake
Birthdays are an excuse for me to try some of the many cakes and desserts that have caught my eye, like this one from Confessions of a Cookbook Queen. I made this and a TimTam cake from Raspberri Cupcakes for my mother and brother's birthday celebrations, along with Father's Day. Although the TimTam cake was good, it didn't wow me like I had expected.
This, on the other hand, lived up to my expectations for it. It tastes like breakfast, in cake form. It is incredibly sweet but wonderful. My cakes turned out a bit dry, so be careful not to overbake like I did.
No pictures due to the celebrations and devouring. Check out the original blog on Confessions of a Cookbook Queen for pretty pictures.
French Toast Cake
Cake
1/2 cup packed brown sugar
1 tsp. cinnamon
2 sticks salted butter, slightly softened
2 cups sugar
3 large eggs
1 1/2 tsp. vanilla
2 1/2 cups flour
2 tsp. baking powder
1/2 tsp. cinnamon
1 cup milk
Frosting
1 cup salted butter, slightly softened
1/4 cup heavy cream
2 tsp. maple extract
4 cups powdered sugar
drop of yellow food color
Ganache
1/2 cup cinnamon chips
1/4 cup heavy cream
3 Tbsp. maple cream
Preheat oven to 350ºF. Butter and flour two (8-inch) cake pans, and set aside. In a small bowl, stir together brown sugar and cinnamon. In a large bowl, mix together flour, baking powder and cinnamon.
Beat butter and sugar on medium speed until light and fluffy, about 2 minutes. Add eggs one at a time, beating well after each. Add vanilla.
With the mixer on medium low, add flour and milk alternately, starting and ending with flour mixture and scraping the bowl as needed. Pour about 1/4 of the batter in each pan. Divide cinnamon/brown sugar mixture between the two cakes, sprinkling evenly over the batter and then topping with the remaining batter. Bake for about 30 minutes or until a toothpick inserted in the center of the cake comes out clean.
Remove cakes from oven, and let cool in pans for about 10 minutes. Carefully remove from pans, and finish cooling on a wire rack.
To make the frosting, beat butter, maple extract and heavy cream on medium low speed until smooth. With the mixer on low, slowly add powdered sugar, and beat on low until just barely mixed. Increase speed to high, and beat for one minute, until fluffy and smooth. Set aside a couple spoonfuls of frosting. Color the small amount of reserved frosting with a drop of yellow food coloring, and place in the refrigerator.
Place one cake top side down on a plate, and cover with frosting. Place the other cake on top, and frost entire cake. Chill for about 30 minutes before pouring ganache over the top, so it doesn't melt the frosting.
To make the ganache, heat cinnamon chips and cream in the microwave, stopping to stir every 15 seconds until smooth. Add maple cream, and stir until combined. Let sit until thickened and slightly cooled.
Pour ganache over chilled frosted, cake, spreading to the edges so it can drip down. Using a small cookie scoop, scoop chilled yellow frosting, so it looks like butter, and place it in the center of the cake.
Rainbow Thai Salad
Periodically one of the (dessert) blogs I read links to someone's healthier recipes. That's how I discovered this salad from Gimme Some Oven. Even though I'm not sold on mangoes, I thought this sounded intriguingly delicious.
I thoroughly enjoyed it several days in a row. When I made it the following week, the mangoes and the avocados didn't work for me as much. I'm not sure why. Still, this was really good and worth repeating even without the chicken.
Rainbow Thai Salad
3 cups shredded cooked chicken (optional)
2 cups shredded purple cabbage
1 cup shredded green cabbage
1 avocado, diced
1 mango, peeled, pitted and diced
1 (large) carrot, julienned
1 red pepper, cored and julienned
1 cup roughly chopped fresh cilantro leaves
1/2 cup chopped green onions
Dressing
1/4 cup chopped cashews or peanuts
1/2 cup peanut butter
2-3 Tbsp. hot water
2 Tbsp. rice wine vinegar
2 Tbsp. soy sauce
2 Tbsp. honey
1/4 tsp. sesame oil
Juice of 1 lime
Pinch of red pepper flakes
To make the salad, combine all the chopped ingredients together. Combine dressing ingredients, and stir until well blended. Pour over salad immediately prior to serving. Serves 3 to 4 as a meal, more as a side dish.
Mushroom Walnut Turnovers
I was pleasantly surprised my husband enjoyed these savory Cooking Light turnovers. The mushroom filling was quite delicious (enough so that I made more the following day for an omelet). I made a slightly more kid-friendly version for our son.
I would definitely repeat these turnovers, but I also like the idea of using a similar crust for other savory meals.
Mushroom Walnut Turnovers
Filling
2 Tbsp. finely chopped onion
8 oz. mushrooms, chopped
1/3 cup dry white wine
1 Tbsp. fat-free cream cheese
2 tsp. fresh thyme, chopped
1/2 tsp. salt
Crust
3 Tbsp. chopped walnuts, toasted
1 1/4 cups flour
1/2 tsp. salt
1 1/2 Tbsp. butter, chilled & cut into small pieces
1/4 cup ice water
2 large egg whites, divided
1 Tbsp. skim milk
Prepare the filling by cooking onion and mushrooms in a pan coated with cooking spray. Cook 6 minutes over medium-high heat, stirring often. Add in wine, and cook 5 minutes or until the liquid is almost evaporated. Remove from heat, and stir in remaining ingredients.
Set aside to cool to room temperature, and preheat the oven to 350ºF. Grind walnuts until smooth in a food processor. Add remaining dry ingredients and butter, and pulse until mixed. Add ice water and one egg white to flour mixture. Stir by hand until moist and mixed. Turn dough onto lightly floured surface, and divide dough into 18 portions. Working with one piece of dough at a time, roll balls into a 3-inch circle. (Keep remaining dough covered while rolling out the individual doughs.) Spoon about 2 tsp. of mushrooms into each crust, and fold dough over filling. Crimp the edges with a fork to seal, and set on a lined baking sheet. Repeat until all dough and filling is used.
Combine remaining egg white and milk in a bowl. Brush the egg wash over all the pastries. Bake for 16 minutes or until golden. Cool on a wire rack. Makes 9 appetizer servings or 4 entree portions.
May 30, 2014
Skillet Chocolate Cake
I asked my dad what type of cake he wanted for his birthday, and his answer was chocolate cake with white frosting or white cake with chocolate frosting. Really, dad? I repeatedly told him how boring that was and offered him literally 20 or more recipes I had bookmarked to try with enticing options. He still wanted plain chocolate cake with white frosting or white cake with chocolate frosting.
Begrudgingly, I honored his request. I did, however, find a bookmark tucked away for Cookies and Cups' cake made in a cast-iron skillet. That's the recipe I selected since it let me try a new recipe and was at least a bit unique. I didn't manage to get a picture before we ate it, so I guess that tells you it was a solid cake. It's worth repeating ... if I'm ever requested to bring a plain chocolate cake anywhere.
Skillet Chocolate Cake
1/2 cup cocoa powder (I used a mix of regular and dark)
1/3 cups semi-sweet chocolate chips
3/4 cup water, brought just to a boil
1 1/2 cups flour
1 tsp. baking soda
1 tsp. salt
1/2 cup plus 2 Tbsp. butter, room temperature
1 1/4 cup light brown sugar
2 tsp. vanilla extract
3 eggs
1/4 cup plus 2 Tbsp. buttermilk
Preheat oven to 350° F. Grease a 10-inch cast-iron skillet with butter. Line bottom of pan with parchment paper, grease again and dust lightly with flour. Set aside. (Note: the parchment paper was necessary for me. As in, I didn't do this step and had my cake not come out of the pan in one piece.)
In a medium bowl, whisk together cocoa powder and chocolate chips. Pour hot water over top, let sit for 1 minute and then whisk until smooth. Set aside to cool.
In another bowl whisk together flour, baking soda and salt. Set aside.
Using a stand mixer, beat together butter and light brown sugar until light and fluffy, about 3 minutes. Add in eggs and vanilla beating until combined and smooth. Turn the mixer to low, and pour in melted chocolate mixture slowly until incorporated. Finally add the flour mixture and buttermilk in alternating portions, beginning and ending with flour. Stir until just combined, scraping sides when necessary.
Pour batter into prepared skillet. Bake for 40-50 minutes, turning skillet halfway through baking. Cake is done with a toothpick inserted in the center comes out clean or with only a few crumbs dangling.
Cool on wire rack for 15 minutes in the skillet, and then invert onto a wire rack to finish cooling. Frost as desired. Makes about 12-18 servings.
Chocolate Pretzel Peanut Butter Granola
This granola from Yammie's Noshery caught my eye because of the inclusion of pretzels. My husband loves pretzels, as does our toddler, and I thought they would add a different twist to our normal granola routine. I made a couple substitutions with this recipe using ingredients on hand, but I'm sure the original recipe is equally delicious.
Chocolate Pretzel Peanut Butter Granola
1 cup peanut butter
1/4 cup almond oil
3 cups rolled oats
1 cup sweetened flaked coconut
1 cup crispy cereal
1 cup almonds, chopped
1 cup pretzels, lightly crushed
1/4 cup brown sugar
1/2 cup honey
2 tsp. vanilla
3/4 tsp. salt
1/2 tsp. cinnamon
1/2 cup chocolate chips
Preheat the oven to 250ºF. Melt the peanut butter in the microwave for one minute. Stir together with the rest of the ingredients (except for the chocolate chips).
Spread on silipat-lined baking sheet. Bake 1 hour, stirring every 15minutes. Melt the chocolate chips, and drizzle over the granola. Allow to cool completely before storing in an airtight container. Makes a large batch to enjoy, about 9 cups.
1 cup crunchy peanut butter (smooth is fine too)
1/4 cup butter
3 cups rolled oats
1 cup sweetened flaked coconut
1 cup Rice Krispies
1 cup pecans,chopped (or other nuts)
1 cup pretzels (lightly crushed)
3/4 cup brown sugar
1/4 cup honey
2 teaspoons vanilla extract
3/4 teaspoon salt
1/2 teaspoon cinnamon
2/3 cup milk chocolate chips
Read more at h
1 cup crunchy peanut butter (smooth is fine too)
1/4 cup butter
3 cups rolled oats
1 cup sweetened flaked coconut
1 cup Rice Krispies
1 cup pecans,chopped (or other nuts)
1 cup pretzels (lightly crushed)
3/4 cup brown sugar
1/4 cup honey
2 teaspoons vanilla extract
3/4 teaspoon salt
1/2 teaspoon cinnamon
2/3 cup milk chocolate chips
Preheat the oven to 250ºF.
Melt the peanut butter and butter together in the microwave. Stir
together with the rest of the ingredients (except for the chocolate
chips).
Spread on an ungreased baking sheet. Bake 1 hour, stirring every fifteen minutes.
Melt the chocolate chips and drizzle over the granola. Allow to cool completely before storing in an airtight container.
Serve with milk, yogurt, or just by the handful.
Read more at http://www.yammiesnoshery.com/2014/04/chocolate-peanut-butter-pretzel-granola.html#XJLPegOf8cyr8TPX.99
Chocolate Pretzel Peanut Butter Granola
1 cup peanut butter
1/4 cup almond oil
3 cups rolled oats
1 cup sweetened flaked coconut
1 cup crispy cereal
1 cup almonds, chopped
1 cup pretzels, lightly crushed
1/4 cup brown sugar
1/2 cup honey
2 tsp. vanilla
3/4 tsp. salt
1/2 tsp. cinnamon
1/2 cup chocolate chips
Preheat the oven to 250ºF. Melt the peanut butter in the microwave for one minute. Stir together with the rest of the ingredients (except for the chocolate chips).
Spread on silipat-lined baking sheet. Bake 1 hour, stirring every 15minutes. Melt the chocolate chips, and drizzle over the granola. Allow to cool completely before storing in an airtight container. Makes a large batch to enjoy, about 9 cups.
Read more at h
Read more at http://www.yammiesnoshery.com/2014/04/chocolate-peanut-butter-pretzel-granola.html#XJLPegOf8cyr8TPX.99
May 19, 2014
Chocolate Peanut Butter Cake
Each year for my birthday, I make a decadent dessert that's been taunting me from the blogging world. The past two year's creations have involved chocolate and peanut butter: Reeses Fudge Pie and Chocolate Peanut Butter Cheesecake Cake. (As a sidenote, I made a lot of tasty things in July 2012!) History will repeat itself this year in the flavor profile with this cake from Dieter's Downfall. The idea of cookie dough sandwiched into cake seems like an appropriate way to celebrate my 31st birthday. And I love that these projects with multiple steps and layers can be done over the course of a few days, which makes them easy to do with two little helpers. This concept is highly adaptable to other flavors of cookie dough, frosting or cake just for future reference. Perhaps future versions will be tastier because this one failed to impress me completely.

Chocolate Peanut Butter Cake
Cookie Dough Layer
1/4 cup butter, room temperature
1/2 cup peanut butter
1/4 cup sugar
1/4 cup brown sugar
1 tsp. vanilla
3/4 cup flour
Cake
3 oz. unsweetened chocolate
1/4 cup butter, room temperature
2 1/4 cup light brown sugar
3 eggs
1 1/2 tsp. vanilla
2 tsp. baking soda
1/2 tsp. salt
2 1/4 cup cake flour
1 cup milk
1 cup boiling water
Frosting
1/2 cup butter
1 cup peanut butter
2-5 Tbsp. milk
2 cups powdered sugar
Garnish
Chocolate curls
Peanut butter cups
Mini chocolate chips
Reeses Pieces
To make the cake, melt chocolate and allow to cool for 30 minutes. Preheat oven to 350ºF. Prepare two 9-inch round cake pans by greasing, flouring and lining them with parchment paper.
Cream butter, and add in brown sugar. Beat until smooth. Add one egg at a time until light and fluffy. Add cooled chocolate, vanilla, baking soda and salt. Alternate adding in the flour and milk, and mix until just combined. Remove from mixer, and stir in the water by hand. Pour into prepared pans, and and bake for 30 minutes or until done. Cool in pans for 10 minutes, and then transfer to a cooling rack to cool completely. Once cakes are cool, wrap in plastic wrap. Ideally freeze overnight to make frosting easier.
To make the frosting, beat butter and peanut butter until smooth. Gradually add in milk and powdered sugar until desired consistency is reached. (Note: I think an edible cookie dough frosting like this would be delicious, too.)
To assemble, place one chocolate cake on a cake platter. Add the cookie dough layer, and top with second chocolate cake. Trim edges as needed, and then frost cake. Garnish as desired.
Note: This cake recipe itself is not my favorite with the changes I made to it, so I would substitute a different recipe or use the original recipe from the blog next time I make it.

Chocolate Peanut Butter Cake
Cookie Dough Layer
1/4 cup butter, room temperature
1/2 cup peanut butter
1/4 cup sugar
1/4 cup brown sugar
1 tsp. vanilla
3/4 cup flour
Cake
3 oz. unsweetened chocolate
1/4 cup butter, room temperature
2 1/4 cup light brown sugar
3 eggs
1 1/2 tsp. vanilla
2 tsp. baking soda
1/2 tsp. salt
2 1/4 cup cake flour
1 cup milk
1 cup boiling water
Frosting
1/2 cup butter
1 cup peanut butter
2-5 Tbsp. milk
2 cups powdered sugar
Garnish
Chocolate curls
Peanut butter cups
Mini chocolate chips
Reeses Pieces
Make the cookie dough layer first by blending butter and peanut butter until smooth. Add in the sugars, and blend until smooth. Stir in remaining ingredients until evenly incorporated. Line a 9-inch cake pan with plastic wrap, and transfer the cookie dough into it. Using slightly damp hands, press the dough evenly into the pan. Refrigerate overnight until set.
To make the cake, melt chocolate and allow to cool for 30 minutes. Preheat oven to 350ºF. Prepare two 9-inch round cake pans by greasing, flouring and lining them with parchment paper.
Cream butter, and add in brown sugar. Beat until smooth. Add one egg at a time until light and fluffy. Add cooled chocolate, vanilla, baking soda and salt. Alternate adding in the flour and milk, and mix until just combined. Remove from mixer, and stir in the water by hand. Pour into prepared pans, and and bake for 30 minutes or until done. Cool in pans for 10 minutes, and then transfer to a cooling rack to cool completely. Once cakes are cool, wrap in plastic wrap. Ideally freeze overnight to make frosting easier.
To make the frosting, beat butter and peanut butter until smooth. Gradually add in milk and powdered sugar until desired consistency is reached. (Note: I think an edible cookie dough frosting like this would be delicious, too.)
To assemble, place one chocolate cake on a cake platter. Add the cookie dough layer, and top with second chocolate cake. Trim edges as needed, and then frost cake. Garnish as desired.
Note: This cake recipe itself is not my favorite with the changes I made to it, so I would substitute a different recipe or use the original recipe from the blog next time I make it.
Double Chocolate Biscotti
Every now and then I get on a biscotti kick. I wanted to make a treat for my aunt to repay her kindness of watching my two little boys while I spent several hours at an appointment, so I made two batches of biscotti. These from Blogging Over Thyme turned out quite tasty. I dipped some in white chocolate and some in dark chocolate for a bit of variety. Crunchy, chocolatey and graced with sea salt ... delicious.

Double Chocolate Biscotti
Double Chocolate Biscotti
2 cups flour
1/2 cup cocoa powder
1/2 cup cocoa powder
2 Tbsp. dark cocoa powder
3/4 tsp. baking soda
1/2 tsp. baking powder
1 tsp. salt
6 Tbsp. unsalted butter, room temperature
1 cup sugar
2 large eggs, room temperature and slightly beaten
1 tsp. vanilla
3/4 tsp. baking soda
1/2 tsp. baking powder
1 tsp. salt
6 Tbsp. unsalted butter, room temperature
1 cup sugar
2 large eggs, room temperature and slightly beaten
1 tsp. vanilla
1 cup raw sliced almonds, roughly chopped
12 oz. dark chocolate, melted
Sea salt
Line a large baking sheet with silipats. Preheat the oven to 350°F. Whisk together the flour, cocoa, dark cocoa, baking soda, baking powder and salt in a bowl and set aside. Beat the butter and sugar together for 2-3 minutes, or until the butter is pale in color. Add the eggs and vanilla, and continue to beat for another minute. Reduce speed to low, and slowly add the dry ingredients, mixing until a dough just comes together. Add the almonds, and stir until just incorporated. The dough will be thick and fairly sticky.
Turn the dough onto a clean counter top, and knead the dough lightly to combine any dry ingredients that were not incorporated. Divide dough in half using a bench scraper. Roll each half into a 12" log, and place both on top of the baking sheet (leaving space between them for spreading). Flatten the logs until the are about 3/4"-1" thick and rectangular in shape.
Bake for 25 minutes, or until the logs are firm to the touch. Allow to cool on a baking sheet for 20 minutes.
Remove the dough to a cutting board, and using a serrated knife, cut each log into 1/2-3/4" thick. Line the pieces flat onto the cookie sheet, and bake the cookies again for 15 minutes, flipping once. Transfer to a rack to cool.
Once the cookies are cool, melt the chocolate in a heatproof bowl in the microwave at 15-20 second increments. Place chocolate in a shallow wide dish. Dip the biscotti lengthwise into the chocolate.
Place the biscotti on a parchment-lined baking sheet. Allow the chocolate to set a bit before sprinkling the tops of the biscotti with flaky salt. Allow chocolate to harden completely before storing. Biscotti can be kept in an airtight container for up to a week or more. Makes about 30 biscotti.
Honey Biscotti
These biscotti came from Girl vs. Dough. The chocolate and salt combination elevate this biscotti from ordinary to addictive. The honey does make the dough more prone to burning in the oven, though, so keep a closer eye as it is baking. Quite a tasty combination.

Honey Biscotti
1 1/2 cups almonds
2 cups flour
1 tsp. baking powder
1/4 tsp. baking soda
1/8 tsp. salt
2 eggs
1/2 cup canola oil
2/3 cup honey
1/3 cup granulated sugar
1 tsp. vanilla
1 1/2 cups semi-sweet chocolate chips
Sea salt, for sprinkling
Preheat oven to 350°F. Place almonds in a single layer on a rimmed baking sheet. Bake 10 to 15 minutes, stirring once, until almonds are toasted. Let cool slightly, and then roughly chop.
In a large bowl, whisk together flour, baking powder, baking soda and salt. In a separate large bowl, combine eggs, oil, honey, sugar and vanilla. Add dry ingredients to wet ingredients, and stir until well combined. Stir in chopped almonds. Cover, and chill dough for at least 2 hours.
Preheat oven to 350°F. When dough is fully chilled, divide in half. Using damp hands, shape both halves into 15-by-2-inch logs on a silipat-lined baking sheet. Bake 20 minutes until lightly golden and set. Cool 15 minutes on baking sheet.
Reduce oven temperature to 325°F. Using a sharp knife, carefully slice logs crosswise into 3/4-inch slices. Place slices cut-side down on the prepared baking sheets. Bake 15 to 20 more minutes until cookies are deep golden brown and crisp, turning biscotti once and rotating baking sheets halfway through. Let biscotti cool 5 minutes on baking sheets, and then transfer to a cool rack to cool completely.
Melt chocolate chips in microwave until smooth. Dip one end of each biscotti into chocolate, then transfer to baking sheets. Sprinkle lightly with sea salt after chocolate is cooled enough that the salt won't melt. Chill biscotti in fridge 15 minutes until chocolate is hardened. Makes about 30 biscotti.
April 24, 2014
Chocolate Mousse Bombe
This recipe from Sprinkle Bakes was our Easter dessert. It was everything you could hope for in a dessert ... except peanut butter. This is crazy delicious and indulgent, the perfect dessert for a larger gathering.

It seems like an incredibly complex recipe, but each step takes relatively little time. I put it together over the course of a couple days (making the cookie dough bowl the first day, making the mouse the second day and making the brownie and assembling the masterpiece the third day), so it seemed to require almost no time each day. It could be done in one day, but I think that would be a bit stressful. It keeps wonderfully refrigerated, as it set for two days after assembly before I served it.

I think this concept would be fun for an ice cream dessert ... I'm envisioning a peanut butter cookie dough bowl (with chocolate chips, still, of course) filled with chocolate ice cream with peanut butter sauce, mini Reese's Pieces and the likes. The edge would be garnished with regular Reese's Pieces. Oh yeah, now that has to be made in the future!
Chocolate Mousse Bombe
Cookie Dough Layer
3 cups flour
3/4 tsp. salt
1 ¼ cups brown sugar, packed
3/4 cup sugar
1 cup unsalted butter, melted and slightly cooled
1 1/4 tsp. vanilla extract
1 cup mini chocolate chips
1/4 cup milk
Chocolate Mousse
1/4 oz. powdered gelatin
2 Tbsp. cold water
3 egg yolks
1/2 cup sugar
1/2 cup milk, hot
8 oz. semi-sweet chocolate, chopped
1 1/2 cups whipping cream
Brownie
4 Tbsp. butter, melted
1/2 cup sugar
1 tsp. vanilla
1 egg
1/4 cup flour
3 Tbsp. unsweetened cocoa powder
1/8 tsp. baking powder
1/8 tsp. salt
Glaze
9 oz. chocolate, finely chopped
1 cup heavy whipping cream
1 Tbsp. corn syrup
Garnish
Chocolate chips
Make the cookie dough bowl first. Line a 10-cup bowl with plastic wrap. Stir together flour, salt, brown sugar and sugar in an electric mixer. Pour in butter and vanilla extract. Mix until a dry dough forms. Add chocolate chips, and mix on lowest speed. When chocolate chips are evenly dispersed, add milk 1 tablespoon at a time with the machine on low speed. Remove dough from mixer bowl, and press about 2/3 into the bottom and up the sides of the lined bowl. Wrap remaining portion of dough in plastic wrap and save for later use. (Seriously, you use this cookie dough later in the recipe. Don't eat all the leftovers right away ... although you can certainly sneak some.) Ideally, the cookie dough layer should be about 1/-4-inch thick. Place in freezer while you make the chocolate mousse.
In a medium saucepan, sprinkle gelatin over water. Let stand for 1 minute. Whisk in eggs and sugar. Stir in hot milk. Cook over medium heat, stirring constantly. Mixture will thicken after 5 minutes or so. When done, it should be thick enough to coat the back of a spoon. Stir in chopped chocolate, and blend until chocolate has melted. Let cool to room temperature.
Whip cream until stiff peaks form. Gently fold whipped cream into the chocolate mixture until well blended. Remove bowl lined with cookie dough from freezer, and pour in mousse mixture. Smooth the top, and place in the freezer until firm, 4-6 hours or overnight.
Then make the brownie, by pre-heating the oven to 350°F. Grease 9-inch round baking pan, and line bottom with a parchment circle. Stir together butter, sugar and vanilla in bowl. Add egg, and beat well with spoon. Stir together flour, cocoa, baking powder and salt in a separate bowl. Gradually add to egg mixture, beating until well blended. Spread batter thinly and evenly in prepared pan. Bake 10 to 15 minutes. Cool completely in pan on wire rack. Turn out onto a piece of plastic wrap, and peel off the parchment circle.
To assemble your masterpiece, remove mousse from freezer. Place a piece of parchment paper or plastic wrap on a work surface. Roll out the remaining portion of cookie dough on the paper to ¼-inch thickness. With the help of the paper, flip the dough onto the mousse, and trim to fit inside the bowl. Then turn the brownie layer onto the cookie dough layer. Press brownie into cookie dough gently but firmly. Trim the edges of the brownie, so it fits inside the bowl and is flush with the bottom of the cookie dough bowl. Trim edges of cookie dough bowl if necessary to make it flush with the brownie. (This is where you can eat any and all remaining cookie dough safely.)
Turn entire dessert out onto a wire rack. Peel off plastic wrap. Place wire rack over a large cookie sheet with a lip. (I found it worked best to place the wire rack perpendicular to the cookie sheet, so the dessert was over the cookie sheet with the legs to the wire rack outside the cookie sheet. Less mess.) Let stand at room temperature while you make the glaze.
Place heavy cream in a large microwaveable bowl. Heat in the microwave at 40-second intervals until very hot but not boiling. Stir in chopped chocolate. Let stand for 3 minutes, and then begin gently stirring mixture. When chocolate and cream are thoroughly mixed and smooth, add corn syrup. Stir until combined.
Pour glaze over entire surface of bombe. Allow the dessert to stand until the glaze dripping subsides, and then pour excess chocolate in the cookie sheet back into glaze bowl. Rewarm glaze for 20 to 30 seconds in the microwave if it has thickened. Stir, and then pour a second coat over the entire surface of the dessert. When dripping subsides, repeat warming and pouring process a third time (the more times you cover with chocolate, the smoother the surface becomes). Transfer bombe to a cake plate being careful not to smudge the glaze. Place a line of standard size chocolate chips flat-side-out around the bottom edge of the dessert. Keep chilled. Slice and serve. Makes about 16 servings.
It seems like an incredibly complex recipe, but each step takes relatively little time. I put it together over the course of a couple days (making the cookie dough bowl the first day, making the mouse the second day and making the brownie and assembling the masterpiece the third day), so it seemed to require almost no time each day. It could be done in one day, but I think that would be a bit stressful. It keeps wonderfully refrigerated, as it set for two days after assembly before I served it.
I think this concept would be fun for an ice cream dessert ... I'm envisioning a peanut butter cookie dough bowl (with chocolate chips, still, of course) filled with chocolate ice cream with peanut butter sauce, mini Reese's Pieces and the likes. The edge would be garnished with regular Reese's Pieces. Oh yeah, now that has to be made in the future!
Chocolate Mousse Bombe
Cookie Dough Layer
3 cups flour
3/4 tsp. salt
1 ¼ cups brown sugar, packed
3/4 cup sugar
1 cup unsalted butter, melted and slightly cooled
1 1/4 tsp. vanilla extract
1 cup mini chocolate chips
1/4 cup milk
Chocolate Mousse
1/4 oz. powdered gelatin
2 Tbsp. cold water
3 egg yolks
1/2 cup sugar
1/2 cup milk, hot
8 oz. semi-sweet chocolate, chopped
1 1/2 cups whipping cream
Brownie
4 Tbsp. butter, melted
1/2 cup sugar
1 tsp. vanilla
1 egg
1/4 cup flour
3 Tbsp. unsweetened cocoa powder
1/8 tsp. baking powder
1/8 tsp. salt
Glaze
9 oz. chocolate, finely chopped
1 cup heavy whipping cream
1 Tbsp. corn syrup
Garnish
Chocolate chips
Make the cookie dough bowl first. Line a 10-cup bowl with plastic wrap. Stir together flour, salt, brown sugar and sugar in an electric mixer. Pour in butter and vanilla extract. Mix until a dry dough forms. Add chocolate chips, and mix on lowest speed. When chocolate chips are evenly dispersed, add milk 1 tablespoon at a time with the machine on low speed. Remove dough from mixer bowl, and press about 2/3 into the bottom and up the sides of the lined bowl. Wrap remaining portion of dough in plastic wrap and save for later use. (Seriously, you use this cookie dough later in the recipe. Don't eat all the leftovers right away ... although you can certainly sneak some.) Ideally, the cookie dough layer should be about 1/-4-inch thick. Place in freezer while you make the chocolate mousse.
In a medium saucepan, sprinkle gelatin over water. Let stand for 1 minute. Whisk in eggs and sugar. Stir in hot milk. Cook over medium heat, stirring constantly. Mixture will thicken after 5 minutes or so. When done, it should be thick enough to coat the back of a spoon. Stir in chopped chocolate, and blend until chocolate has melted. Let cool to room temperature.
Whip cream until stiff peaks form. Gently fold whipped cream into the chocolate mixture until well blended. Remove bowl lined with cookie dough from freezer, and pour in mousse mixture. Smooth the top, and place in the freezer until firm, 4-6 hours or overnight.
Then make the brownie, by pre-heating the oven to 350°F. Grease 9-inch round baking pan, and line bottom with a parchment circle. Stir together butter, sugar and vanilla in bowl. Add egg, and beat well with spoon. Stir together flour, cocoa, baking powder and salt in a separate bowl. Gradually add to egg mixture, beating until well blended. Spread batter thinly and evenly in prepared pan. Bake 10 to 15 minutes. Cool completely in pan on wire rack. Turn out onto a piece of plastic wrap, and peel off the parchment circle.
To assemble your masterpiece, remove mousse from freezer. Place a piece of parchment paper or plastic wrap on a work surface. Roll out the remaining portion of cookie dough on the paper to ¼-inch thickness. With the help of the paper, flip the dough onto the mousse, and trim to fit inside the bowl. Then turn the brownie layer onto the cookie dough layer. Press brownie into cookie dough gently but firmly. Trim the edges of the brownie, so it fits inside the bowl and is flush with the bottom of the cookie dough bowl. Trim edges of cookie dough bowl if necessary to make it flush with the brownie. (This is where you can eat any and all remaining cookie dough safely.)
Turn entire dessert out onto a wire rack. Peel off plastic wrap. Place wire rack over a large cookie sheet with a lip. (I found it worked best to place the wire rack perpendicular to the cookie sheet, so the dessert was over the cookie sheet with the legs to the wire rack outside the cookie sheet. Less mess.) Let stand at room temperature while you make the glaze.
Place heavy cream in a large microwaveable bowl. Heat in the microwave at 40-second intervals until very hot but not boiling. Stir in chopped chocolate. Let stand for 3 minutes, and then begin gently stirring mixture. When chocolate and cream are thoroughly mixed and smooth, add corn syrup. Stir until combined.
Pour glaze over entire surface of bombe. Allow the dessert to stand until the glaze dripping subsides, and then pour excess chocolate in the cookie sheet back into glaze bowl. Rewarm glaze for 20 to 30 seconds in the microwave if it has thickened. Stir, and then pour a second coat over the entire surface of the dessert. When dripping subsides, repeat warming and pouring process a third time (the more times you cover with chocolate, the smoother the surface becomes). Transfer bombe to a cake plate being careful not to smudge the glaze. Place a line of standard size chocolate chips flat-side-out around the bottom edge of the dessert. Keep chilled. Slice and serve. Makes about 16 servings.
April 22, 2014
Chocolate Mousse
Oh my. So simple. Two ingredients. So delicious. (I ate four of the five in one day. In my defense, my children slept horribly the previous night and napped poorly that day. My husband is lucky indeed I saved him one.)
These are rich enough that a small portion truly does satisfy when you're not eating away your stress. Top them with homemade whipped cream for a perfectly impressive dessert. You can fill 5 1/4-pint jars with one batch.
You can substitute other milk varieties if desired. I think this would be perfect with a peanut butter whipped topping, but Oh Ladycakes has many ideas beyond just her basic recipe. I've shared my shortcut method below, but her post has a more traditional approach.

Chocolate Mousse
6 oz. dark chocolate
3/4 cup unsweetened vanilla almond milk
Have your 1/4-pint jars or other small bowls ready before you start as you will need to work quickly. Melt the chocolate on medium heat in the microwave, stirring often until just melted. Place bowl on top of ice packs to chill chocolate while adding the almond milk. Beat with a hand mixer on medium-low speed for 3 to 5 minutes. The mixture will be very bubbly, and then fine lines will start to appear. Once the bubbles diminish and all you see are lines, mix for 10 more seconds. Pour mousse into jars, and tap to remove any trapped air bubbles. Chill at least 2 hours until set. Mousse will keep up to 5 days in the refrigerator. Makes 5 portions.
These are rich enough that a small portion truly does satisfy when you're not eating away your stress. Top them with homemade whipped cream for a perfectly impressive dessert. You can fill 5 1/4-pint jars with one batch.
You can substitute other milk varieties if desired. I think this would be perfect with a peanut butter whipped topping, but Oh Ladycakes has many ideas beyond just her basic recipe. I've shared my shortcut method below, but her post has a more traditional approach.
Chocolate Mousse
6 oz. dark chocolate
3/4 cup unsweetened vanilla almond milk
Have your 1/4-pint jars or other small bowls ready before you start as you will need to work quickly. Melt the chocolate on medium heat in the microwave, stirring often until just melted. Place bowl on top of ice packs to chill chocolate while adding the almond milk. Beat with a hand mixer on medium-low speed for 3 to 5 minutes. The mixture will be very bubbly, and then fine lines will start to appear. Once the bubbles diminish and all you see are lines, mix for 10 more seconds. Pour mousse into jars, and tap to remove any trapped air bubbles. Chill at least 2 hours until set. Mousse will keep up to 5 days in the refrigerator. Makes 5 portions.
Buttermilk Honey Bread
Homemade bread is a staple in our house, so much so that cheap storebought bread becomes the treat. (There's something about the nostalgia of a pb&j with the flimsy bread.) This recipe from Local Milk caught my eye over the weekend, and it was on our dinner table the following Monday.
This is a sweeter bread than I normally would prefer, but it is oh so soft with a crunch to the crust. Delicious toasted and slathered with butter.
 Buttermilk Honey Bread
1/4 cup water
1 tsp. sugar
1 heaping tsp. yeast
1 1/2 buttermilk, warmed
1/3 cup honey
3 Tbsp. unsalted butter, melted
1 tsp. salt
4 1/2 cups flour
Heat the water to 110°, and mix the yeast and sugar in the warm water. Let it stand for about 10 minutes, until foamy.
In a large stand mixing bowl, whisk together 4 cups of flour and the salt.
In a medium saucepan, melt the butter over low heat. Add the buttermilk and warm gently, stirring. Remove from heat, and stir in the honey as well as the yeast mixture.
Add the yeast mixture into the flour, and knead on low. Add more flour as needed until the dough comes together into a smooth, elastic dough. The dough will still be sticky due to the honey but shouldn't stick to the sides of the bowl.
Place the dough in a greased bowl, cover with a towel, and let it rise in a warm spot until doubled in bulk, about two hours.
Punch the dough down, form in a loaf, place into two oiled loaf pans, cover with the towel again, and let it rise until doubled again, about another hour. Meanwhile, preheat your oven to 375°F.
Bake in the middle of the oven for about 30 to 45 minutes until golden and hollow sounding when knocked on the bottom. If the top seems to be getting toodark , cover with foil for the rest of the bake time.
Allow to cool in the pan for 5 to 10 minutes. Remove, and allow to cool for 30 minutes to an hour before slicing. Makes 2 8 x 4 loaves.
This is a sweeter bread than I normally would prefer, but it is oh so soft with a crunch to the crust. Delicious toasted and slathered with butter.
1/4 cup water
1 tsp. sugar
1 heaping tsp. yeast
1 1/2 buttermilk, warmed
1/3 cup honey
3 Tbsp. unsalted butter, melted
1 tsp. salt
4 1/2 cups flour
Heat the water to 110°, and mix the yeast and sugar in the warm water. Let it stand for about 10 minutes, until foamy.
In a large stand mixing bowl, whisk together 4 cups of flour and the salt.
In a medium saucepan, melt the butter over low heat. Add the buttermilk and warm gently, stirring. Remove from heat, and stir in the honey as well as the yeast mixture.
Add the yeast mixture into the flour, and knead on low. Add more flour as needed until the dough comes together into a smooth, elastic dough. The dough will still be sticky due to the honey but shouldn't stick to the sides of the bowl.
Place the dough in a greased bowl, cover with a towel, and let it rise in a warm spot until doubled in bulk, about two hours.
Punch the dough down, form in a loaf, place into two oiled loaf pans, cover with the towel again, and let it rise until doubled again, about another hour. Meanwhile, preheat your oven to 375°F.
Bake in the middle of the oven for about 30 to 45 minutes until golden and hollow sounding when knocked on the bottom. If the top seems to be getting toodark , cover with foil for the rest of the bake time.
Allow to cool in the pan for 5 to 10 minutes. Remove, and allow to cool for 30 minutes to an hour before slicing. Makes 2 8 x 4 loaves.
April 13, 2014
Strawberry Jam Crumb Bars
The original post at NAMI-NAMI calls these an Estonian crumb cake, but in my mind it's not a cake. This is a buttery crumb bar with strawberry (or other if you choose) jam sandwiched between the piles of crumbs. Tasty, but not my treat of choice since there is no chocolate involved.

Strawberry Jam Crumb Bars
3 1/3 cups flour
3 oz. sugar
Pinch of salt
14 Tbsp. cold butter, cubed
1 egg
1 pint strawberry jam
Preheat the oven to 400ºF. Grease a 9 x 13 pan, and set aside.
Combine the flour, sugar, salt and butter in a food processor until the mixture resembles wet sand. Transfer 1/3 of the mixture to a small bowl, and set aside as the crumb topping. Add the egg to the food processor, and process until well mixed.
Pour into the prepared pan, spread evenly and press down with the palm of your hand. Spread the filling evenly over the crumb base, leaving a bit of room between the jam and the edges of the pan if you desire an easier pan to clean. Sprinkle with the remaining crumb mixture.
Bake 30 minutes or until crumb topping is lightly golden. Cool completely before cutting into bars.
Caramel Peanut Butter Oatmeal Bars
There's nothing like using 7 sticks of butter in one morning (two sets of bars including these and the world's largest batch of waffle batter for a family of 2 adults, 1 toddler and an almost 9-month-old babe). I felt much better knowing most of the bars would go to our church's Lenten fish fry, so I'm sharing the buttery wealth.
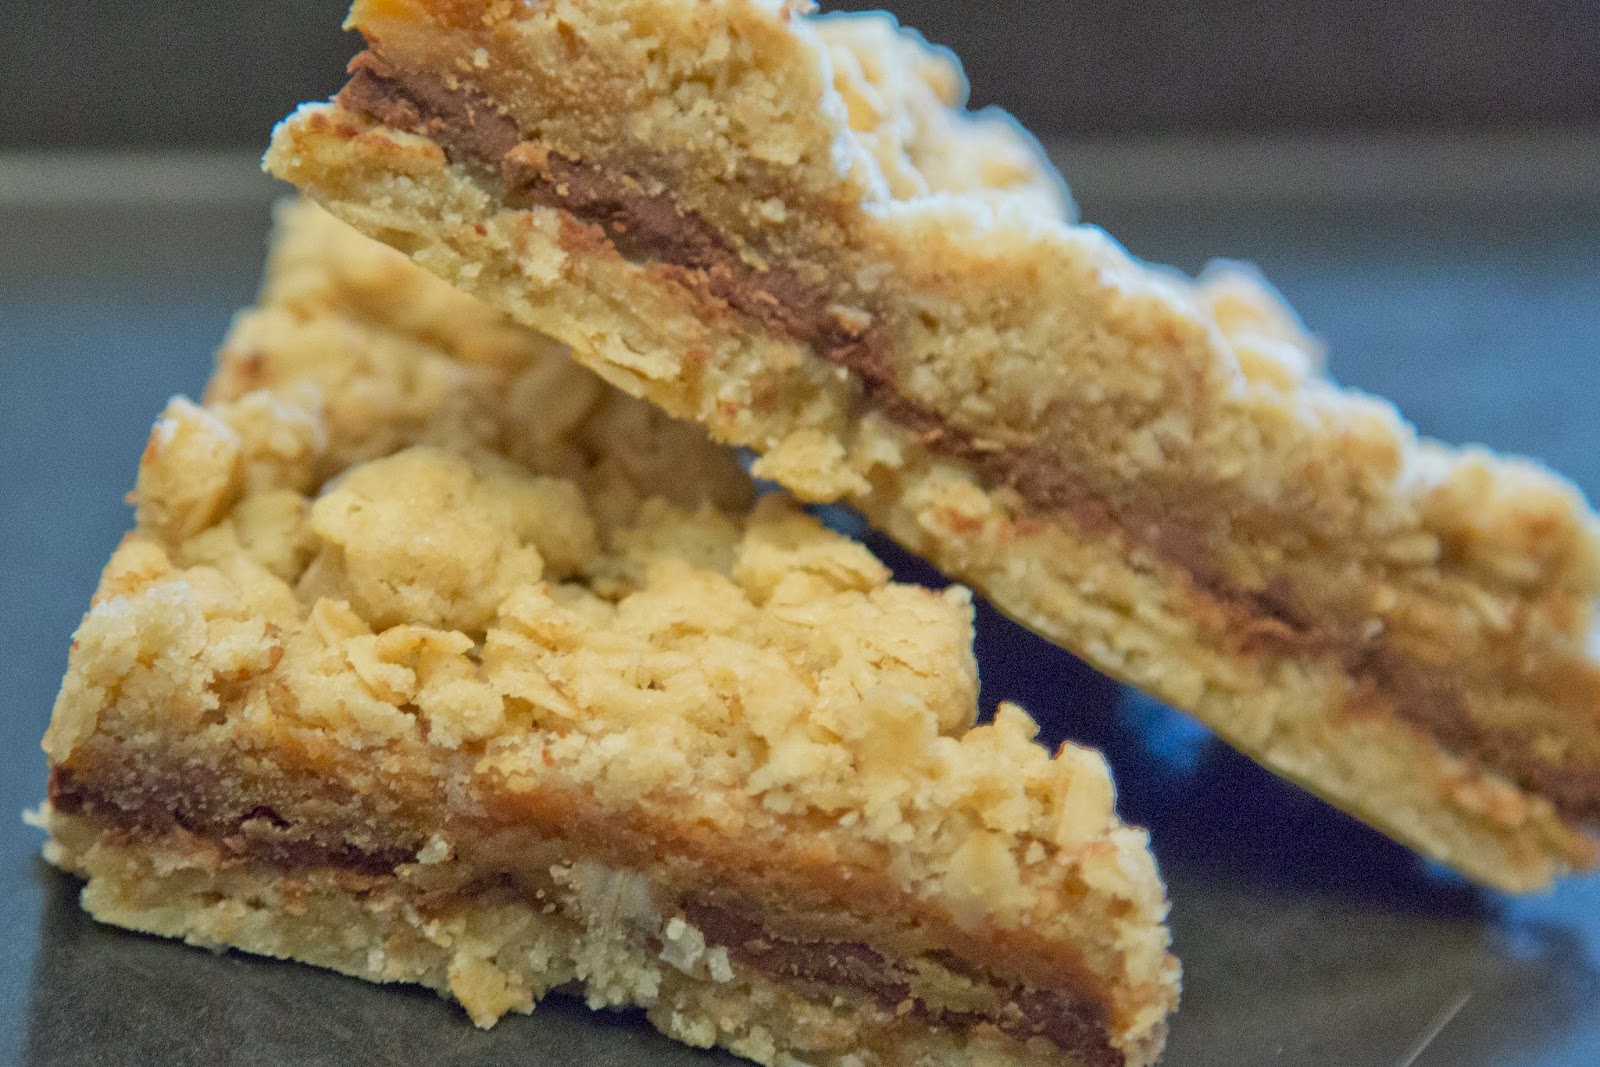
Caramel Peanut Butter Oatmeal Bars
3 sticks plus 2 Tbsp. butter, divided
1 can sweetened condensed milk
1 cup peanut butter
2 tsp. vanilla
2 cups oats
2 cups flour
11 oz. milk chocolate chips
Preheat oven to 350ºF. In a medium saucepan, melt together 2 Tbsp. brown sugar and 2 Tbsp. butter over medium heat. Add the sweetened condensed milk, and cook stirring almost constantly until the mixture thickens and deepens to a caramel color, about 10 minutes.
Remove from heat, and stir in peanut butter and vanilla. Set aside.
Combine remaining 1/2 cup brown sugar, oats and flour together. Melt the remaining 3 sticks of butter, and mix well into the dry ingredients. Press half the oatmeal mixture into the bottom of the pan, and bake 10 minutes. Immediately top with chocolate chips, and spread caramel peanut butter sauce evenly over the chocolate chips. Sprinkle evenly with remaining oat mixture.
Bake for another 15 minutes or until top is golden. Cool completely before cutting into bars.
When I saw these bars on Buns in My Oven, I knew I wanted to make them. I also knew I didn't want to be tempted to eat a half batch of them, so taking them to the fish fry is the perfect solution for me.
Caramel Peanut Butter Oatmeal Bars
1/2 cup plus 2 tablespoons brown sugar, divided
1 1/2 cups plus 2 tablespoons butter, divided
1 can sweetened condensed milk
1 cup peanut butter
2 teaspoons vanilla
2 cups flour
2 cups oatmeal
1 bag (11 ounces) milk chocolate chips
Read more at http://www.bunsinmyoven.com/2014/03/27/caramel-peanut-butter-oatmeal-bars/#1987oijMM4Qzkzbv.99
1 1/2 cups plus 2 tablespoons butter, divided
1 can sweetened condensed milk
1 cup peanut butter
2 teaspoons vanilla
2 cups flour
2 cups oatmeal
1 bag (11 ounces) milk chocolate chips
Read more at http://www.bunsinmyoven.com/2014/03/27/caramel-peanut-butter-oatmeal-bars/#1987oijMM4Qzkzbv.99
1/2 cup plus 2 tablespoons brown sugar, divided
1 1/2 cups plus 2 tablespoons butter, divided
1 can sweetened condensed milk
1 cup peanut butter
2 teaspoons vanilla
2 cups flour
2 cups oatmeal
1 bag (11 ounces) milk chocolate chips
Read more at http://www.bunsinmyoven.com/2014/03/27/caramel-peanut-butter-oatmeal-bars/#1987oijMM4Qzkzbv.99
1/2 cup plus 2 Tbsp. brown sugar, divided1 1/2 cups plus 2 tablespoons butter, divided
1 can sweetened condensed milk
1 cup peanut butter
2 teaspoons vanilla
2 cups flour
2 cups oatmeal
1 bag (11 ounces) milk chocolate chips
Read more at http://www.bunsinmyoven.com/2014/03/27/caramel-peanut-butter-oatmeal-bars/#1987oijMM4Qzkzbv.99
1/2 cup plus 2 tablespoons brown sugar, divided
1 1/2 cups plus 2 tablespoons butter, divided
1 can sweetened condensed milk
1 cup peanut butter
2 teaspoons vanilla
2 cups flour
2 cups oatmeal
1 bag (11 ounces) milk chocolate chips
Read more at http://www.bunsinmyoven.com/2014/03/27/caramel-peanut-butter-oatmeal-bars/#1987oijMM4Qzkzbv.99
1 1/2 cups plus 2 tablespoons butter, divided
1 can sweetened condensed milk
1 cup peanut butter
2 teaspoons vanilla
2 cups flour
2 cups oatmeal
1 bag (11 ounces) milk chocolate chips
Read more at http://www.bunsinmyoven.com/2014/03/27/caramel-peanut-butter-oatmeal-bars/#1987oijMM4Qzkzbv.99
3 sticks plus 2 Tbsp. butter, divided
1 can sweetened condensed milk
1 cup peanut butter
2 tsp. vanilla
2 cups oats
2 cups flour
11 oz. milk chocolate chips
Preheat oven to 350ºF. In a medium saucepan, melt together 2 Tbsp. brown sugar and 2 Tbsp. butter over medium heat. Add the sweetened condensed milk, and cook stirring almost constantly until the mixture thickens and deepens to a caramel color, about 10 minutes.
Remove from heat, and stir in peanut butter and vanilla. Set aside.
Combine remaining 1/2 cup brown sugar, oats and flour together. Melt the remaining 3 sticks of butter, and mix well into the dry ingredients. Press half the oatmeal mixture into the bottom of the pan, and bake 10 minutes. Immediately top with chocolate chips, and spread caramel peanut butter sauce evenly over the chocolate chips. Sprinkle evenly with remaining oat mixture.
Bake for another 15 minutes or until top is golden. Cool completely before cutting into bars.
make
the caramel sauce by melting 2 tablespoons of butter and 2 tablespoons
of brown sugar in a medium sauce pan over medium low heat. When melted,
stir in the sweetened condensed milk and continue cooking, stirring
constantly, until the mixture thickens and darkens to a caramel color,
about 20 minutes. Remove from the heat and stir in the peanut butter and
vanilla.
To make the crust, combine the flour, oatmeal, and remaining 1/2 cup of brown sugar in a large bowl. Melt the remaining 1 1/2 cups of butter and stir into the oatmeal mixture.
Press half of the oatmeal mixture into the bottom of a 9x13 baking dish and bake in a preheated 350 degree oven for 10 minutes. Remove from the oven.
Sprinkle the chocolate chips over the oatmeal crust. Spread the caramel peanut butter mixture over the chocolate chips and crumble the remaining oatmeal crust mixture over the top. Return to the oven and continue baking for 15 minutes.
Remove from the oven and cool completely before cutting.
Read more at http://www.bunsinmyoven.com/2014/03/27/caramel-peanut-butter-oatmeal-bars/#1987oijMM4Qzkzbv.99
1/2 cup plus 2 tablespoons brown sugar, divided
1 1/2 cups plus 2 tablespoons butter, divided
1 can sweetened condensed milk
1 cup peanut butter
2 teaspoons vanilla
2 cups flour
2 cups oatmeal
1 bag (11 ounces) milk chocolate chips
Read more at http://www.bunsinmyoven.com/2014/03/27/caramel-peanut-butter-oatmeal-bars/#1987oijMM4Qzkzbv.99
1 1/2 cups plus 2 tablespoons butter, divided
1 can sweetened condensed milk
1 cup peanut butter
2 teaspoons vanilla
2 cups flour
2 cups oatmeal
1 bag (11 ounces) milk chocolate chips
Read more at http://www.bunsinmyoven.com/2014/03/27/caramel-peanut-butter-oatmeal-bars/#1987oijMM4Qzkzbv.99
April 8, 2014
Black Bean and Quinoa Enchilada Bake
Our semi-vegetarian quest through Lent continues. I made white bean burgers while my husband was out of town for work since he thought they sounded disgusting. Disgusting ... no. Delicious ... no. I have a hard time getting behind bean burgers, I guess. I think they sound pretty good and then am left feeling bleh.
But this Enchilada Bake from Two Peas & Their Pod has no blehness whatsoever. This is delicious. And it's versatile in the sense that leftovers could be made into burritos (with a bit of fried chorizo on a non-vegetarian day). Both my husband and I thoroughly enjoyed this, so this will be a repeat meal for us.
No pictures here, but check out the original post for pretty pictures.
Black Bean and Quinoa Enchilada Bake
1 cup uncooked quinoa
2 cups water
1 Tbsp. olive oil
1 small onion, diced
3 cloves garlic, minced
1 chipotle pepper in adobo sauce, diced
1 red pepper, diced
1 orange pepper, diced
1 cup corn frozen kernels
Juice of 1 small lime
1 tsp. cumin
1 Tbsp. chili powder
1 Tbsp. dried cilantro
30 oz. black beans, drained and rinsed
2 cups enchilada sauce
2 cups shredded Mexican cheese
Preheat the oven to 350ºF. Grease a 9 x 13 baking dish with nonstick spray, and set aside.
Add quinoa and water to a medium saucepan, and bring to a boil over medium heat. Boil for 5 minutes. Turn the heat to low, and simmer for about 15 minutes or until water is absorbed. Remove from heat, and fluff with a fork. Cover quinoa, and set aside.
In a large skillet, heat olive oil over medium-high heat. Add the onion, garlic and peppers. Sauté until softened, about 5 minutes. Add in the corn. Cook for about 3 to 4 minutes. Add the lime juice, cumin, chili powder and cilantro. Stir to combine.
In a large bowl, add the cooked quinoa and black beans. Add the vegetable mixture, and stir to combine. Pour in the enchilada sauce, and stir. Add 1/2 cup shredded cheese.
Pour the black bean and quinoa mixture into the prepared baking dish. Top with remaining shredded cheese. Cover the pan with foil. Bake for 20 minutes, and then remove foil. Bake an additional 10 minutes or until the cheese is melted and edges are bubbling. Remove from the oven, and let cool for 10 minutes. Garnish with toppings, if desired. Serve warm. Makes 8 to 10 servings.
March 28, 2014
Chocolate Peanut Butter Pie
It's pie day for our church's Lenten fish fry. Shockingly, I have three different peanut butter pies bookmarked to try. This one from Spicy Perspective was my winner, winner, fish dinner because it allowed me to use the remaining homemade cream cheese for something other than beer dip that I would devour by myself.
I actually doubled this recipe and made it in a giant disposable foil pan intended for grilling pizza. Best part is I had enough extra to make a small tart version that my husband and I reluctantly shared. His logic was since he only had half a pie that he should be able to have another half of a pie with the whole thing.

That should tell you how good it is. I was completely impressed with my ability to create such a huge pie that looks so presentable!
Chocolate Peanut Butter Pie
Crust
1 cup flour
1/3 cup cocoa
1/2 tsp. salt
2 1/2 Tbsp. sugar
6 Tbsp. cold butter, cut into cubes
4 Tbsp. COLD shortening, cut into cubes
3-4 Tbsp. cold brandy
Filling
3 cups heavy cream, whipped (6 cups whipped cream)
2 cups peanut butter
16 oz. cream cheese, softened
4 cups powdered sugar
Garnish
1/4 cup heavy cream
1/2 cup chocolate chips
1/2 cup chopped salted peanuts
1 small chocolate bar for chocolate curls
Preheat the oven to 375ºF, and lower the rack to the lowest position. Cut the butter and shortening into cubes, and place in the freezer to chill while pulling out the other ingredients. Pour the brandy over ice to chill.
Pulse the flour, cocoa powder, salt and sugar in a food processor. Add the cold butter and shortening, and pulse to break up the butter into small pea-size balls. Drain the brandy, and add one tablespoon at a time pulsing, in between, until the dough come together. Don't add too much liquid, and don't over mix. Dump out onto a piece of plastic wrap. Wrap well, and refrigerate for at least 30 minutes.
Once the dough has chilled, place a piece of foil on the counter. Flour the foil, and place the dough in the center. Flour a rolling pin, and roll the dough out into a 12-inch circle. Use the foil to flip the dough into a deep-dish pie pan, and then remove the foil. Fit the crust down into the pie pan, but don't stretch the dough. Fold the rough edges under, and crimp the edges with your fingers. Then place the foil back inside the pie crust, and fill with dried beans. Bake the pie crust for 17 to 20 minutes until set. Allow the crust to cool before removing the pie weights and paper. Cool completely before filling.
For the filling, whip the heavy cream into firm peaks, and set aside. Beat the cream cheese until smooth, and then beat in the peanut butter. Scrape the bowl, and slowly add the powdered sugar. Once the mixture is smooth, gently fold in the whipped cream until the texture is consistent.Scoop the pie filling into the cooled crust. Refrigerate immediately.
To garnish, microwave the heavy cream until scalding hot. Add the chocolate chips, and allow them to sit in the cream for 2 to 3 minutes. Stir until smooth. Once the chocolate ganache cools a little, use a spoon to drizzle it over the top. Then sprinkle with peanuts. Use a vegetable peeler to shave chocolate curls over the top. Chill until ready to serve. Serves 8.

I actually doubled this recipe and made it in a giant disposable foil pan intended for grilling pizza. Best part is I had enough extra to make a small tart version that my husband and I reluctantly shared. His logic was since he only had half a pie that he should be able to have another half of a pie with the whole thing.
That should tell you how good it is. I was completely impressed with my ability to create such a huge pie that looks so presentable!
Chocolate Peanut Butter Pie
Crust
1 cup flour
1/3 cup cocoa
1/2 tsp. salt
2 1/2 Tbsp. sugar
6 Tbsp. cold butter, cut into cubes
4 Tbsp. COLD shortening, cut into cubes
3-4 Tbsp. cold brandy
Filling
3 cups heavy cream, whipped (6 cups whipped cream)
2 cups peanut butter
16 oz. cream cheese, softened
4 cups powdered sugar
Garnish
1/4 cup heavy cream
1/2 cup chocolate chips
1/2 cup chopped salted peanuts
1 small chocolate bar for chocolate curls
Preheat the oven to 375ºF, and lower the rack to the lowest position. Cut the butter and shortening into cubes, and place in the freezer to chill while pulling out the other ingredients. Pour the brandy over ice to chill.
Pulse the flour, cocoa powder, salt and sugar in a food processor. Add the cold butter and shortening, and pulse to break up the butter into small pea-size balls. Drain the brandy, and add one tablespoon at a time pulsing, in between, until the dough come together. Don't add too much liquid, and don't over mix. Dump out onto a piece of plastic wrap. Wrap well, and refrigerate for at least 30 minutes.
Once the dough has chilled, place a piece of foil on the counter. Flour the foil, and place the dough in the center. Flour a rolling pin, and roll the dough out into a 12-inch circle. Use the foil to flip the dough into a deep-dish pie pan, and then remove the foil. Fit the crust down into the pie pan, but don't stretch the dough. Fold the rough edges under, and crimp the edges with your fingers. Then place the foil back inside the pie crust, and fill with dried beans. Bake the pie crust for 17 to 20 minutes until set. Allow the crust to cool before removing the pie weights and paper. Cool completely before filling.
For the filling, whip the heavy cream into firm peaks, and set aside. Beat the cream cheese until smooth, and then beat in the peanut butter. Scrape the bowl, and slowly add the powdered sugar. Once the mixture is smooth, gently fold in the whipped cream until the texture is consistent.Scoop the pie filling into the cooled crust. Refrigerate immediately.
To garnish, microwave the heavy cream until scalding hot. Add the chocolate chips, and allow them to sit in the cream for 2 to 3 minutes. Stir until smooth. Once the chocolate ganache cools a little, use a spoon to drizzle it over the top. Then sprinkle with peanuts. Use a vegetable peeler to shave chocolate curls over the top. Chill until ready to serve. Serves 8.
March 25, 2014
Molten Chocolate Banana Bread
This recipe from Lady and Pups caught my eye and was perfect for the overripe bananas on my counter. It's tasty, but it still doesn't top my all-time favorite banana bread. My molten chocolate, so to speak, isn't so molten for some reason. Still, I can't see someone complaining if you handed them a slice ... or loaf ... of this.

Molten Chocolate Banana Bread
Chocolate Center
5.3 oz. dark chocolate, chopped
1 1/2 Tbsp. butter
3 Tbsp. flour
1 large egg
1/3 cup powdered sugar
Banana Bread
3 Tbsp. vegetable oil
3 large, ripe bananas
1 large egg
1/2 cup brown sugar
1 Tbsp. molasses
1 tsp. vanilla
1 cup wheat flour
1/2 cup flour
1 tsp. baking soda
1 tsp. cinnamon
1/4 tsp. nutmeg
1/4 tsp. salt
First prepare the chocolate center by microwaving chocolate and butter until melted, stirring every 30 seconds. Stir in flour until very smooth. In a separate bowl, whisk together egg and sugar until foamy. Fold into chocolate mixture until evenly incorporated. Chill in the refrigerator at least 20 minutes to become firm.
Preheat the oven to 350ºF. Microwave the vegetable oil and butter 30 seconds or until butter is melted. Mash the bananas into this mixture until very few lumps are left. Whisk in the egg, brown sugar, molasses and vanilla until smooth and thick.
Let it cool for 15 minutes in the pan before
removing. Makes 1 loaf.
Molten Chocolate Banana Bread
Chocolate Center
5.3 oz. dark chocolate, chopped
1 1/2 Tbsp. butter
3 Tbsp. flour
1 large egg
1/3 cup powdered sugar
Banana Bread
3 Tbsp. vegetable oil
3 large, ripe bananas
1 large egg
1/2 cup brown sugar
1 Tbsp. molasses
1 tsp. vanilla
1 cup wheat flour
1/2 cup flour
1 tsp. baking soda
1 tsp. cinnamon
1/4 tsp. nutmeg
1/4 tsp. salt
First prepare the chocolate center by microwaving chocolate and butter until melted, stirring every 30 seconds. Stir in flour until very smooth. In a separate bowl, whisk together egg and sugar until foamy. Fold into chocolate mixture until evenly incorporated. Chill in the refrigerator at least 20 minutes to become firm.
Preheat the oven to 350ºF. Microwave the vegetable oil and butter 30 seconds or until butter is melted. Mash the bananas into this mixture until very few lumps are left. Whisk in the egg, brown sugar, molasses and vanilla until smooth and thick.
In a separate bowl, combine all the dry ingredients. Fold into the banana mixture just until evenly combined. Pour the batter into a greased loaf-pan, and then add the molten chocolate-batter into
the center of the banana bread batter in dollops. Gently press the
chocolate batter into the banana bread batter, but not too much. Bake
in the oven for 45 to 50 minutes until a wooden skewer comes out clean from the center of the banana bread but still runny and gooey from the center of the molten chocolate.
Key Lime Eclairs
Key lime is one of the few flavors that can tempt me away from chocolate, so these eclairs from Confessions of a Cookbook Queen caught my eye. I made them for our church's fish dinner when the desserts needed to be "green."
I was quite impressed with myself and my ability to recreate these. I didn't manage any pictures before the required taste testing and delivery of the goods. I do plan to try eclairs again with a different flavor combo, so perhaps I'll manage pictures then.
Key Lime Eclairs
Pastry
1 stick butter
1 Tbsp. sugar
1 cup water
1 cup plus 1 Tbsp. flour
4 large eggs, whisked
Key Lime Cream
14 oz. sweetened condensed milk
2 large egg yolks
1/4 cup key lime juice
1 cup heavy cream
Preheat oven to 400°F. Line a baking sheet with a silipat, and set aside.
Prepare your filling first by whisking together the sweetened condensed milk, egg yolks and key lime juice in a medium saucepan. Cook until it's hot but not boiling, stirring occasionally. Remove from heat, and strain through a sieve into a bowl. Refrigerate about an hour, until cooled and thickened.
While that is chilling, prepare your eclairs. In a medium saucepan, heat butter, sugar, salt and water over medium heat until the butter is melted, but do not boil. Add the flour, and stir until it forms a stiff batter. Keep stirring until the mixture starts to look more like a dough. Keep stirring for several minutes until it becomes matte and leaves a film on the bottom of the pan.
Transfer dough to the bowl of a stand mixer. Mix on medium low for one minute. Add the whisked eggs gradually. Once they've all been added, change the mixer speed to medium high, and beat just until dough is glossy.
Using a pastry bag with a 1-inch round tip, pipe strips about 3 inches long and 1 inch wide onto prepared baking sheet. Bake for about 15 minutes until the pastries start to turn golden brown, and then turn oven down to 325°F to continue baking until they are entirely brown.
Remove pastries from the oven, and poke a small hole in each pastry to let steam escape. Let cool completely on the pans set on wire racks.
Place a metal mixing bowl and the mixer's whisk attachment in your freezer for about 5 minutes. Pour the cold cream in the bowl, and whisk on high speed until a thick whipped cream is formed. Fold into the chilled key lime custard until no streaks remain.
Split eclair shells, and fill with key lime custard. Makes about 20 small eclairs.
Subscribe to:
Posts (Atom)